> ## Documentation Index
> Fetch the complete documentation index at: https://docs.zoice.com/llms.txt
> Use this file to discover all available pages before exploring further.
# Create Custom AI Avatars from Photos
> Transform your photos into personalized AI avatars with Zoice. Create animated presenters for branded content and authentic video presentations using your own image.
## What are Custom Avatars?
Custom avatars are AI-generated characters created from your uploaded photos. They maintain the likeness of the person in the photo while adding realistic animations, lip-sync, and expressions for video presentations.
## Benefits of Custom Avatars
* **Personal Branding**: Use your own face or brand representatives
* **Authenticity**: Real people, AI-powered animation
* **Brand Consistency**: Maintain visual brand identity
* **Professional Presence**: Create polished video content
* **Flexibility**: Multiple team members as avatars
* **Reusable**: Create once, use for multiple videos
## How It Works
Describe your ideal avatar using text prompts, and our AI will generate a 3D avatar model matching your description. You have full control over appearance, style, clothing, and characteristics.
## Getting Started
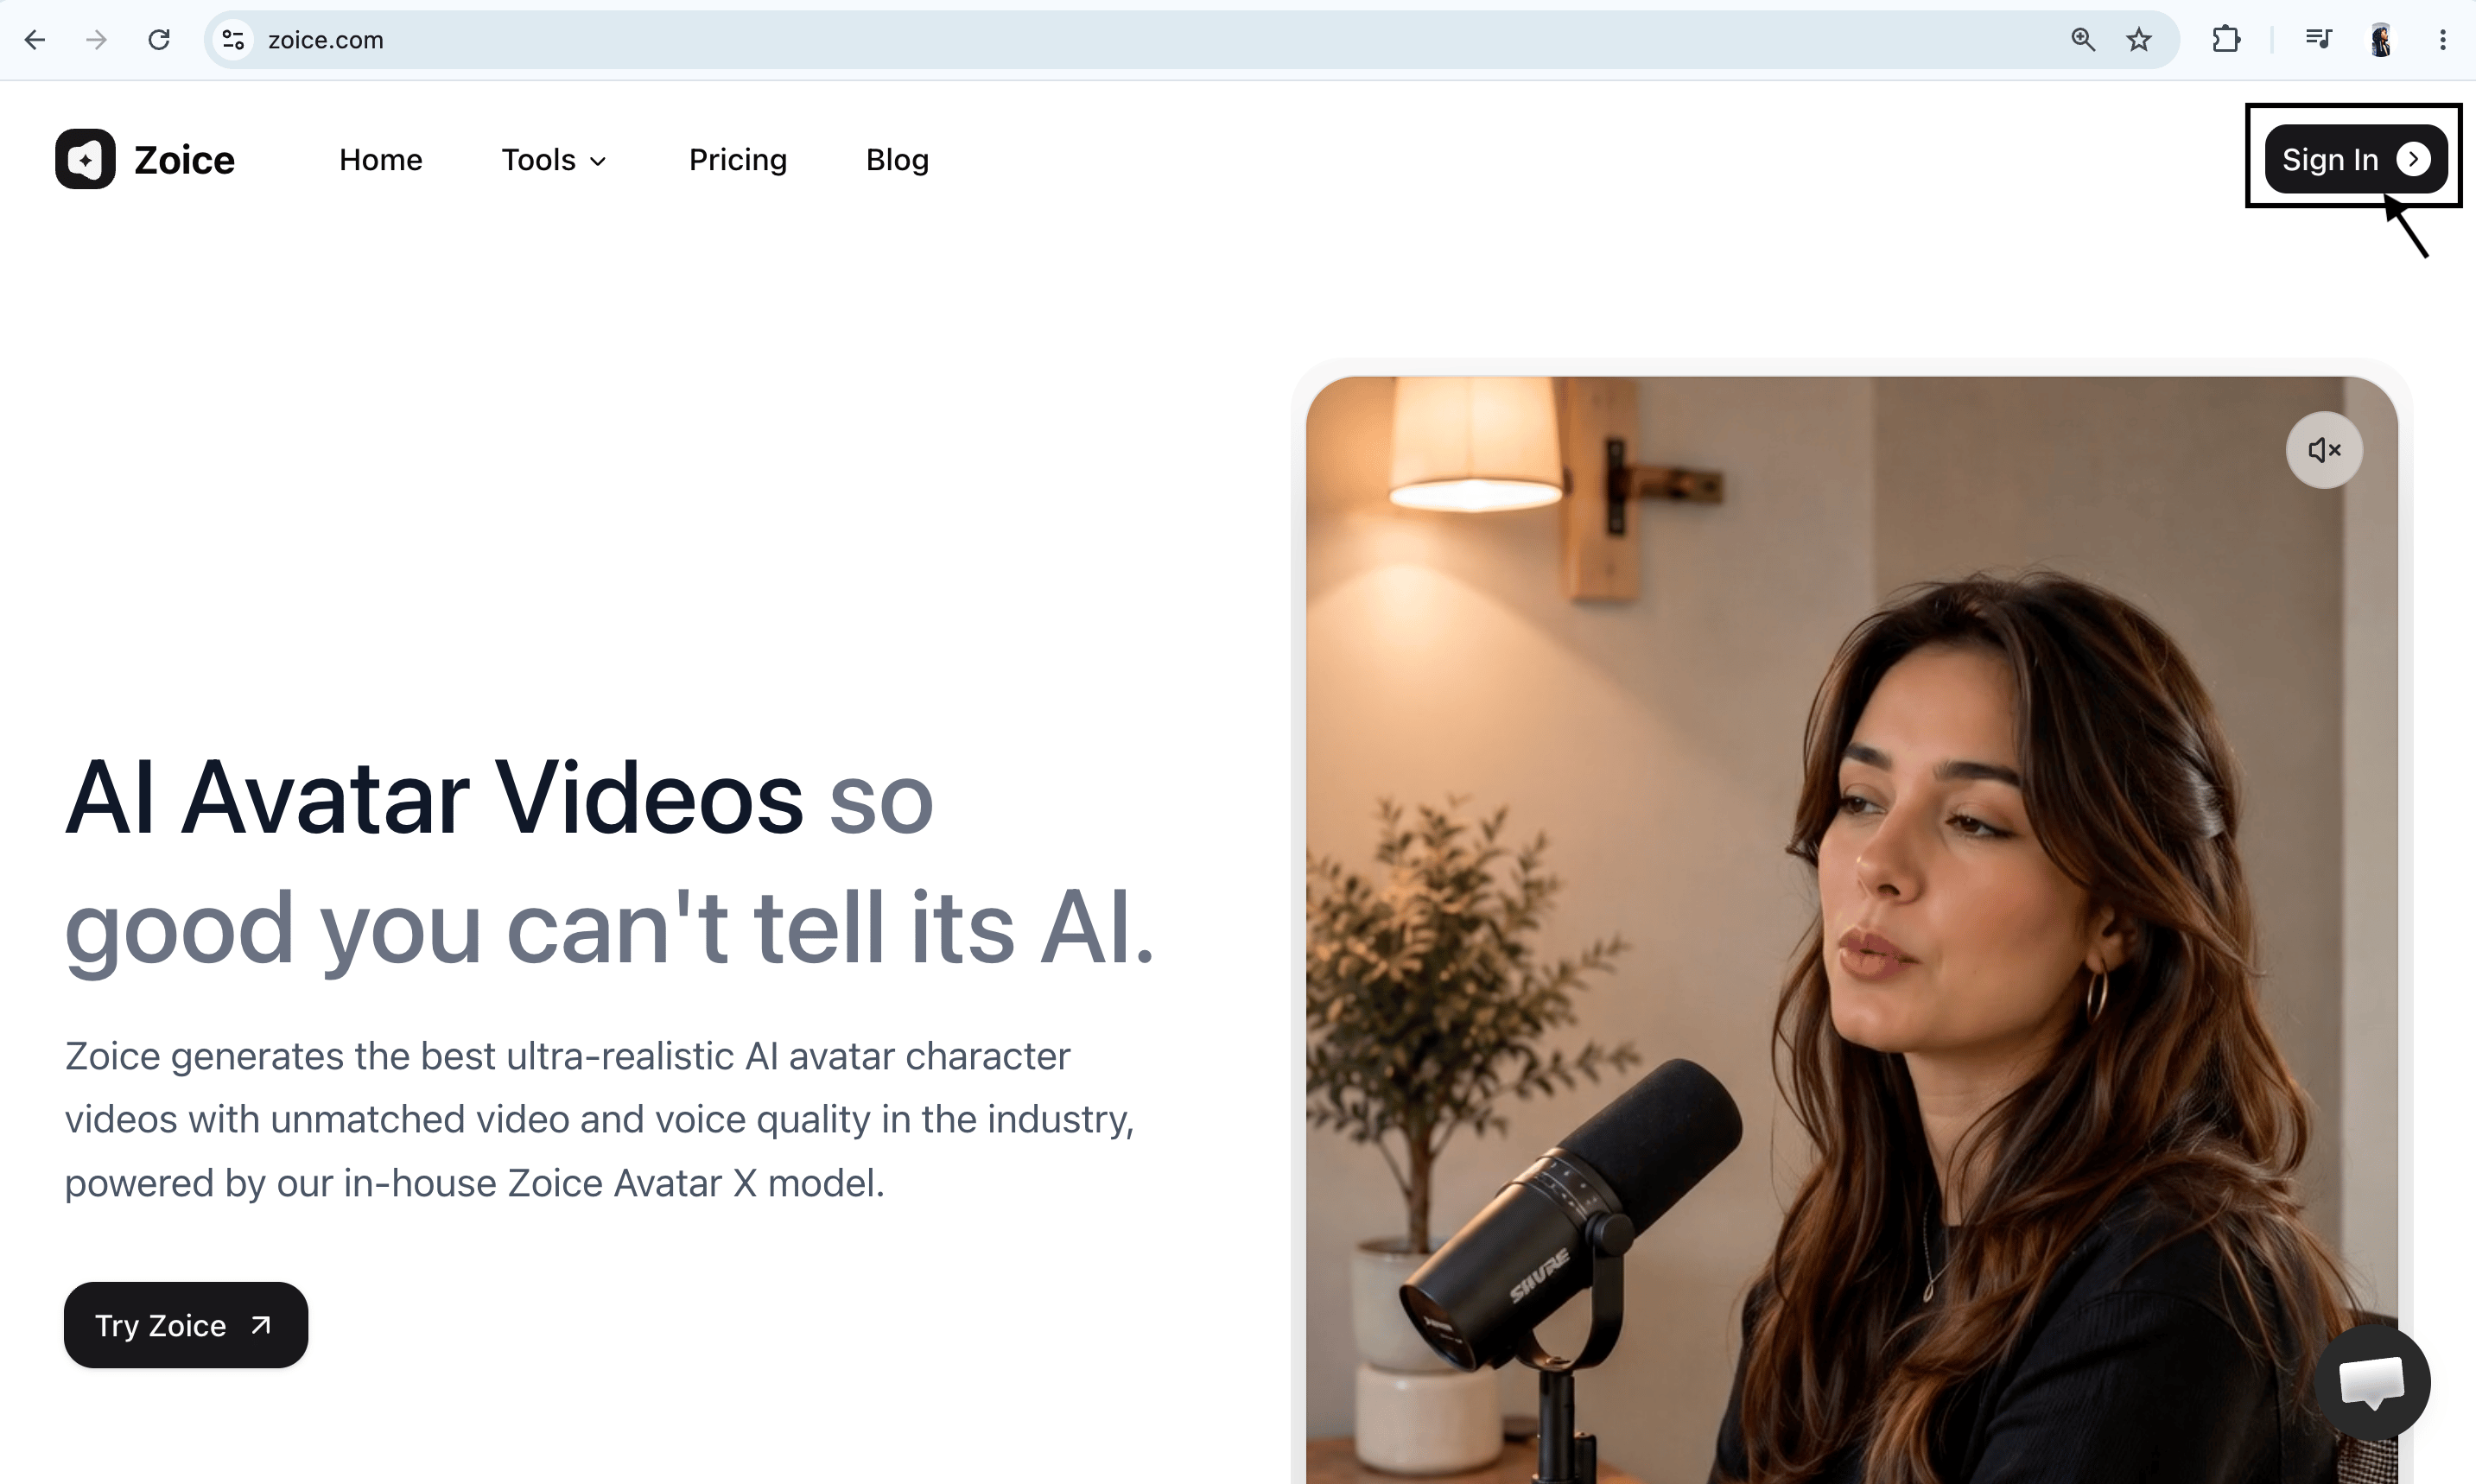
Log in to your account at [Zoice.com](https://zoice.com).
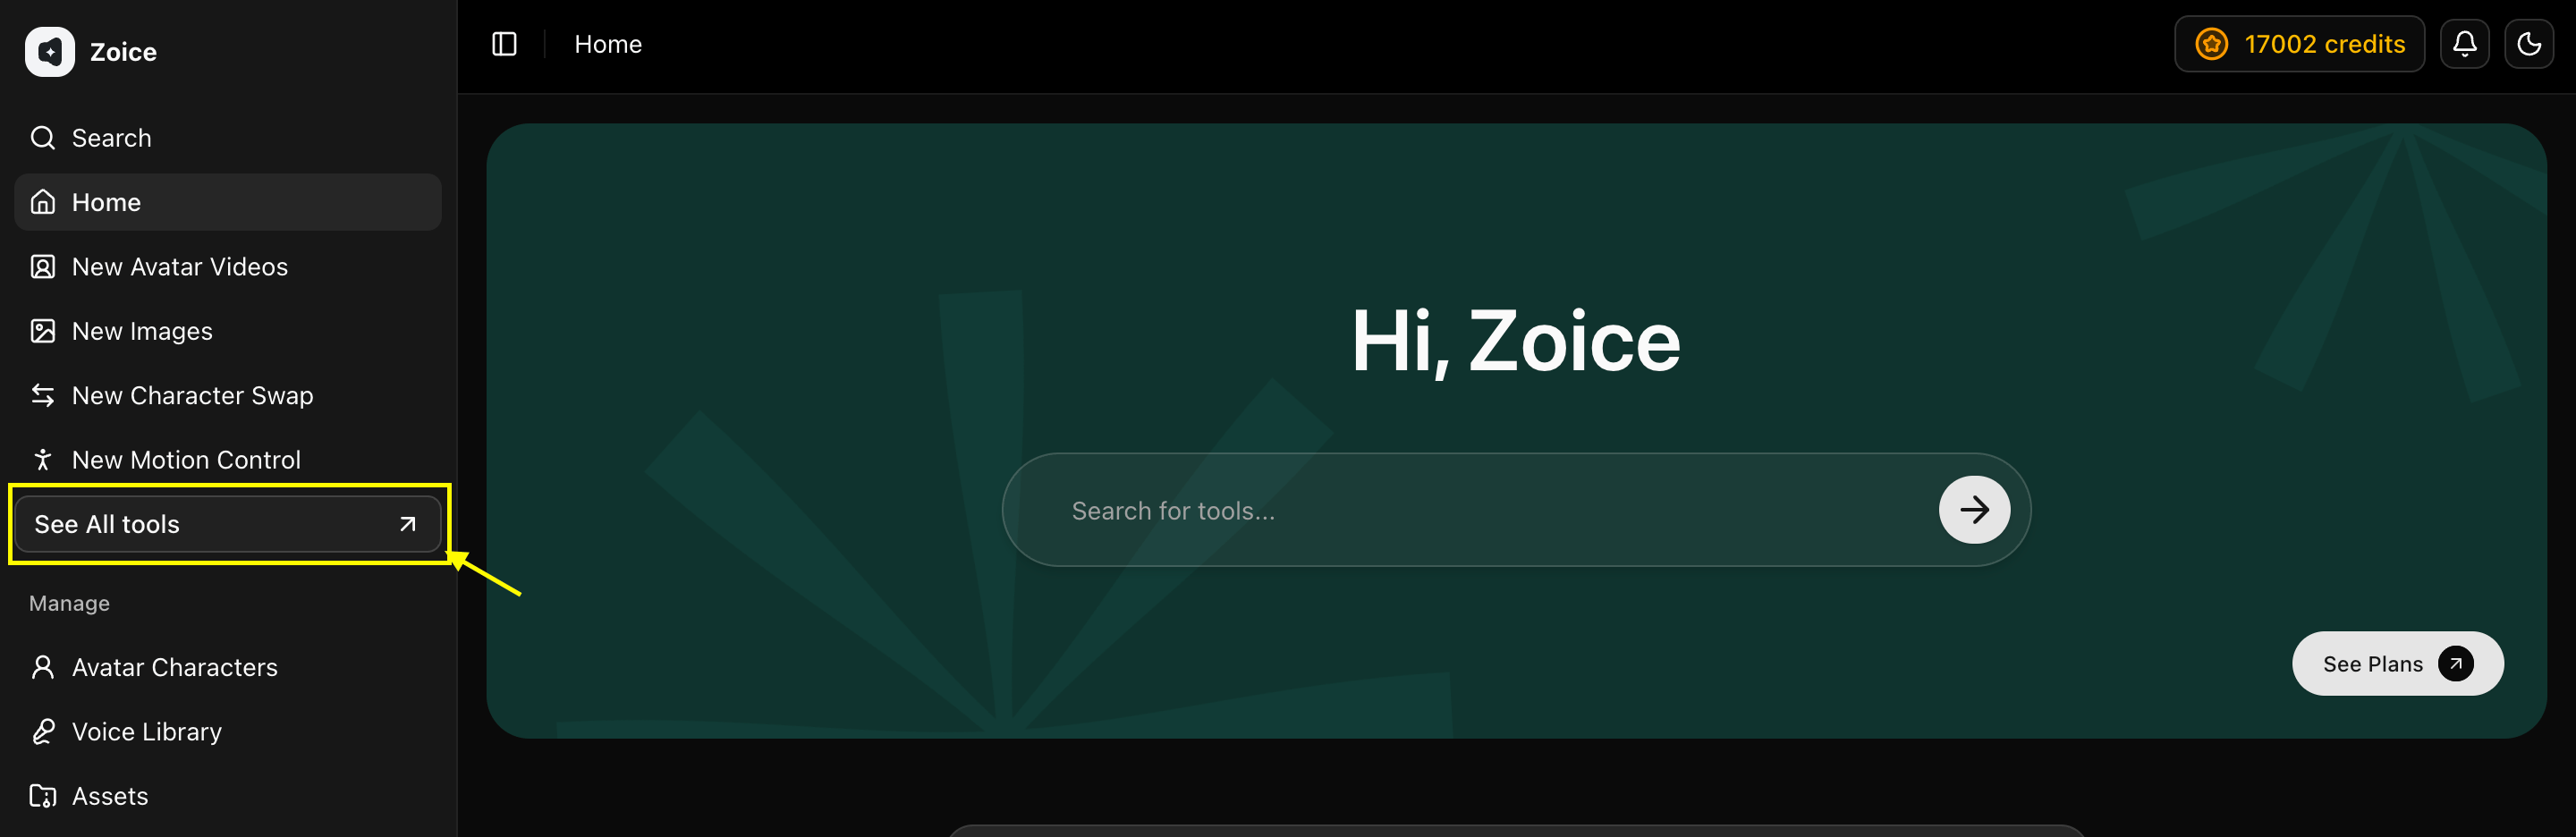
 Click on **See all tools** and scroll down to locate the video creation features.
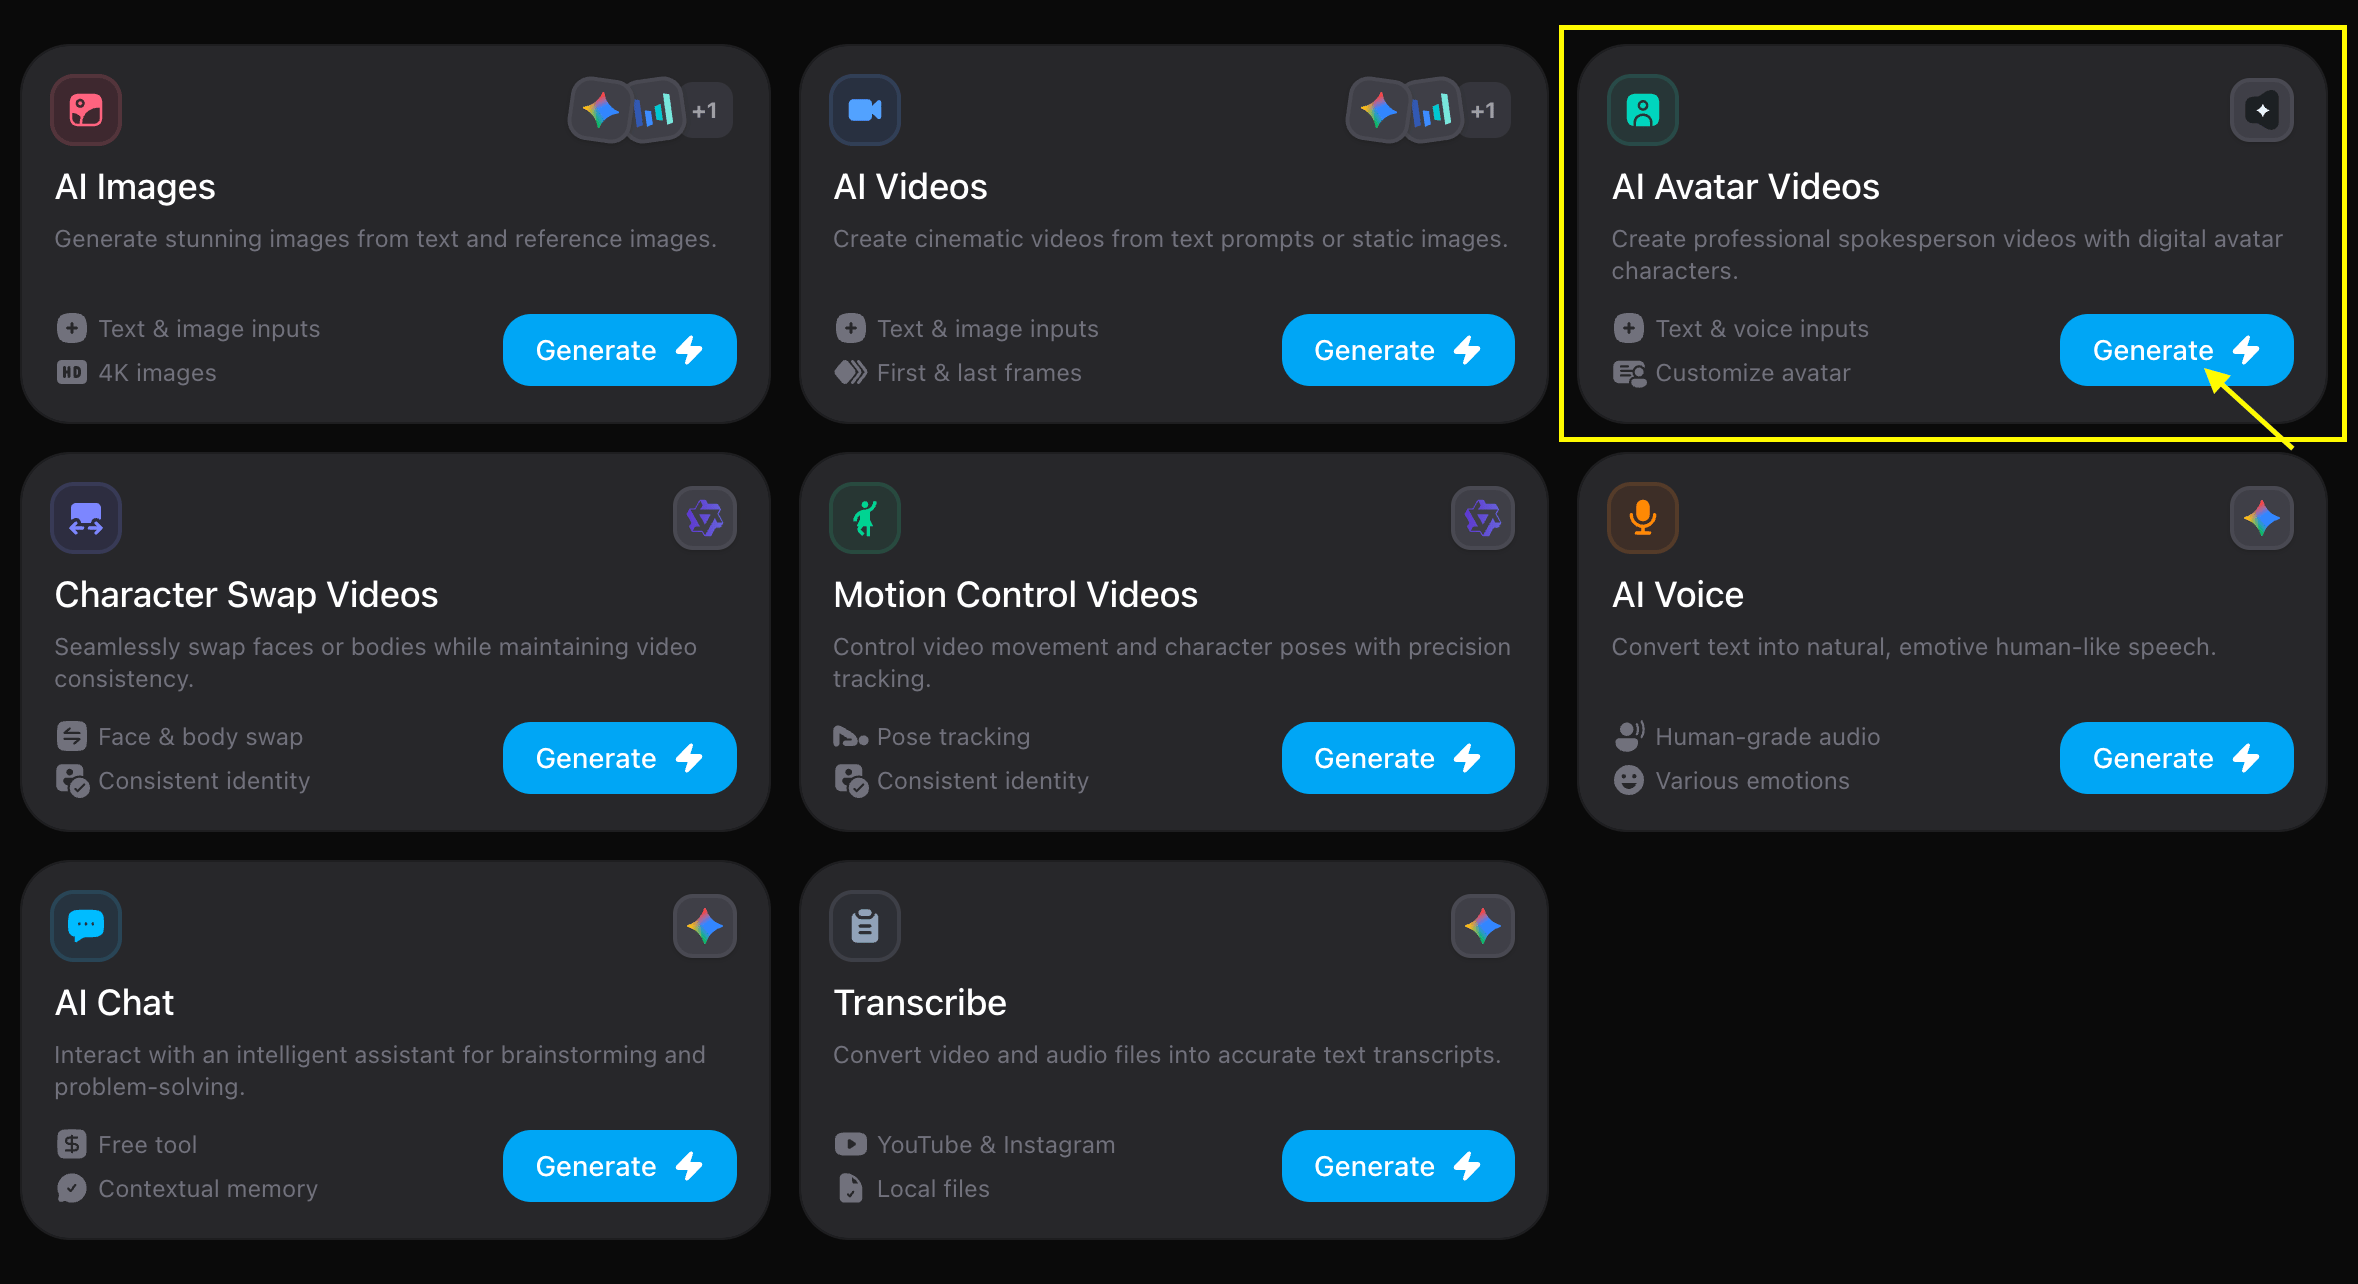
 Find **AI Avatar Videos** and click on **Generate** to proceed.
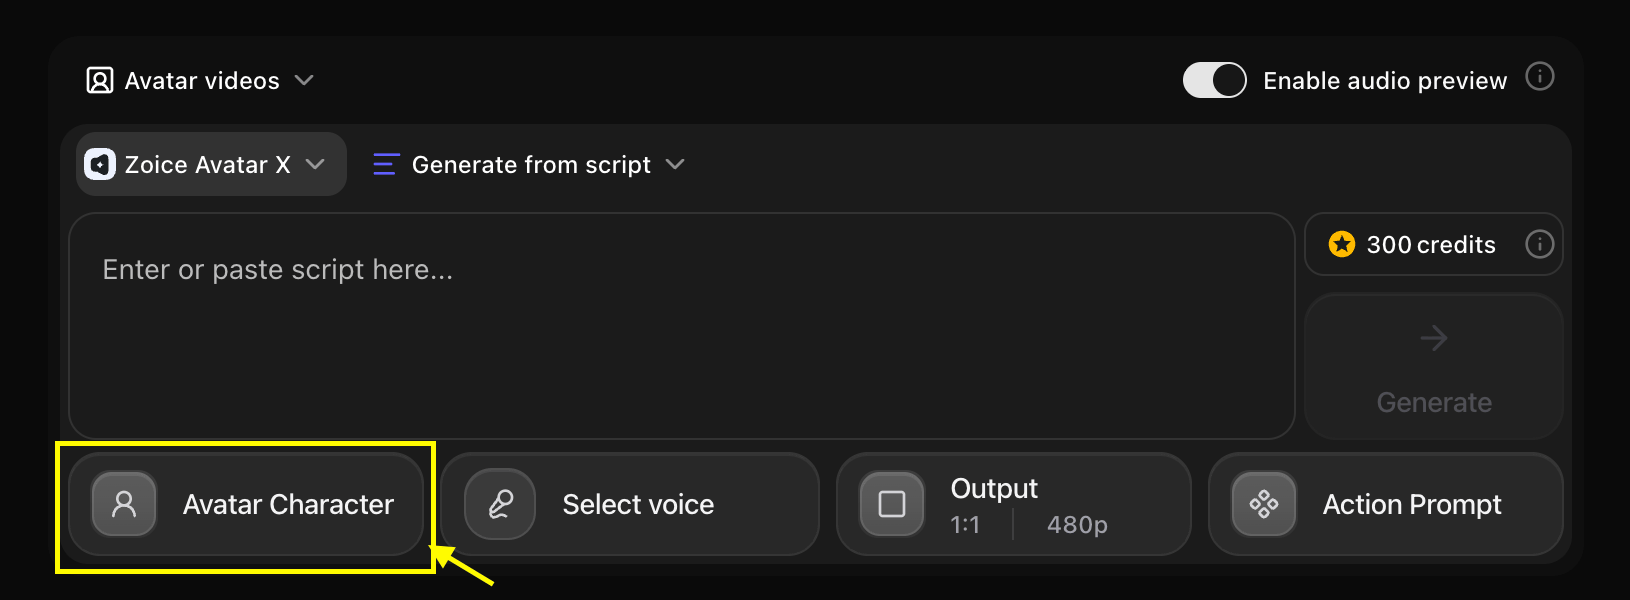
 On the options screen, locate **Avatar Character** and click on it.
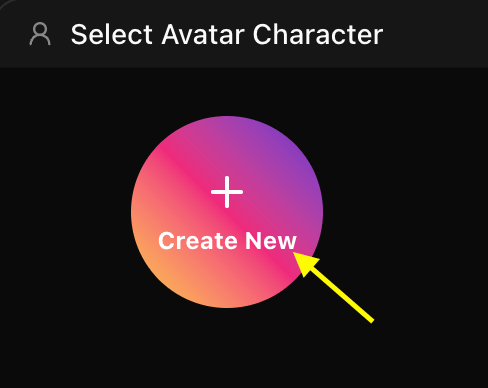
 Click on the **Create New** button to initiate the avatar creation wizard.
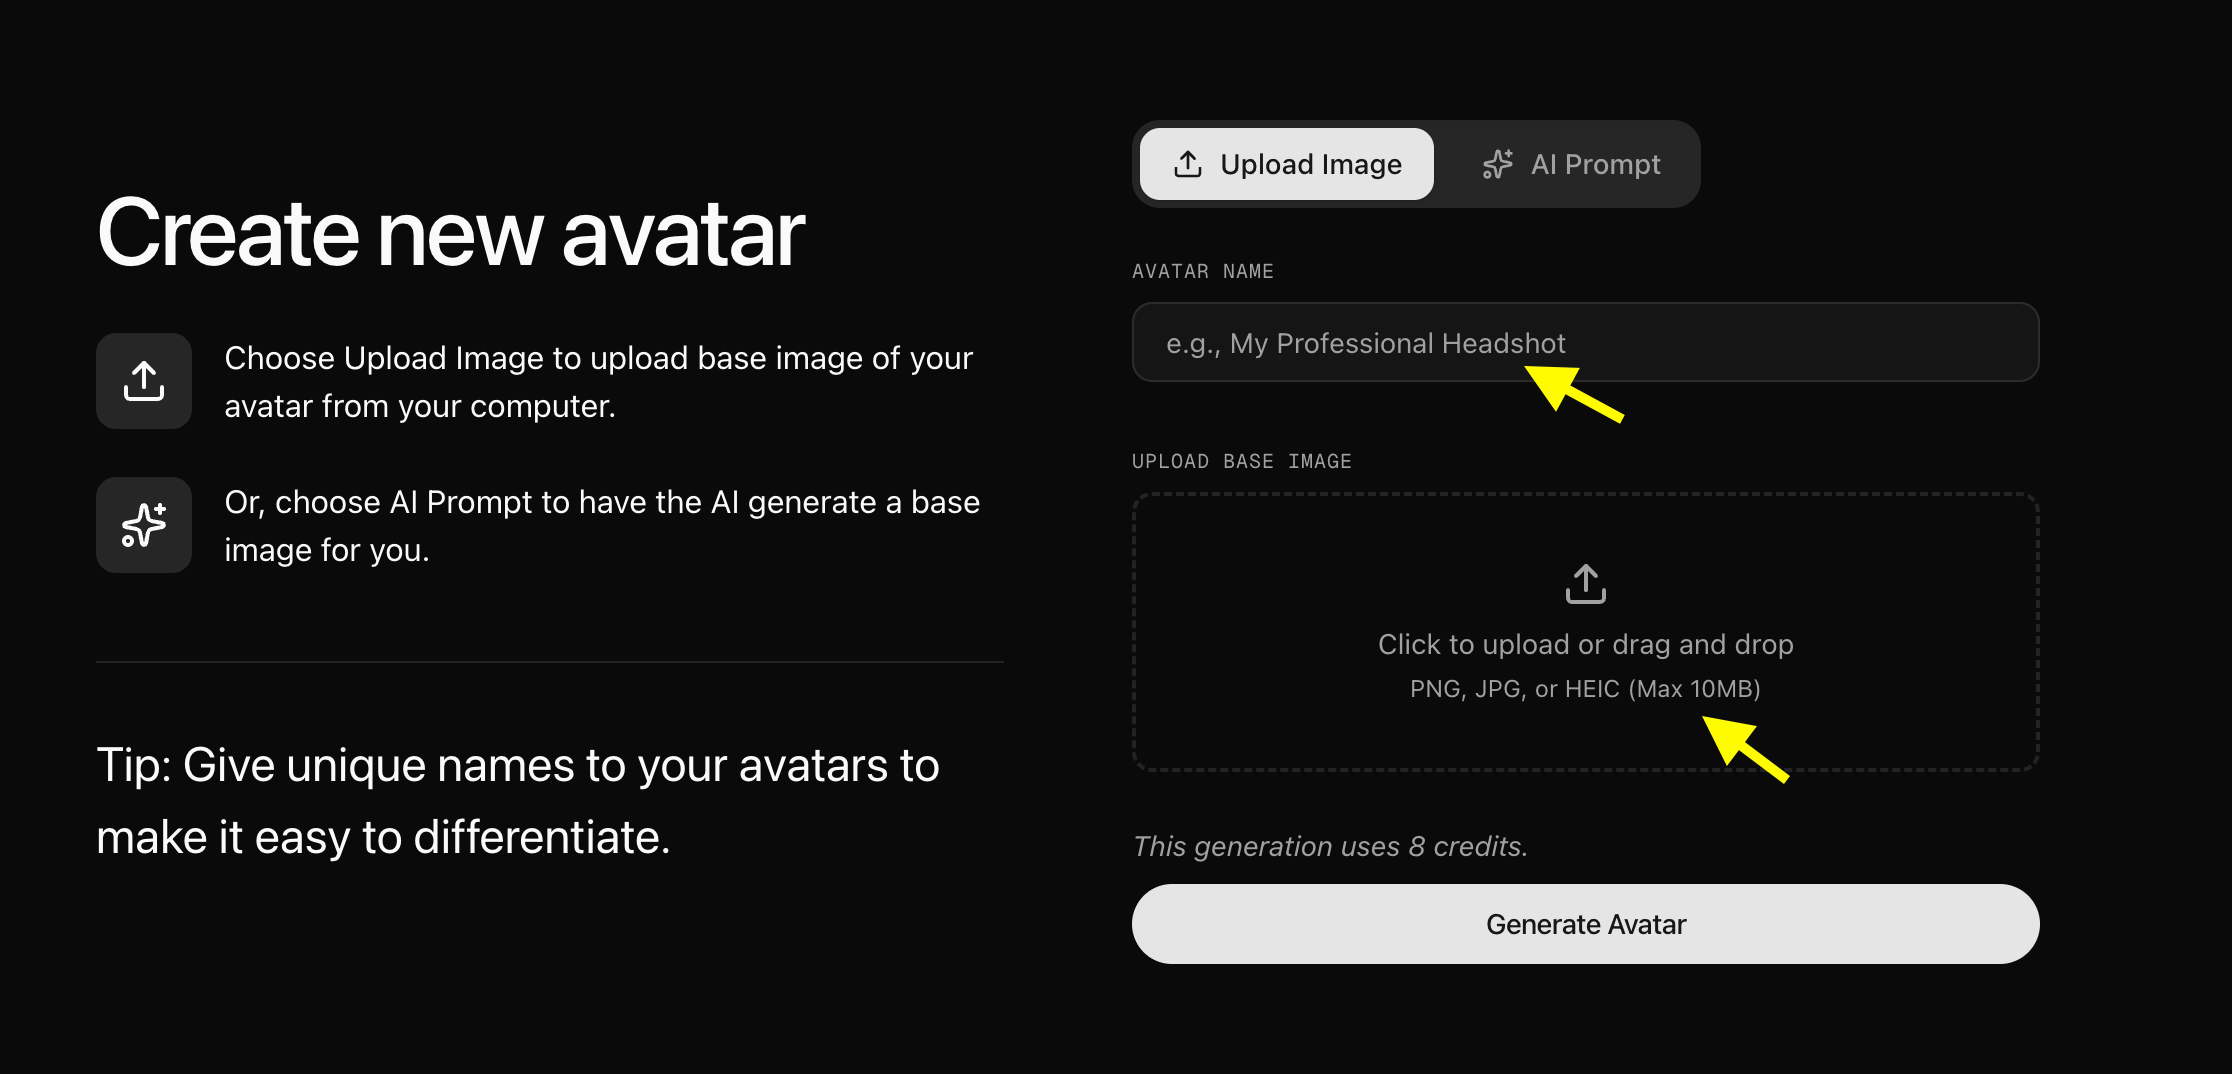
 You have two options to set up your avatar image:
* **Upload Image**: Enter a name and upload your front-facing portrait image.
You have two options to set up your avatar image:
* **Upload Image**: Enter a name and upload your front-facing portrait image.
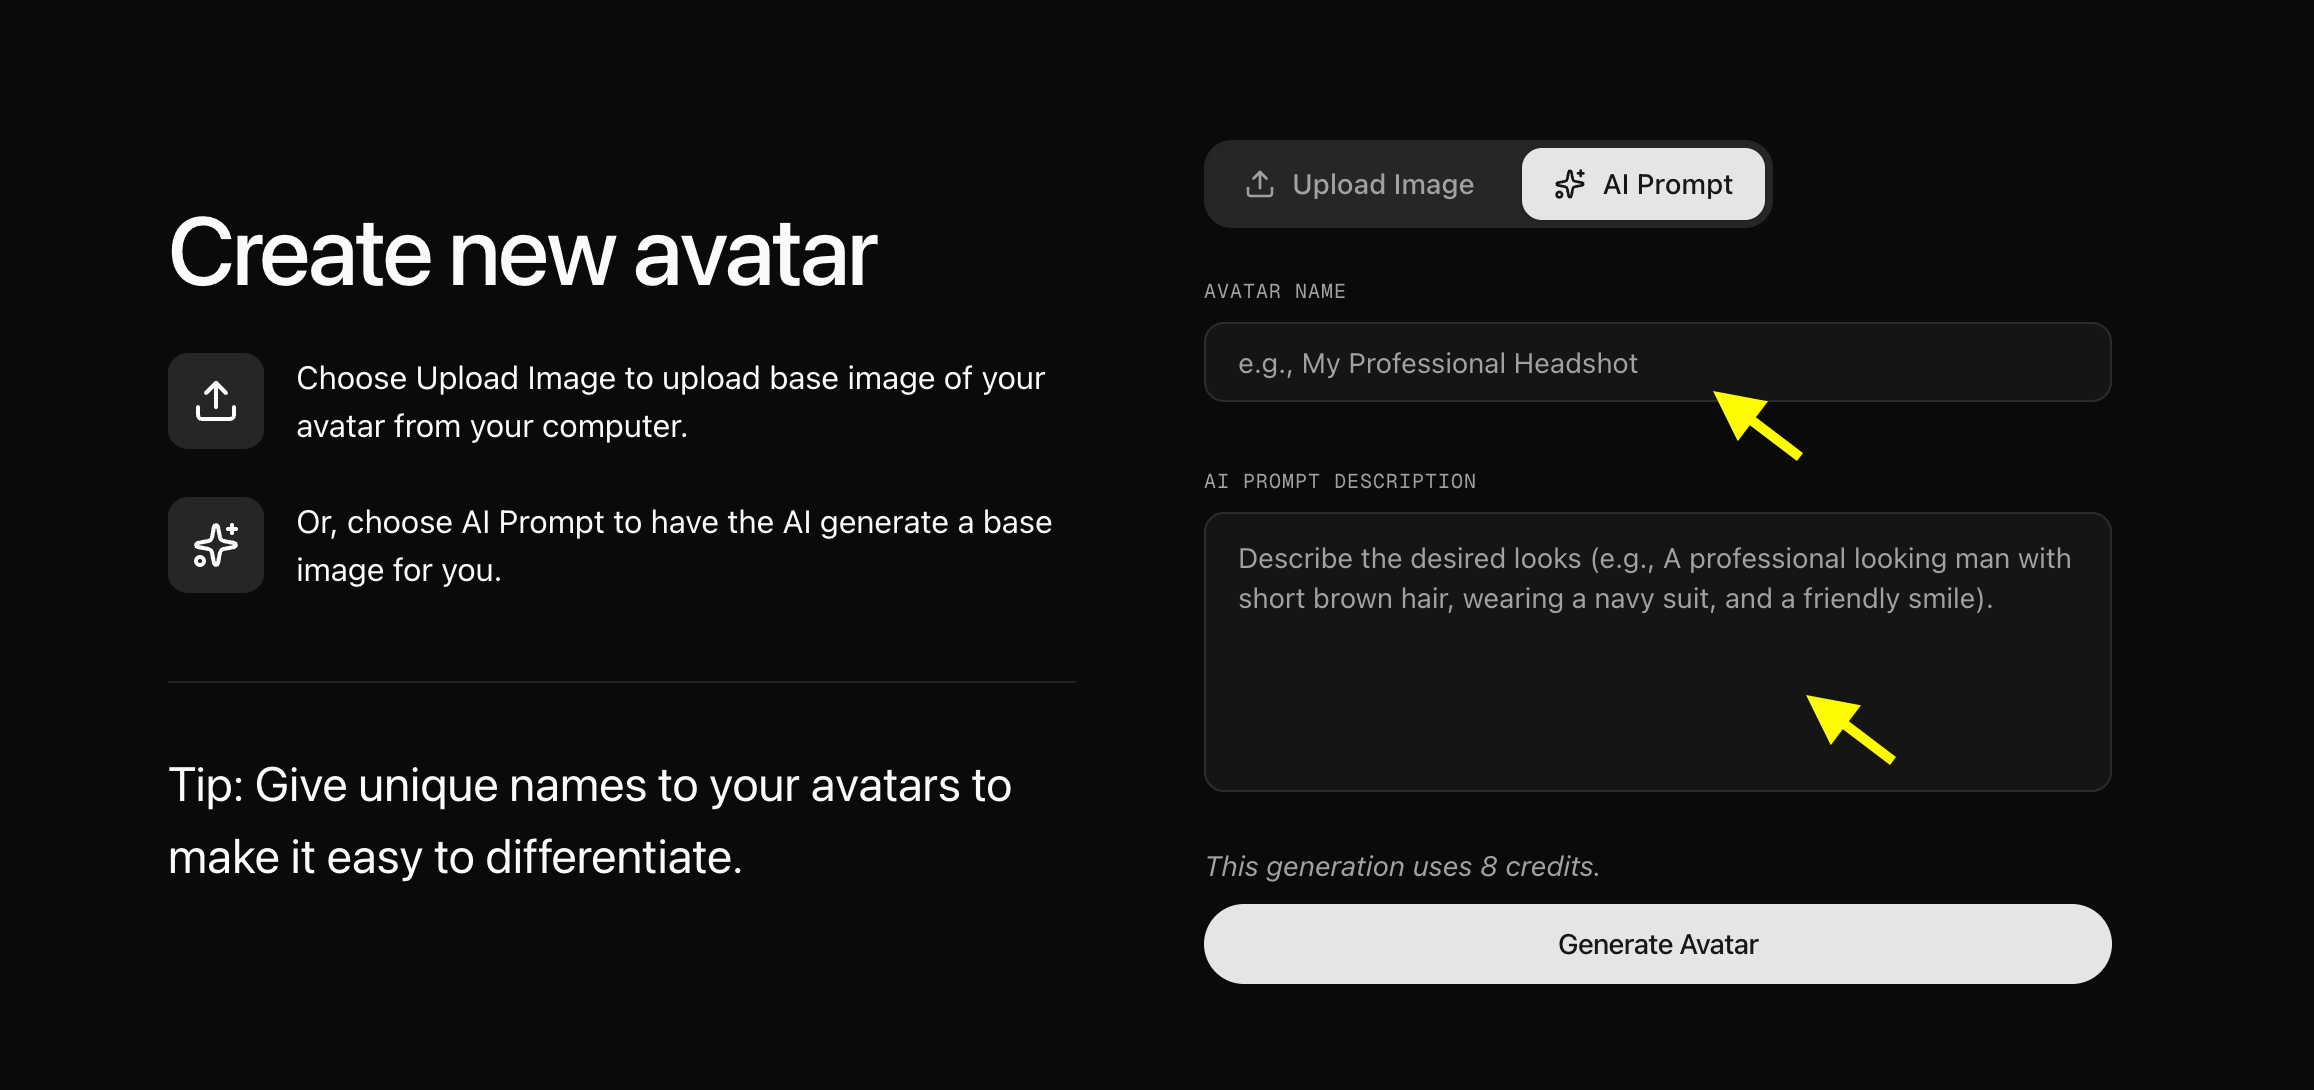
 * **AI Prompt Generation**: Toggle the AI prompt option, name your avatar, and enter a detailed prompt to generate an image.
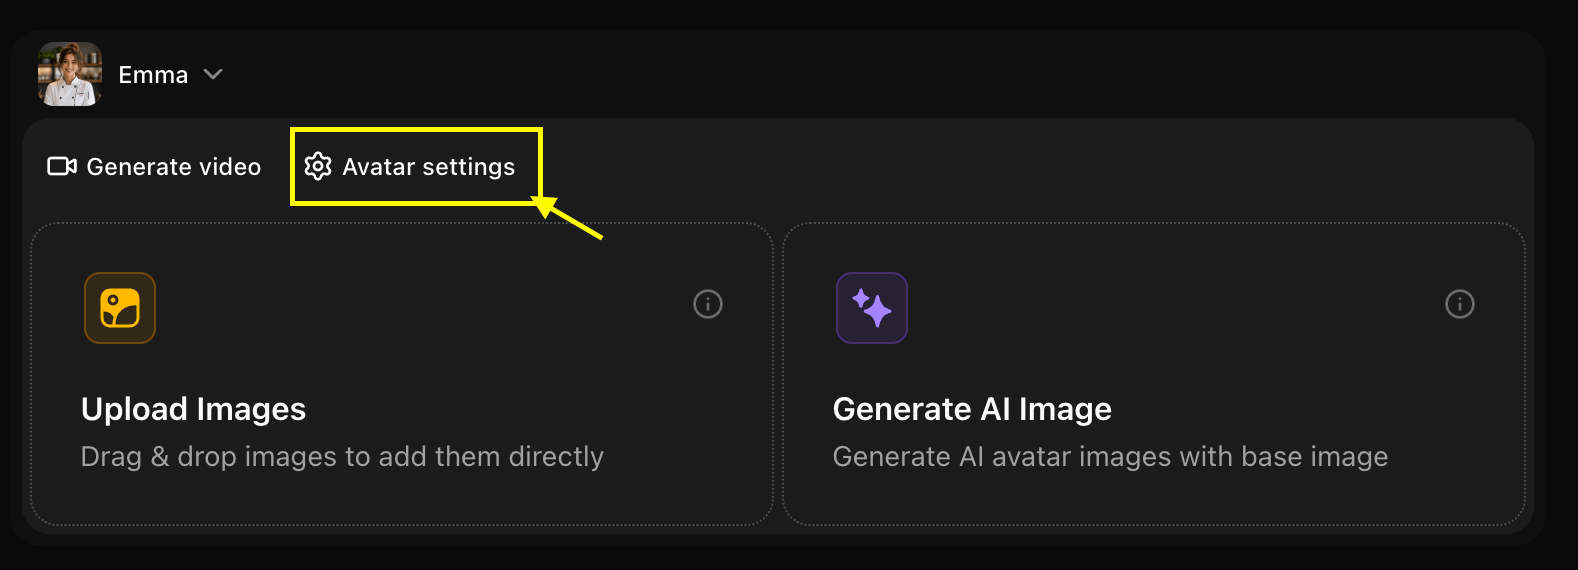
 Click on **Avatar Settings** to customize details for a more realistic output. Once customized, you can add more images or generate variations from the base image.
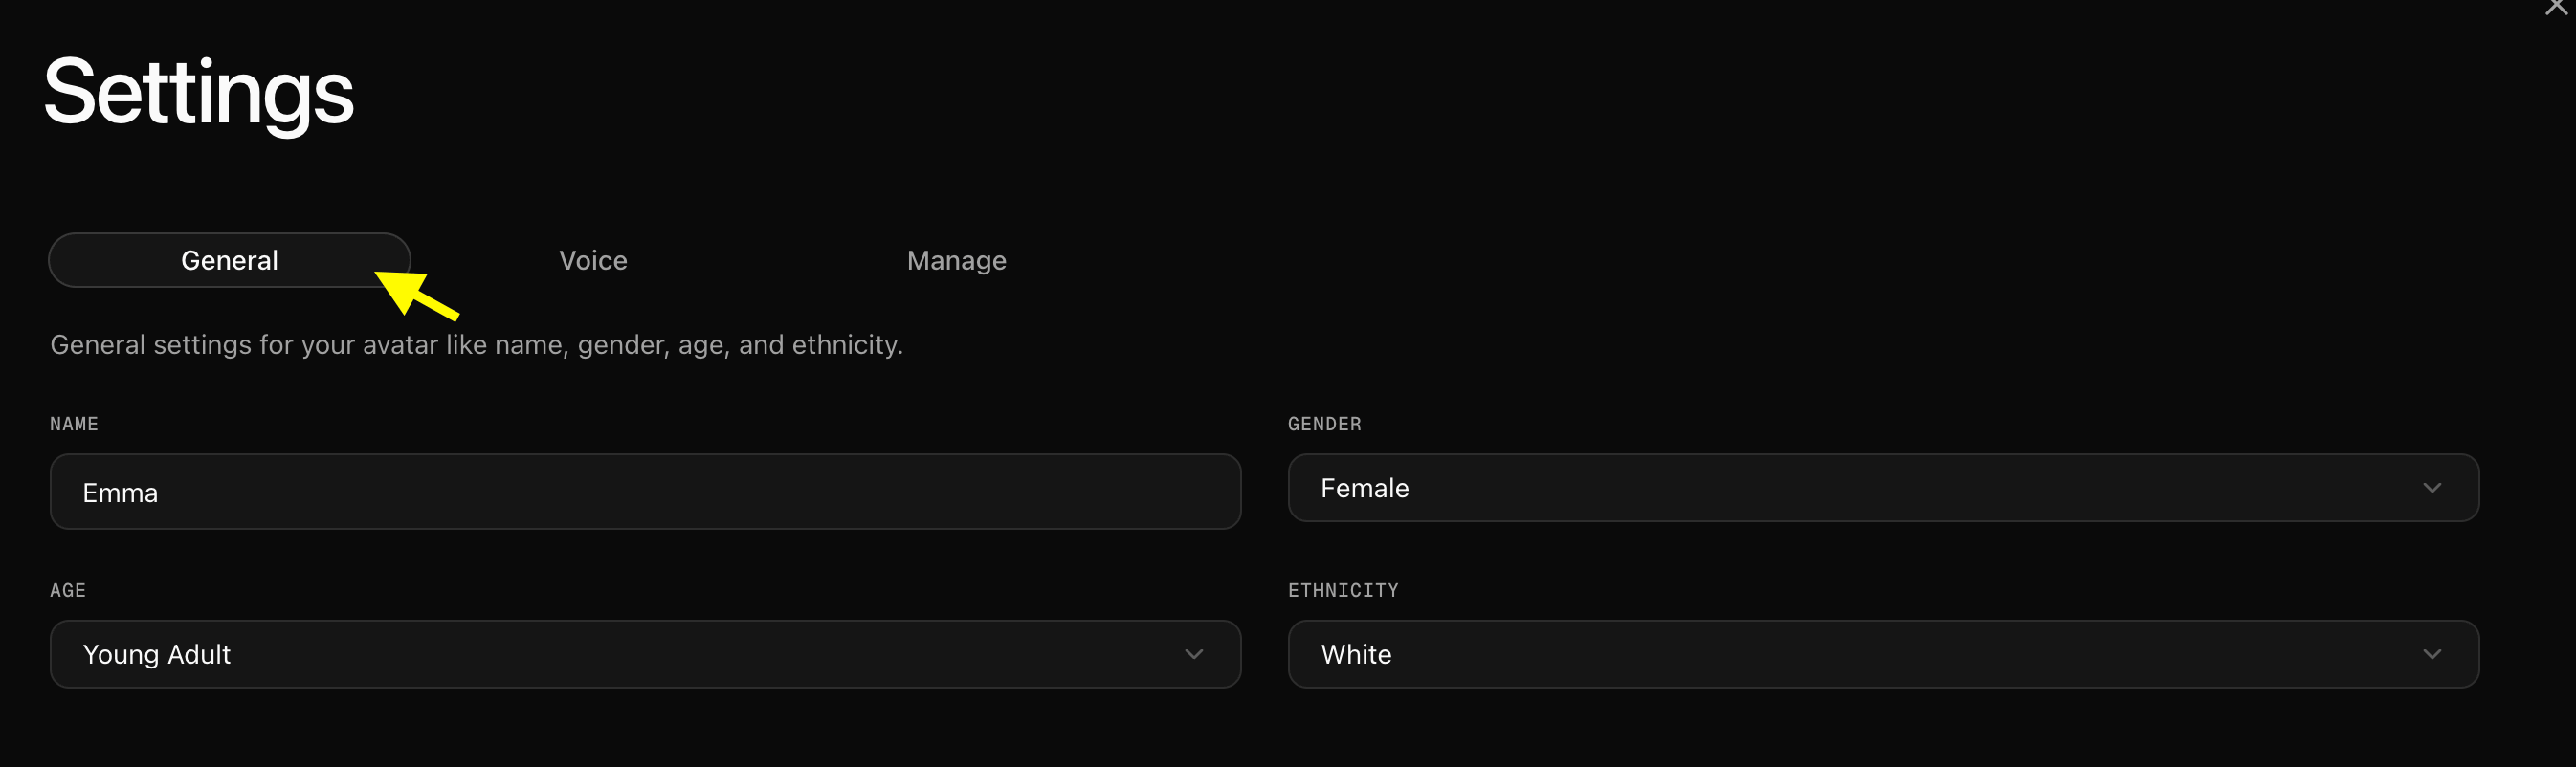
 In the **General Settings** tab, fill in the basic details such as age, ethnicity, and gender.
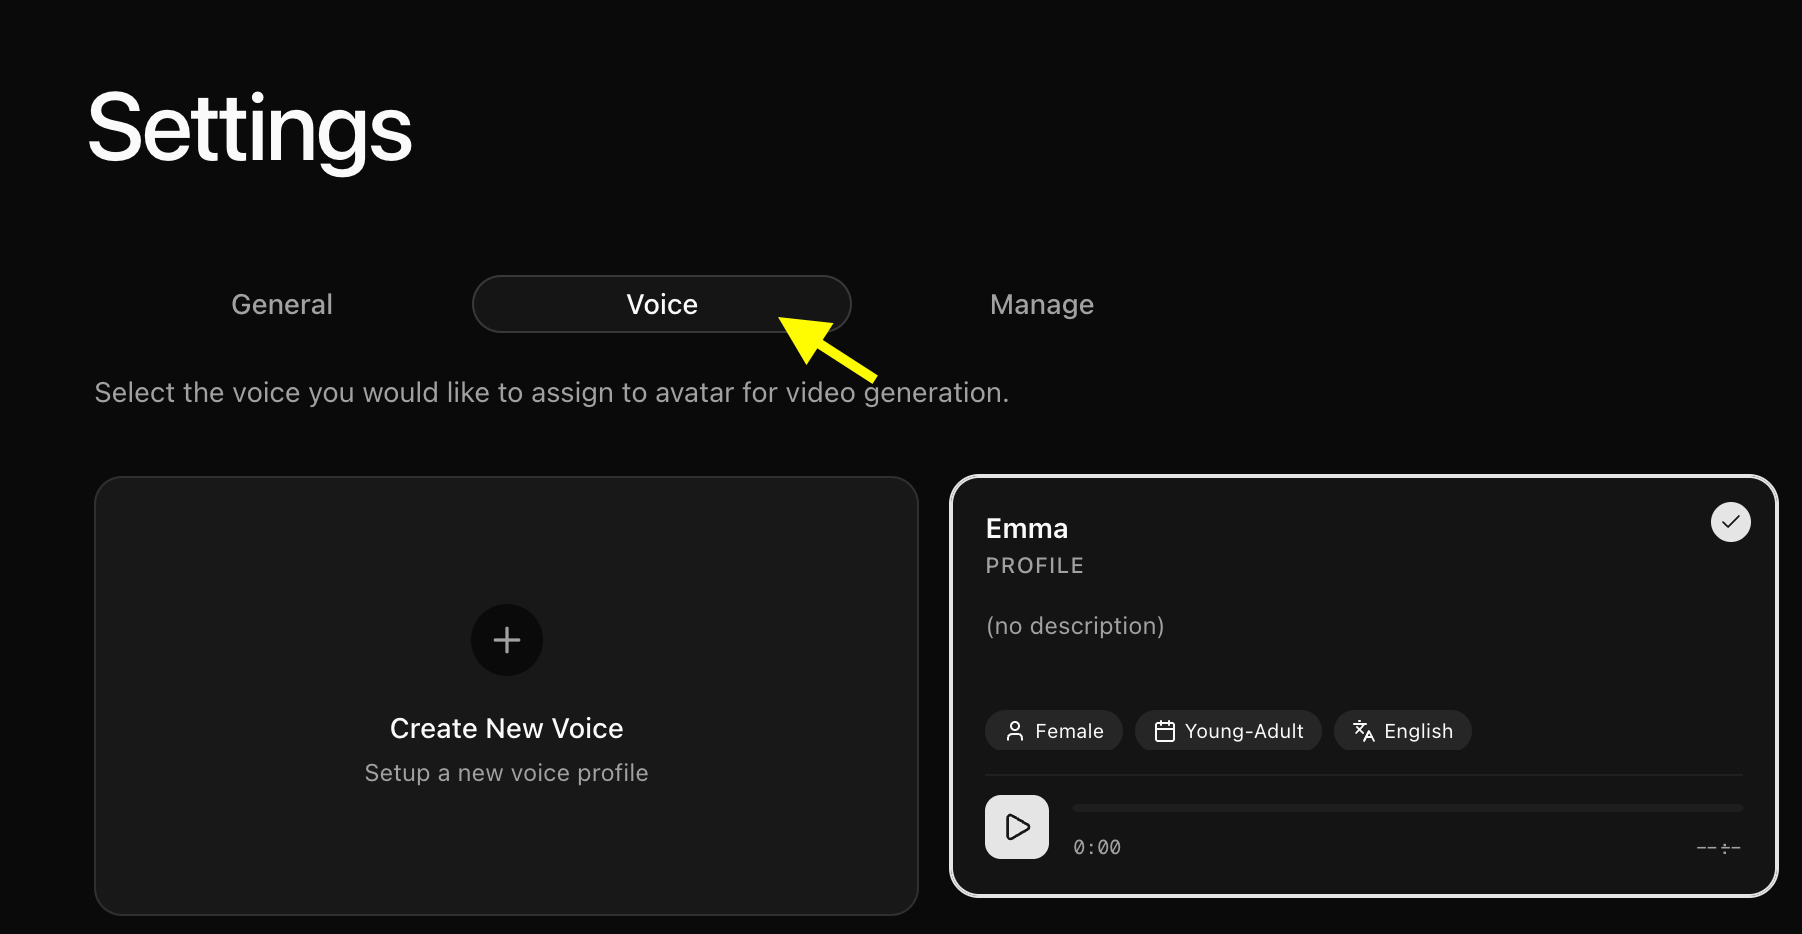
 In the voice settings tab, upload or record your own voice to set it as the default voice for your custom avatar.
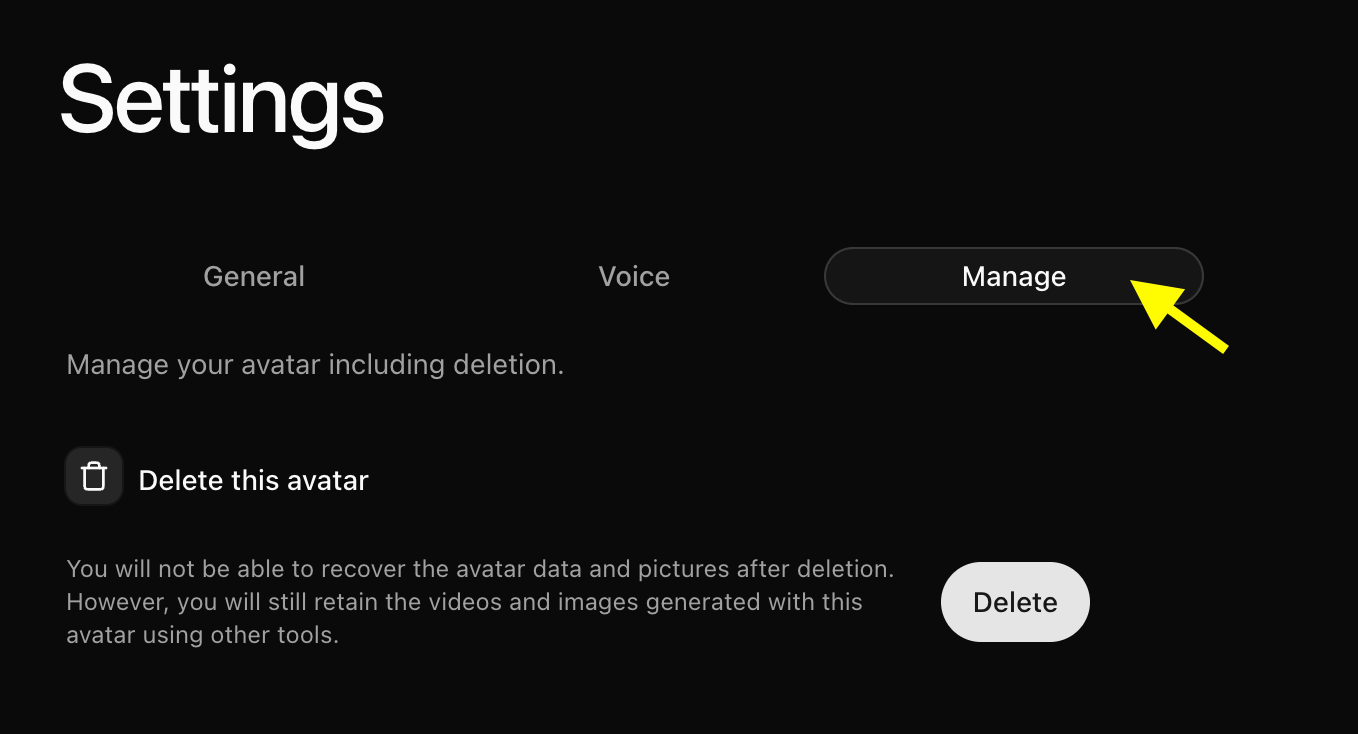
 Under the **Manage** tab, you can manage your avatar options or delete the avatar to start fresh if needed.
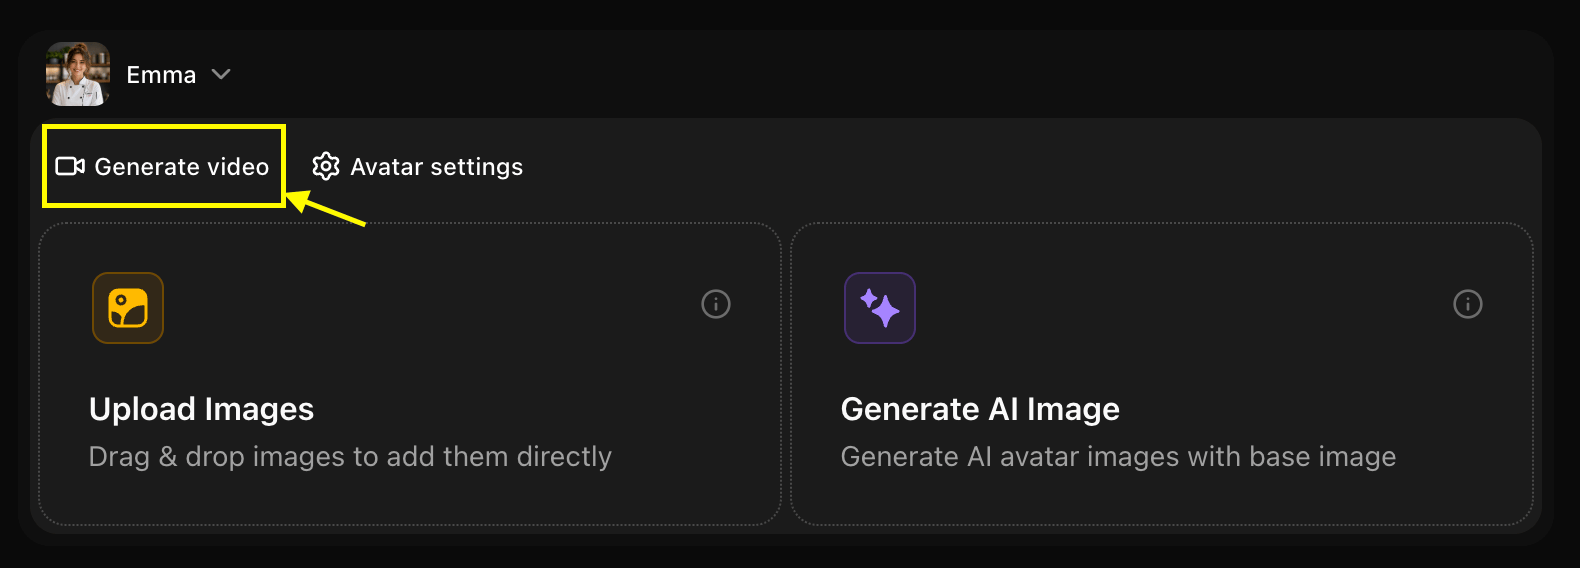
 Go back to the previous screen and click **Generate Video** to open the advanced video settings panel.
 > \[!TIP]
> **Audio Preview Feature**: Use the audio preview in the top-right corner to listen to the generated speech before creating the full video, helping you conserve credits.
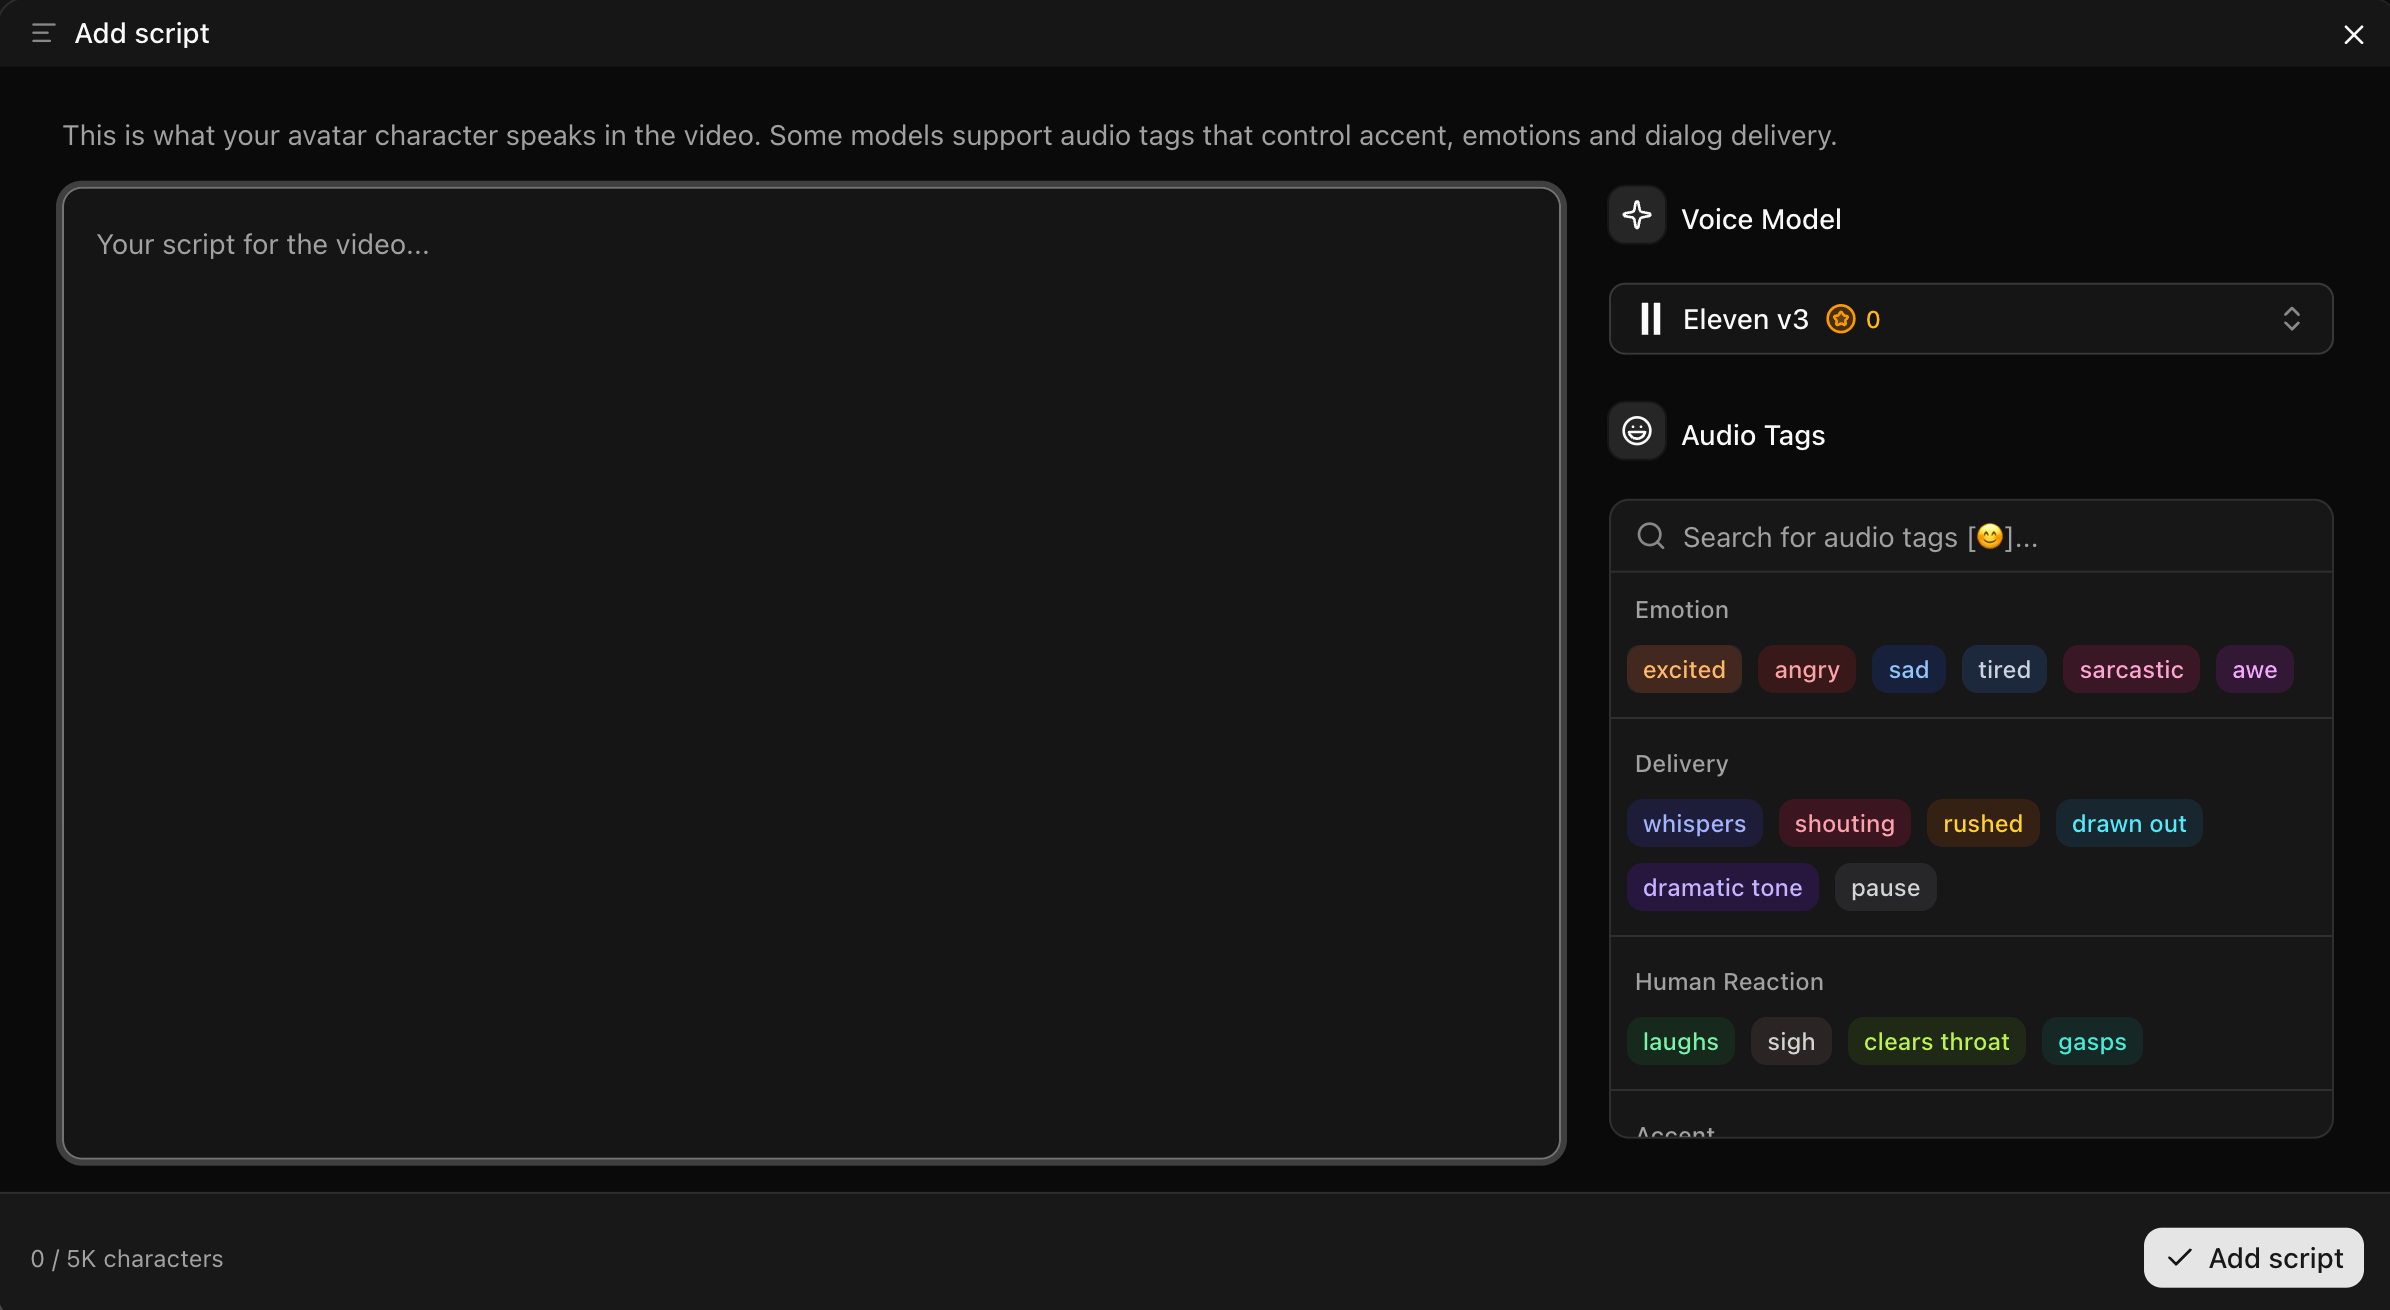
Add your text script, select your voice model, and configure emotions, delivery style, human reactions, and accent tags.
> \[!TIP]
> **Audio Preview Feature**: Use the audio preview in the top-right corner to listen to the generated speech before creating the full video, helping you conserve credits.
Add your text script, select your voice model, and configure emotions, delivery style, human reactions, and accent tags.
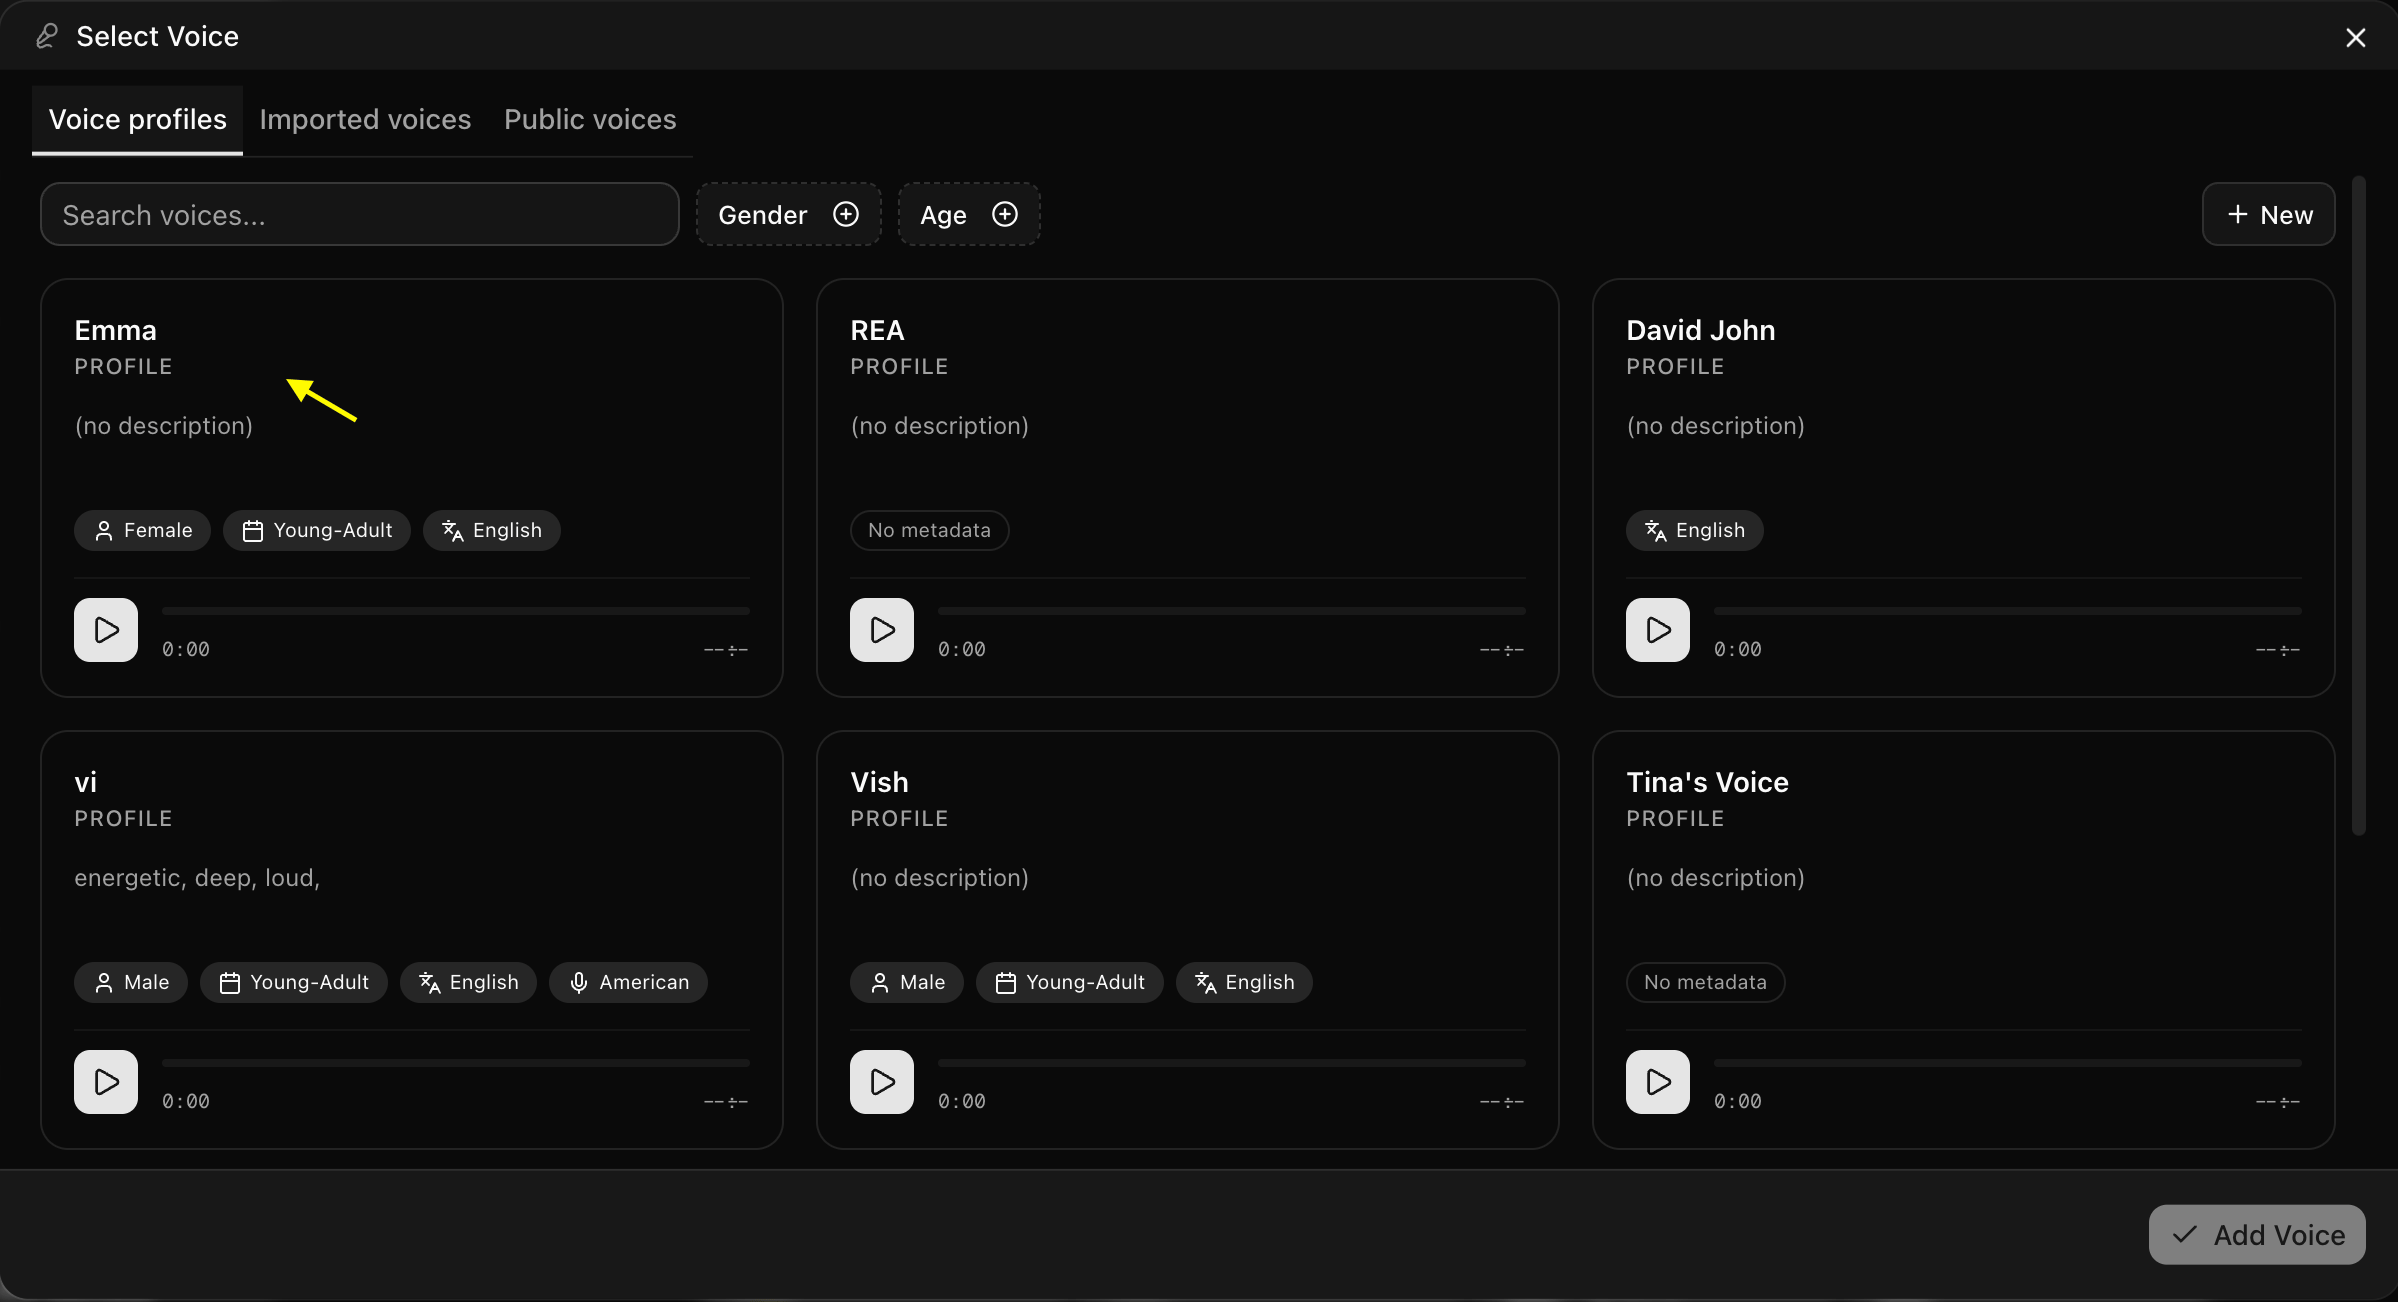
 Select your uploaded voice, import a public voice, or add a new one by clicking the **New** button.
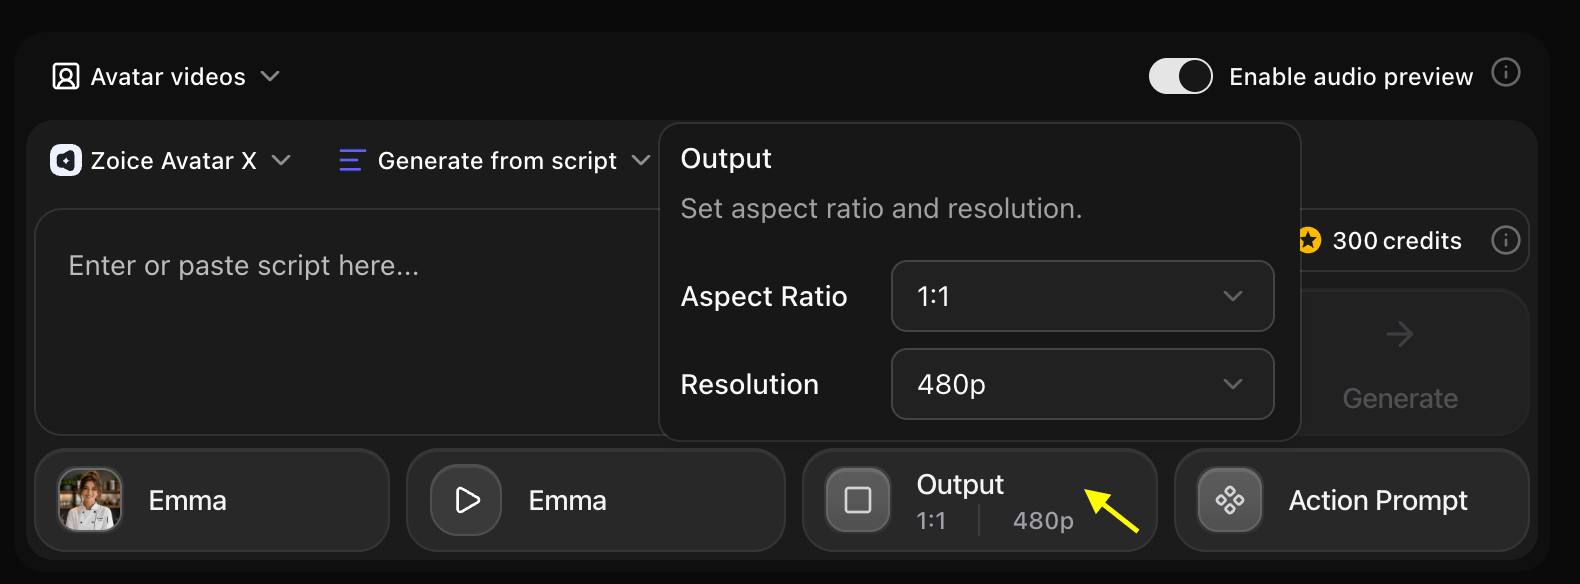
 Choose the desired aspect ratio and resolution for your output video.
 Click and select a preset action suitable for your avatar, or type a custom description for the avatar's movement.
Verify all settings and click **Generate**. Wait a few minutes for the system to process and deliver your custom AI avatar video!
## Writing Effective Prompts
### Basic Structure
A good avatar prompt includes:
* **Demographics**: Age, gender, ethnicity
* **Appearance**: Hair color/style, facial features, build
* **Style**: Clothing, accessories, overall aesthetic
* **Mood**: Expression, demeanor, personality
### Example Prompts
```text Professional theme={null}
A professional woman in her 30s with shoulder-length brown hair, wearing a navy blue blazer, friendly smile, confident posture, modern office background
```
```text Creative theme={null}
A young creative artist in their 20s with colorful dyed hair, casual streetwear, artistic tattoos, expressive features, studio background
```
```text Educational theme={null}
A friendly teacher in their 40s with glasses, warm smile, professional attire, approachable demeanor, classroom setting
```
```text Character theme={null}
A futuristic sci-fi character with sleek silver hair, high-tech outfit, glowing accents, confident expression, digital background
```
## Customization Options
### Appearance Controls
* **Age Range**: Child, teen, young adult, middle-aged, senior
* **Gender**: Male, female, non-binary
* **Ethnicity**: Various ethnic backgrounds available
* **Hair**: Color, length, style
* **Facial Features**: Eyes, nose, mouth, facial structure
* **Build**: Body type and proportions
### Style Options
* **Realistic**: Photorealistic human avatars
* **Stylized**: Semi-realistic with artistic touches
* **Cartoon**: Animated, cartoon-style characters
* **Anime**: Anime/manga-inspired style
### Clothing & Accessories
* **Professional**: Business attire, formal wear
* **Casual**: Everyday clothing, streetwear
* **Creative**: Artistic, unique outfits
* **Themed**: Specific themes or costumes
### Background & Setting
* **Office**: Professional workspace
* **Studio**: Neutral or colored backgrounds
* **Outdoor**: Natural settings
* **Custom**: Upload your own background
## Use Cases
Create unique brand representative avatars
Generate presenters for videos and webinars
Design characters for games or interactive content
Create consistent avatar personas for platforms
## Best Practices
* Be specific about key features
* Include style preferences
* Mention clothing and accessories
* Describe the mood or expression
* Specify background if important
* Start with a basic description
* Generate and review
* Refine prompt based on results
* Adjust specific details
* Test different style options
* Save successful prompts for reuse
* Use similar descriptions for character consistency
* Document your avatar specifications
* Create style guides for brand avatars
Start with simple descriptions and add details gradually. Too many details in one prompt can sometimes conflict.
## Advanced Features
### Voice Integration
Combine your text-generated avatar with:
* Custom voice selection
* Voice cloning for unique voices
* Emotion and tone control
* Multi-language support
### Animation Control
* **Expression Intensity**: Subtle to expressive
* **Movement Style**: Static, moderate, or dynamic
* **Gesture Options**: Hand movements and body language
* **Camera Angles**: Front, slight angle, or dynamic
## Limitations
* Avatar generation may take 30-60 seconds
* Very complex or contradictory prompts may produce unexpected results
* Extreme or unrealistic features may not render accurately
* Some style combinations may not be available
Generated avatars should not be used to impersonate real individuals without consent.
## Next Steps
Animate your photos into AI presenters
Explore our library of professional presenters
Master generation techniques
Click and select a preset action suitable for your avatar, or type a custom description for the avatar's movement.
Verify all settings and click **Generate**. Wait a few minutes for the system to process and deliver your custom AI avatar video!
## Writing Effective Prompts
### Basic Structure
A good avatar prompt includes:
* **Demographics**: Age, gender, ethnicity
* **Appearance**: Hair color/style, facial features, build
* **Style**: Clothing, accessories, overall aesthetic
* **Mood**: Expression, demeanor, personality
### Example Prompts
```text Professional theme={null}
A professional woman in her 30s with shoulder-length brown hair, wearing a navy blue blazer, friendly smile, confident posture, modern office background
```
```text Creative theme={null}
A young creative artist in their 20s with colorful dyed hair, casual streetwear, artistic tattoos, expressive features, studio background
```
```text Educational theme={null}
A friendly teacher in their 40s with glasses, warm smile, professional attire, approachable demeanor, classroom setting
```
```text Character theme={null}
A futuristic sci-fi character with sleek silver hair, high-tech outfit, glowing accents, confident expression, digital background
```
## Customization Options
### Appearance Controls
* **Age Range**: Child, teen, young adult, middle-aged, senior
* **Gender**: Male, female, non-binary
* **Ethnicity**: Various ethnic backgrounds available
* **Hair**: Color, length, style
* **Facial Features**: Eyes, nose, mouth, facial structure
* **Build**: Body type and proportions
### Style Options
* **Realistic**: Photorealistic human avatars
* **Stylized**: Semi-realistic with artistic touches
* **Cartoon**: Animated, cartoon-style characters
* **Anime**: Anime/manga-inspired style
### Clothing & Accessories
* **Professional**: Business attire, formal wear
* **Casual**: Everyday clothing, streetwear
* **Creative**: Artistic, unique outfits
* **Themed**: Specific themes or costumes
### Background & Setting
* **Office**: Professional workspace
* **Studio**: Neutral or colored backgrounds
* **Outdoor**: Natural settings
* **Custom**: Upload your own background
## Use Cases
Create unique brand representative avatars
Generate presenters for videos and webinars
Design characters for games or interactive content
Create consistent avatar personas for platforms
## Best Practices
* Be specific about key features
* Include style preferences
* Mention clothing and accessories
* Describe the mood or expression
* Specify background if important
* Start with a basic description
* Generate and review
* Refine prompt based on results
* Adjust specific details
* Test different style options
* Save successful prompts for reuse
* Use similar descriptions for character consistency
* Document your avatar specifications
* Create style guides for brand avatars
Start with simple descriptions and add details gradually. Too many details in one prompt can sometimes conflict.
## Advanced Features
### Voice Integration
Combine your text-generated avatar with:
* Custom voice selection
* Voice cloning for unique voices
* Emotion and tone control
* Multi-language support
### Animation Control
* **Expression Intensity**: Subtle to expressive
* **Movement Style**: Static, moderate, or dynamic
* **Gesture Options**: Hand movements and body language
* **Camera Angles**: Front, slight angle, or dynamic
## Limitations
* Avatar generation may take 30-60 seconds
* Very complex or contradictory prompts may produce unexpected results
* Extreme or unrealistic features may not render accurately
* Some style combinations may not be available
Generated avatars should not be used to impersonate real individuals without consent.
## Next Steps
Animate your photos into AI presenters
Explore our library of professional presenters
Master generation techniques