> ## Documentation Index
> Fetch the complete documentation index at: https://docs.zoice.com/llms.txt
> Use this file to discover all available pages before exploring further.
# Image to Avatar Videos
> Transform static photos into animated AI avatars. Learn how to create professional AI video presentations with personalized animated characters using Zoice.
## Benefits of Image to Avatar
Image to Avatar allows you to create AI-generated characters from your uploaded photos. These avatars maintain the likeness of the person in the photo while adding realistic animations, lip-sync, and expressions for video presentations.
* **Personal Branding**: Use your own face or brand representatives
* **Authenticity**: Real people, AI-powered animation
* **Brand Consistency**: Maintain visual brand identity
* **Professional Presence**: Create polished video content
* **Flexibility**: Multiple team members as avatars
* **Reusable**: Create once, use for multiple videos
## Getting Started
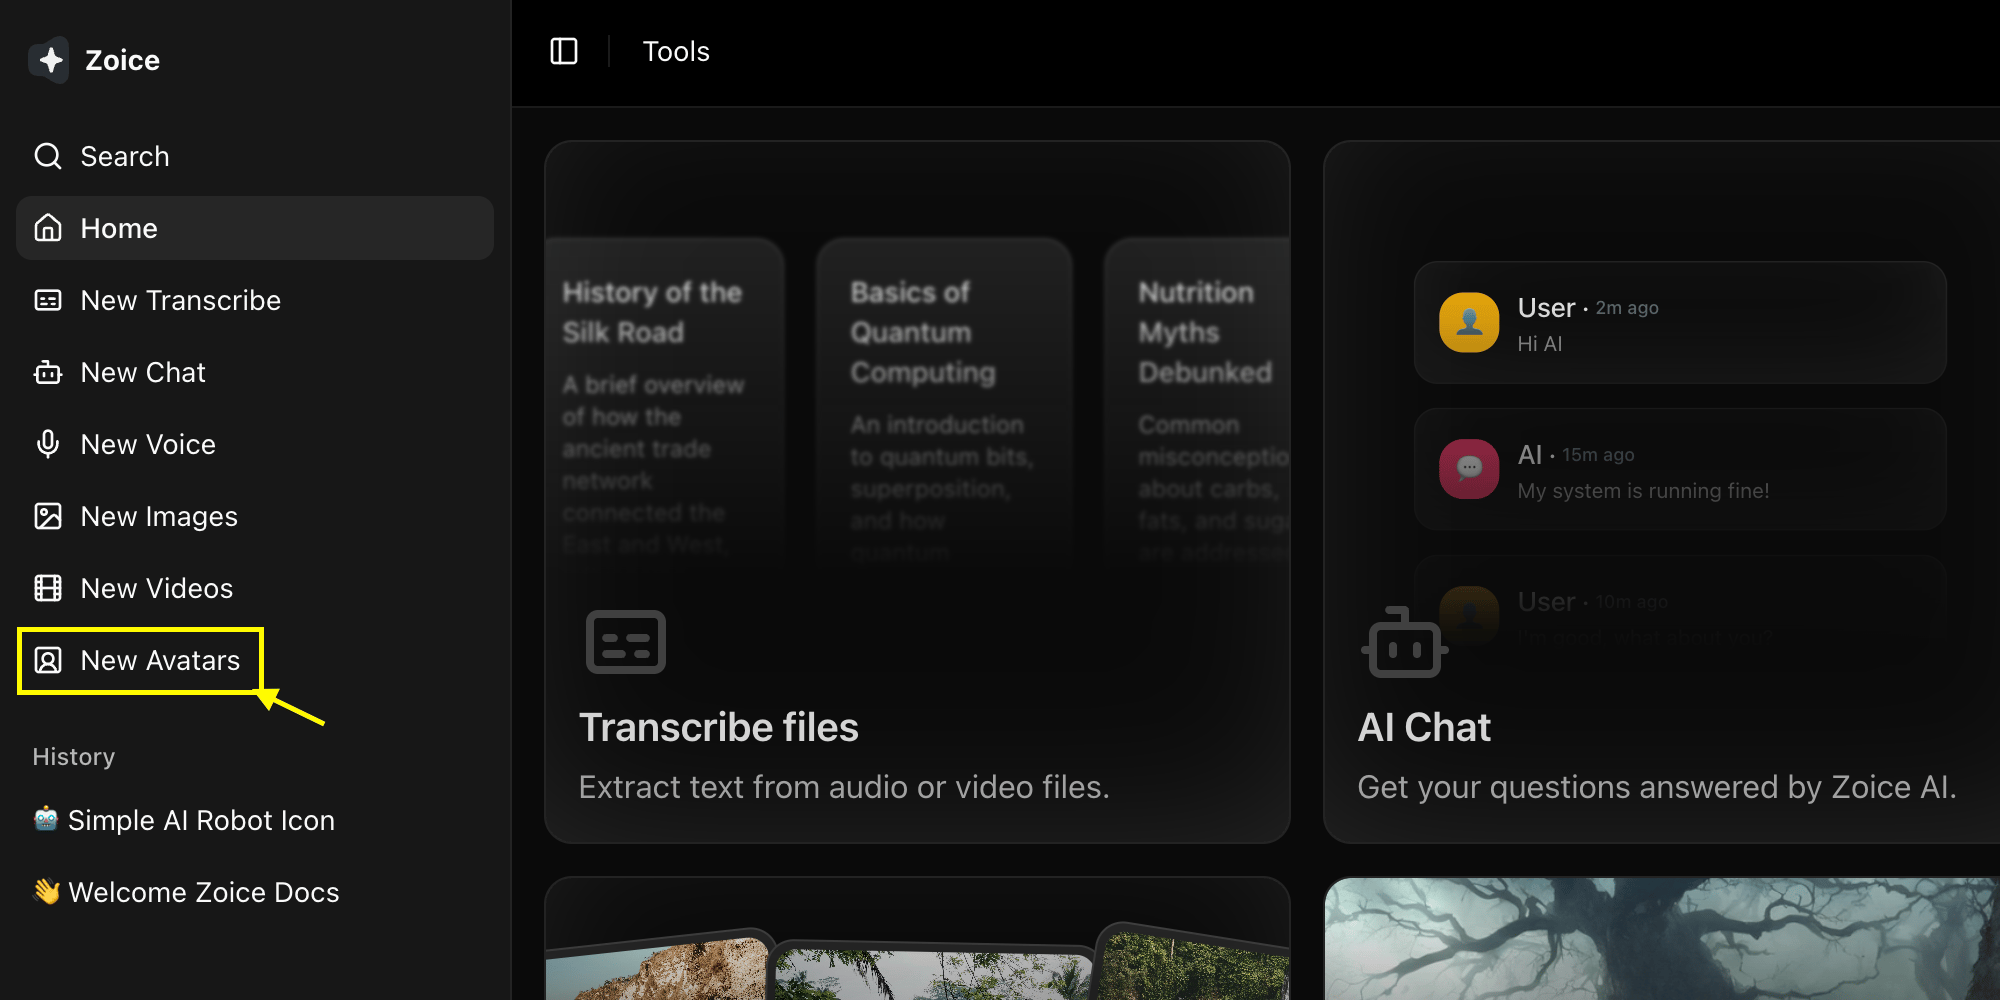
Go to the **New Avatar** section in the left menu of your Zoice dashboard.
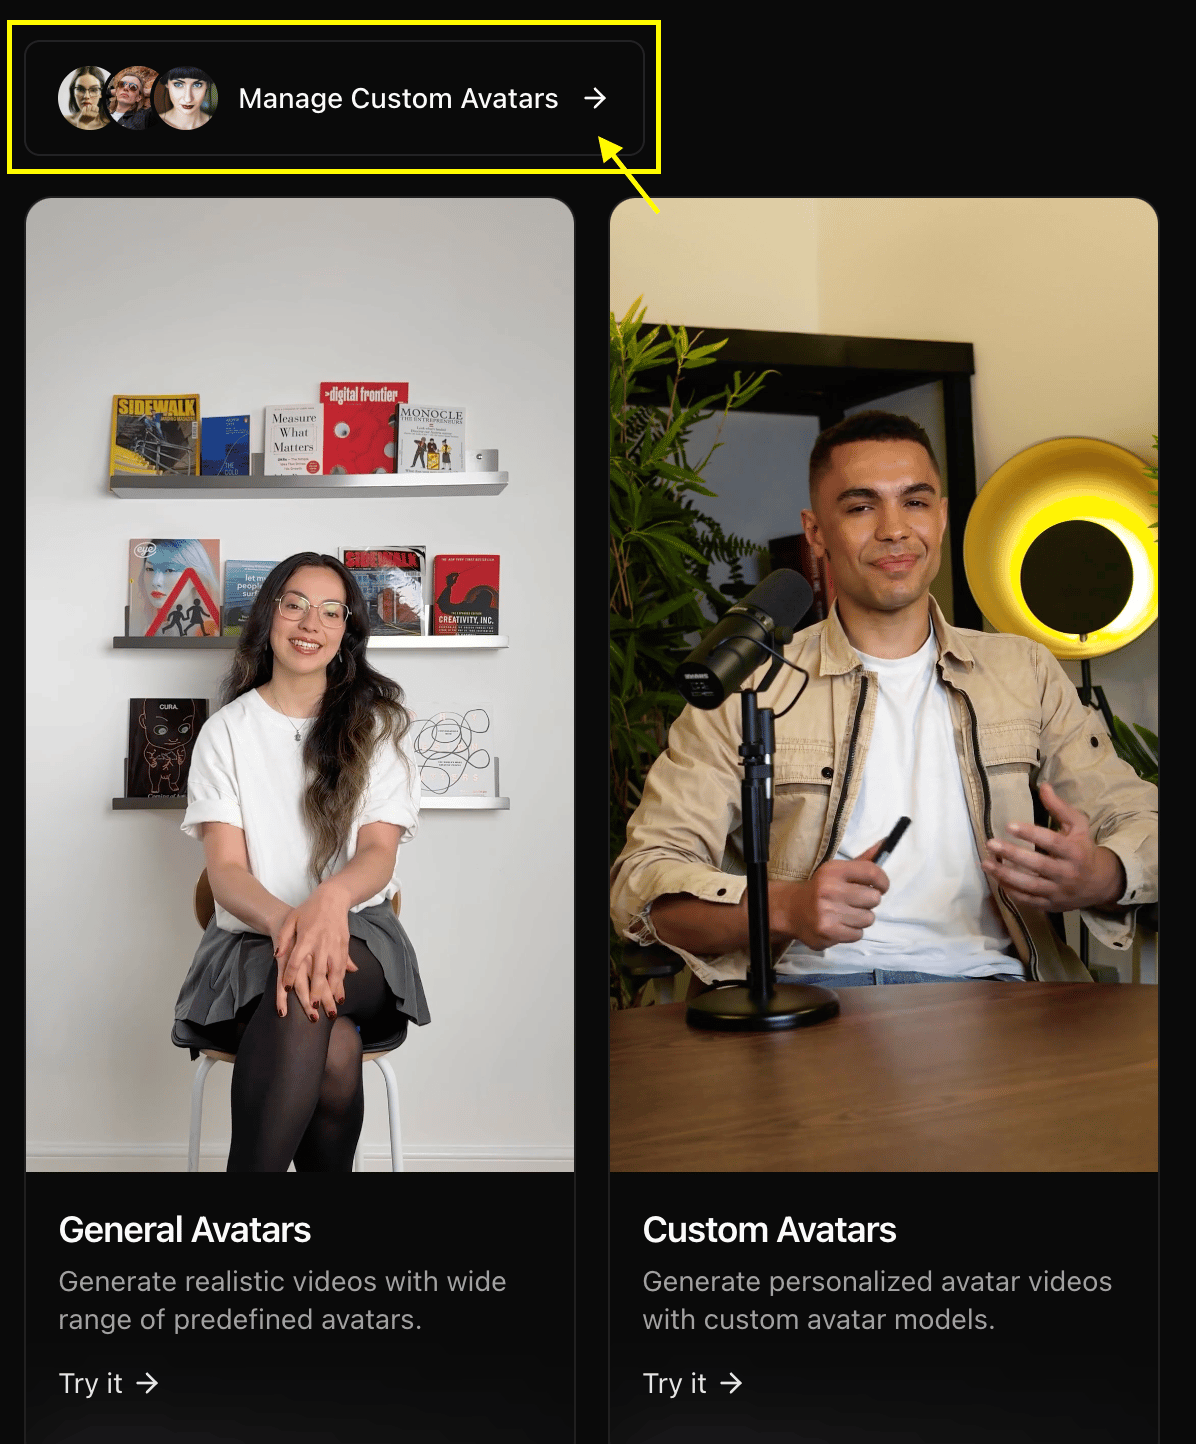
Select the **Manage Custom Avatar** option to start creating your personalized character.
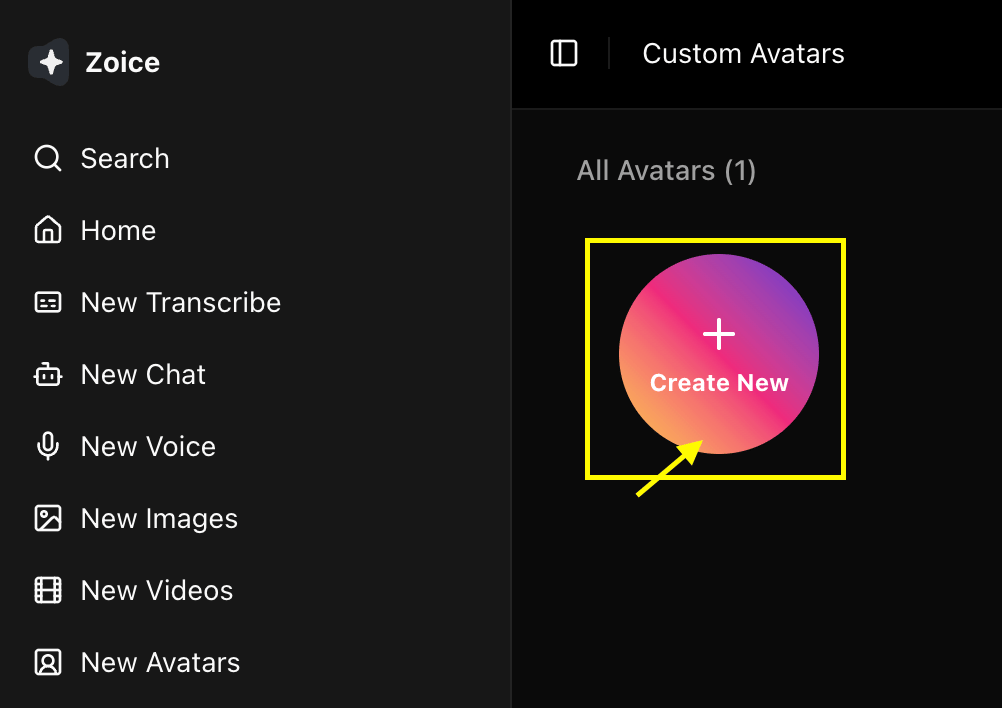
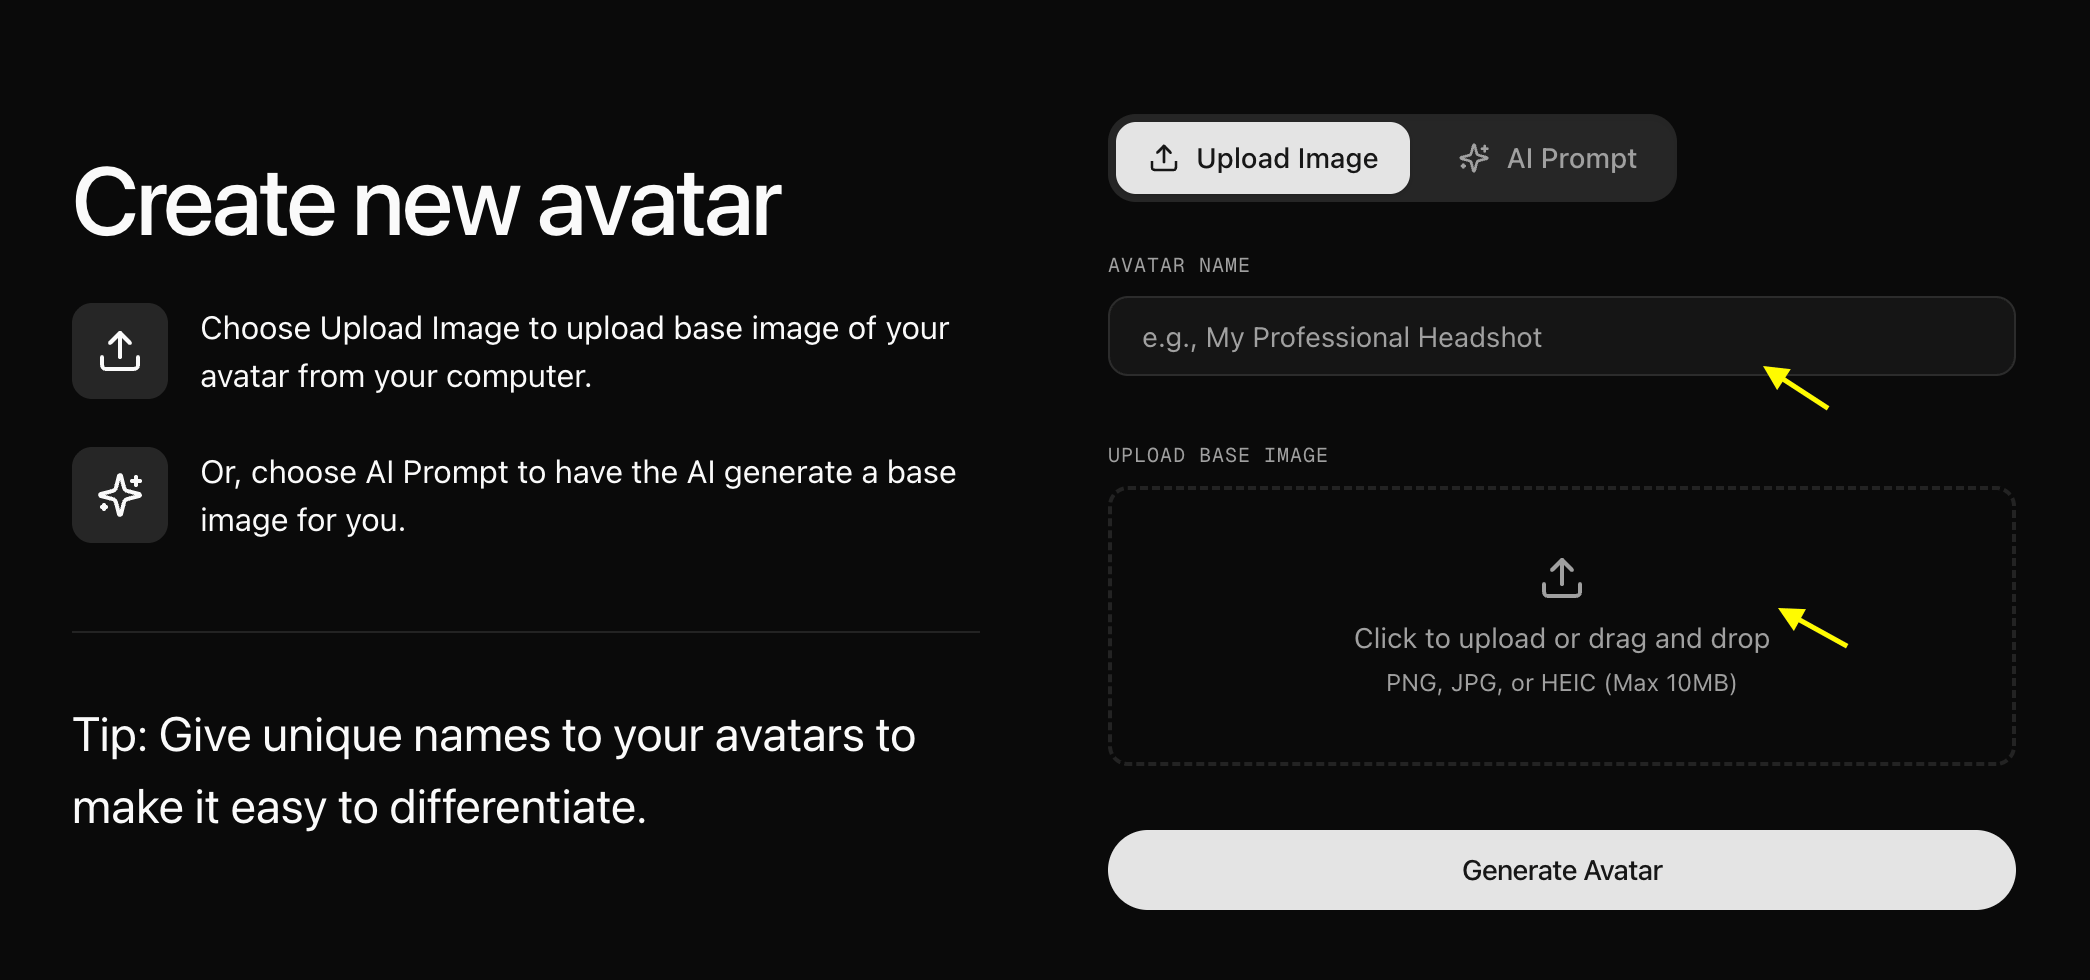
Click on the **Create New** button to begin the avatar creation process.
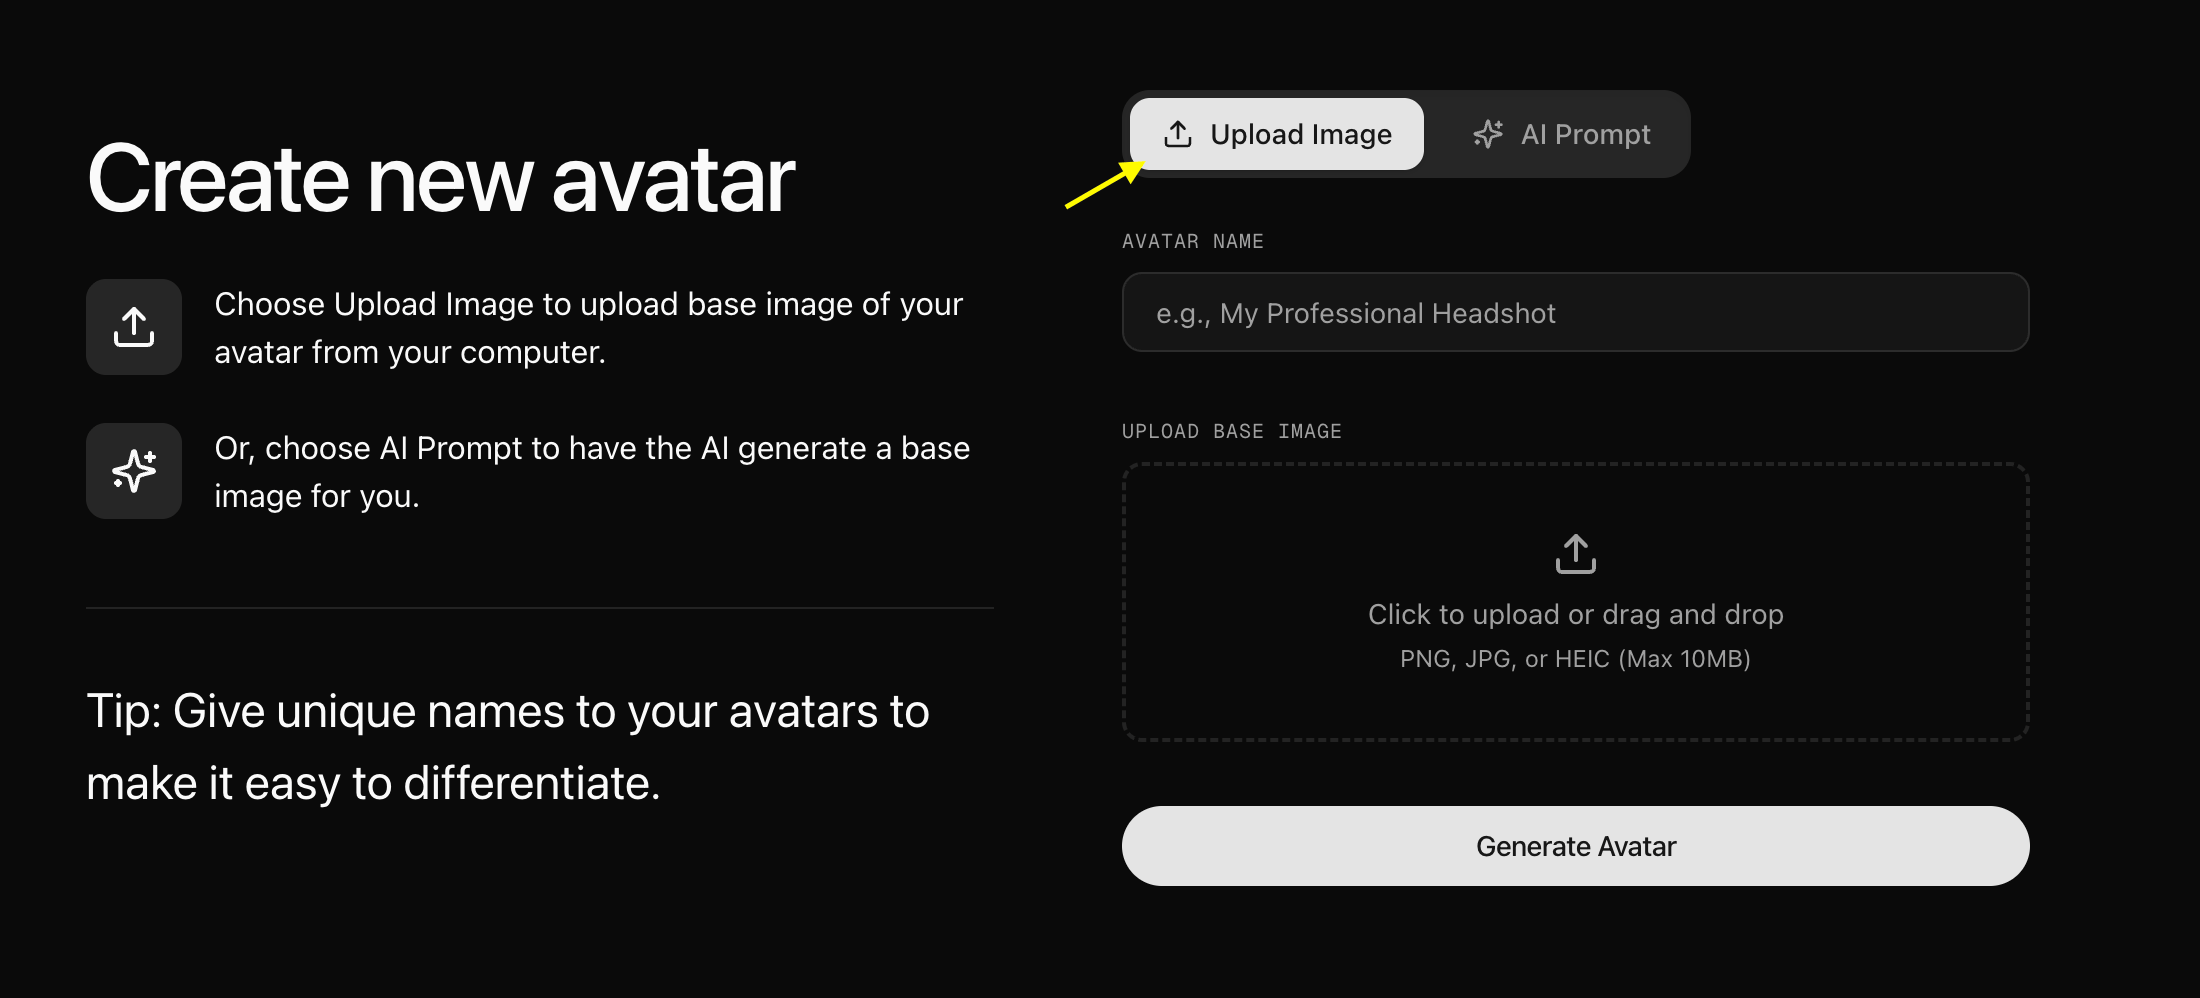
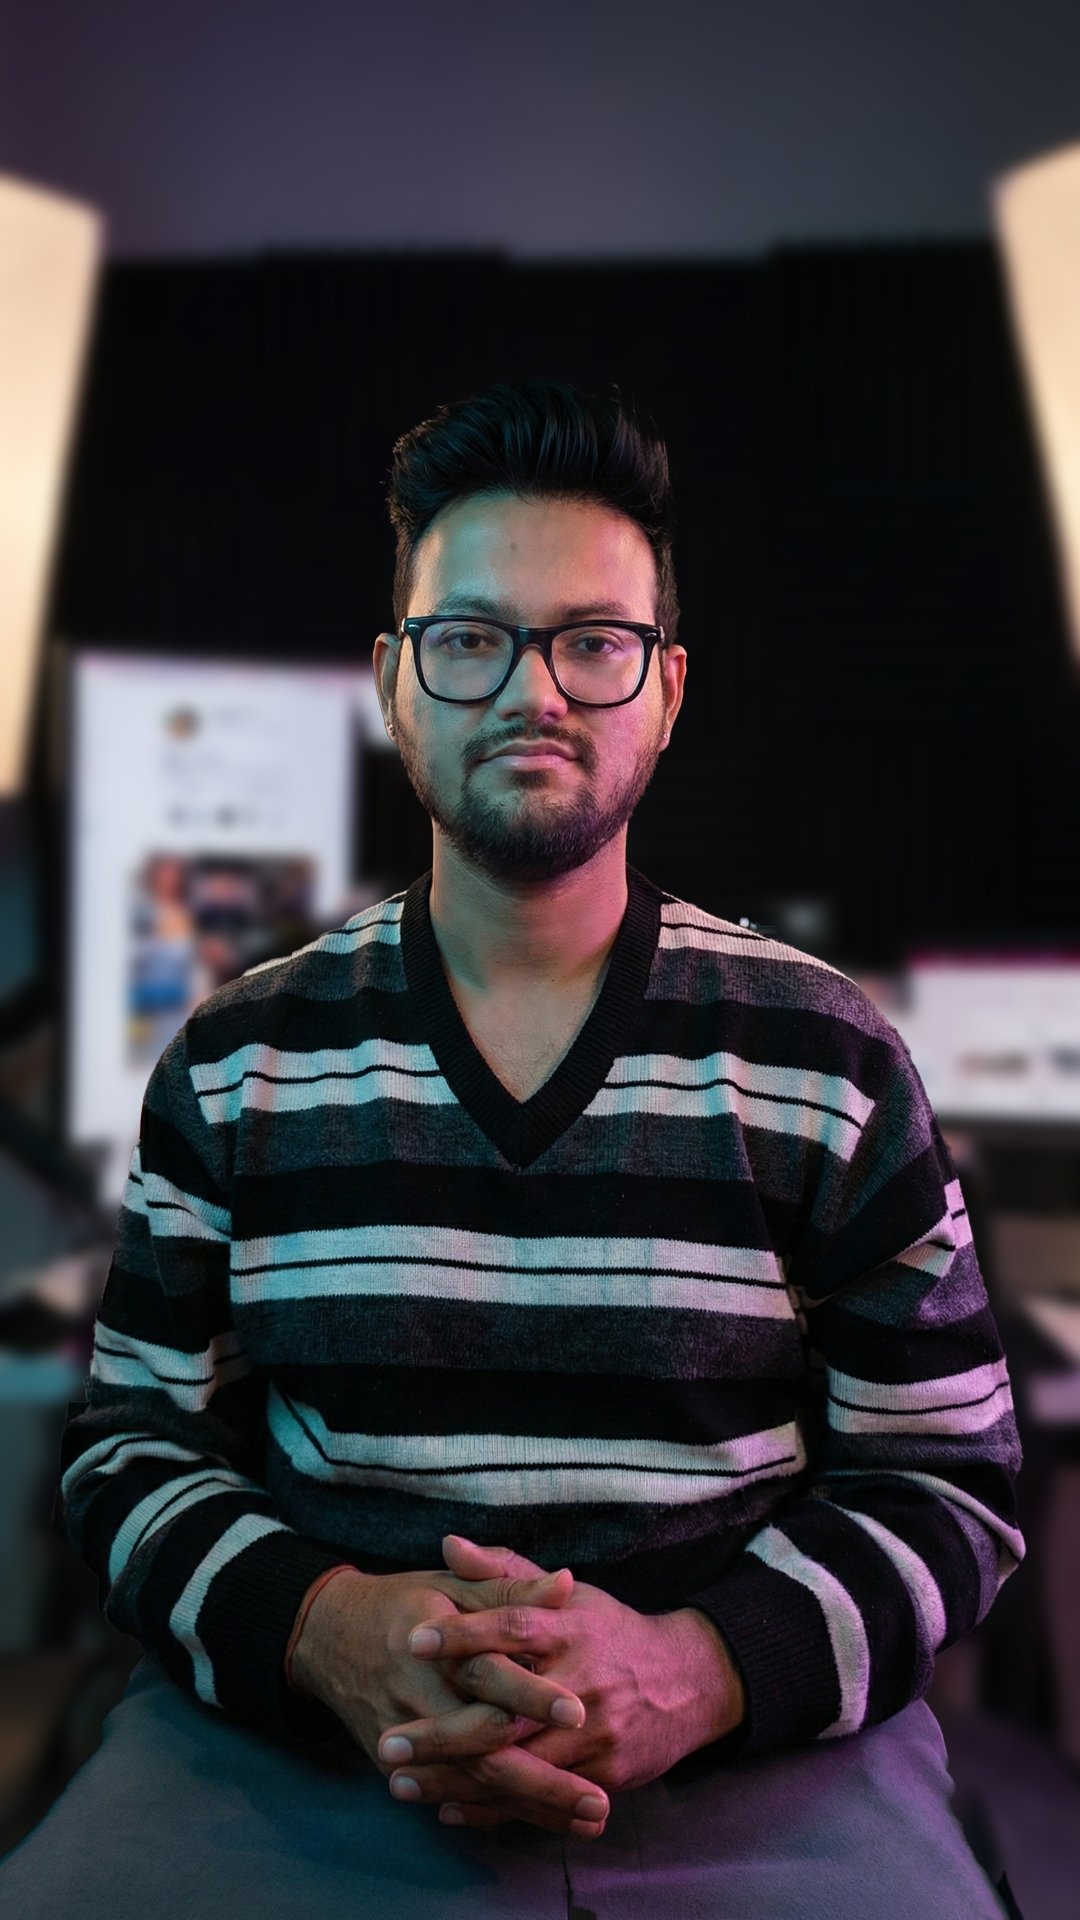
Select the **Upload Image** option to upload your own high-quality, front-facing photo to create your avatar's base image.
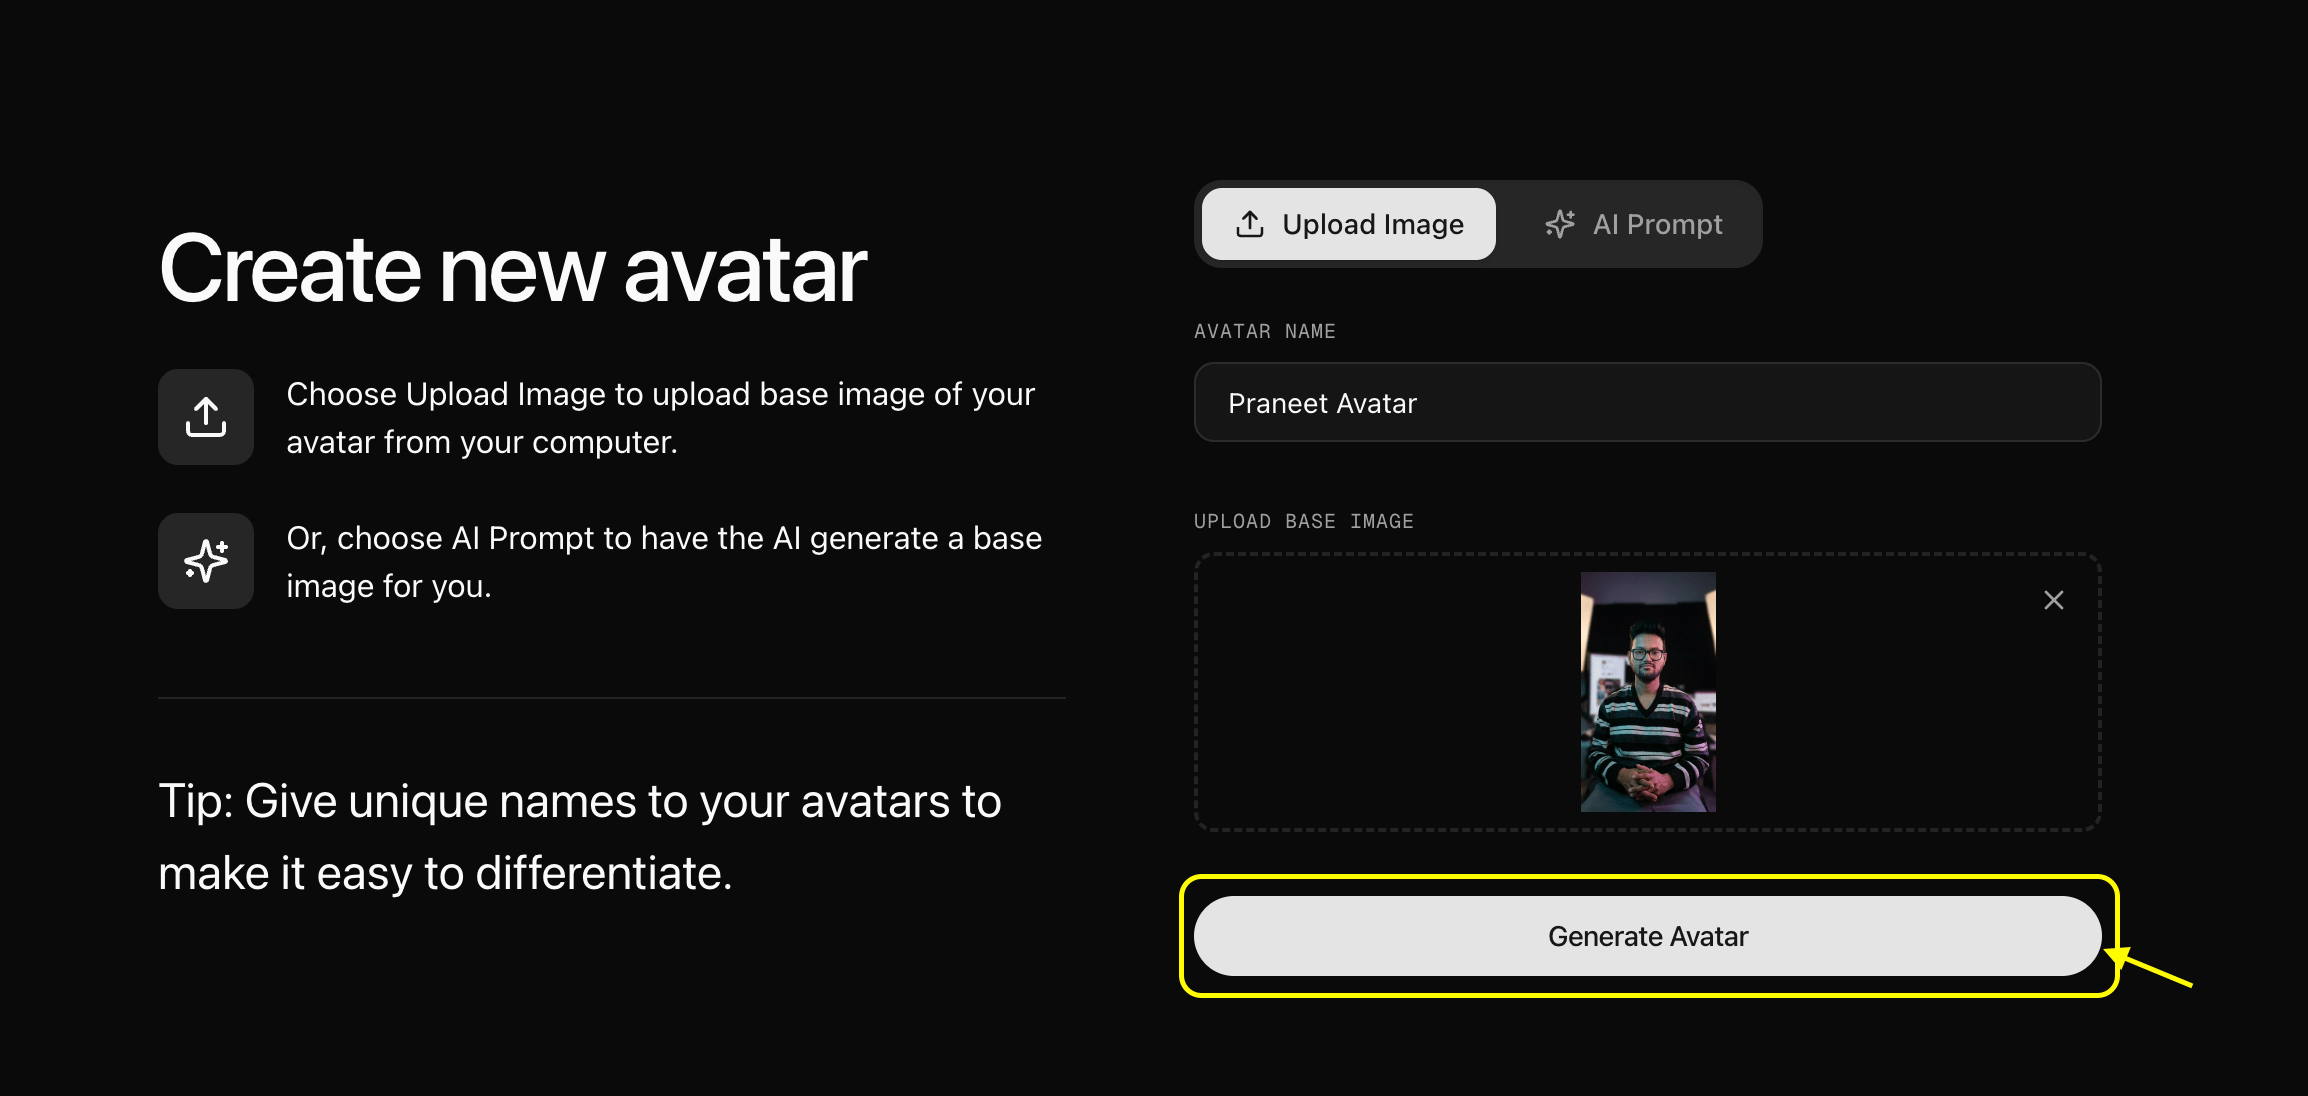
Enter a descriptive name for your avatar to easily identify it in your gallery later. and upload your image.
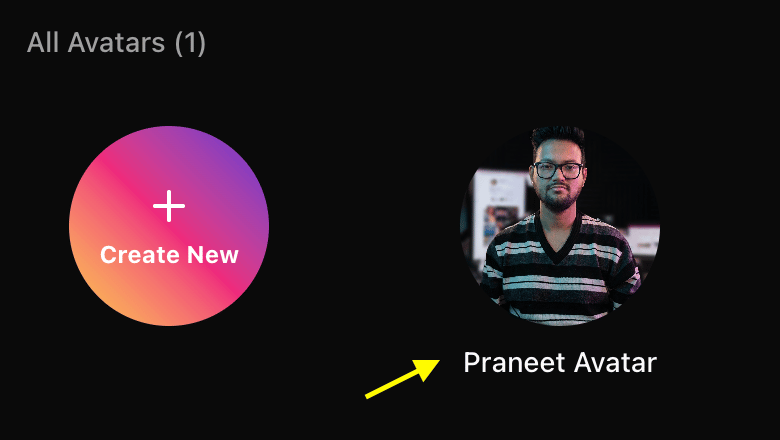
Once you've added your image, click on **Generate Avatar**. You will now see your avatar saved in your gallery with that image.
We named the `Praneet Avatar` and uploaded the image.
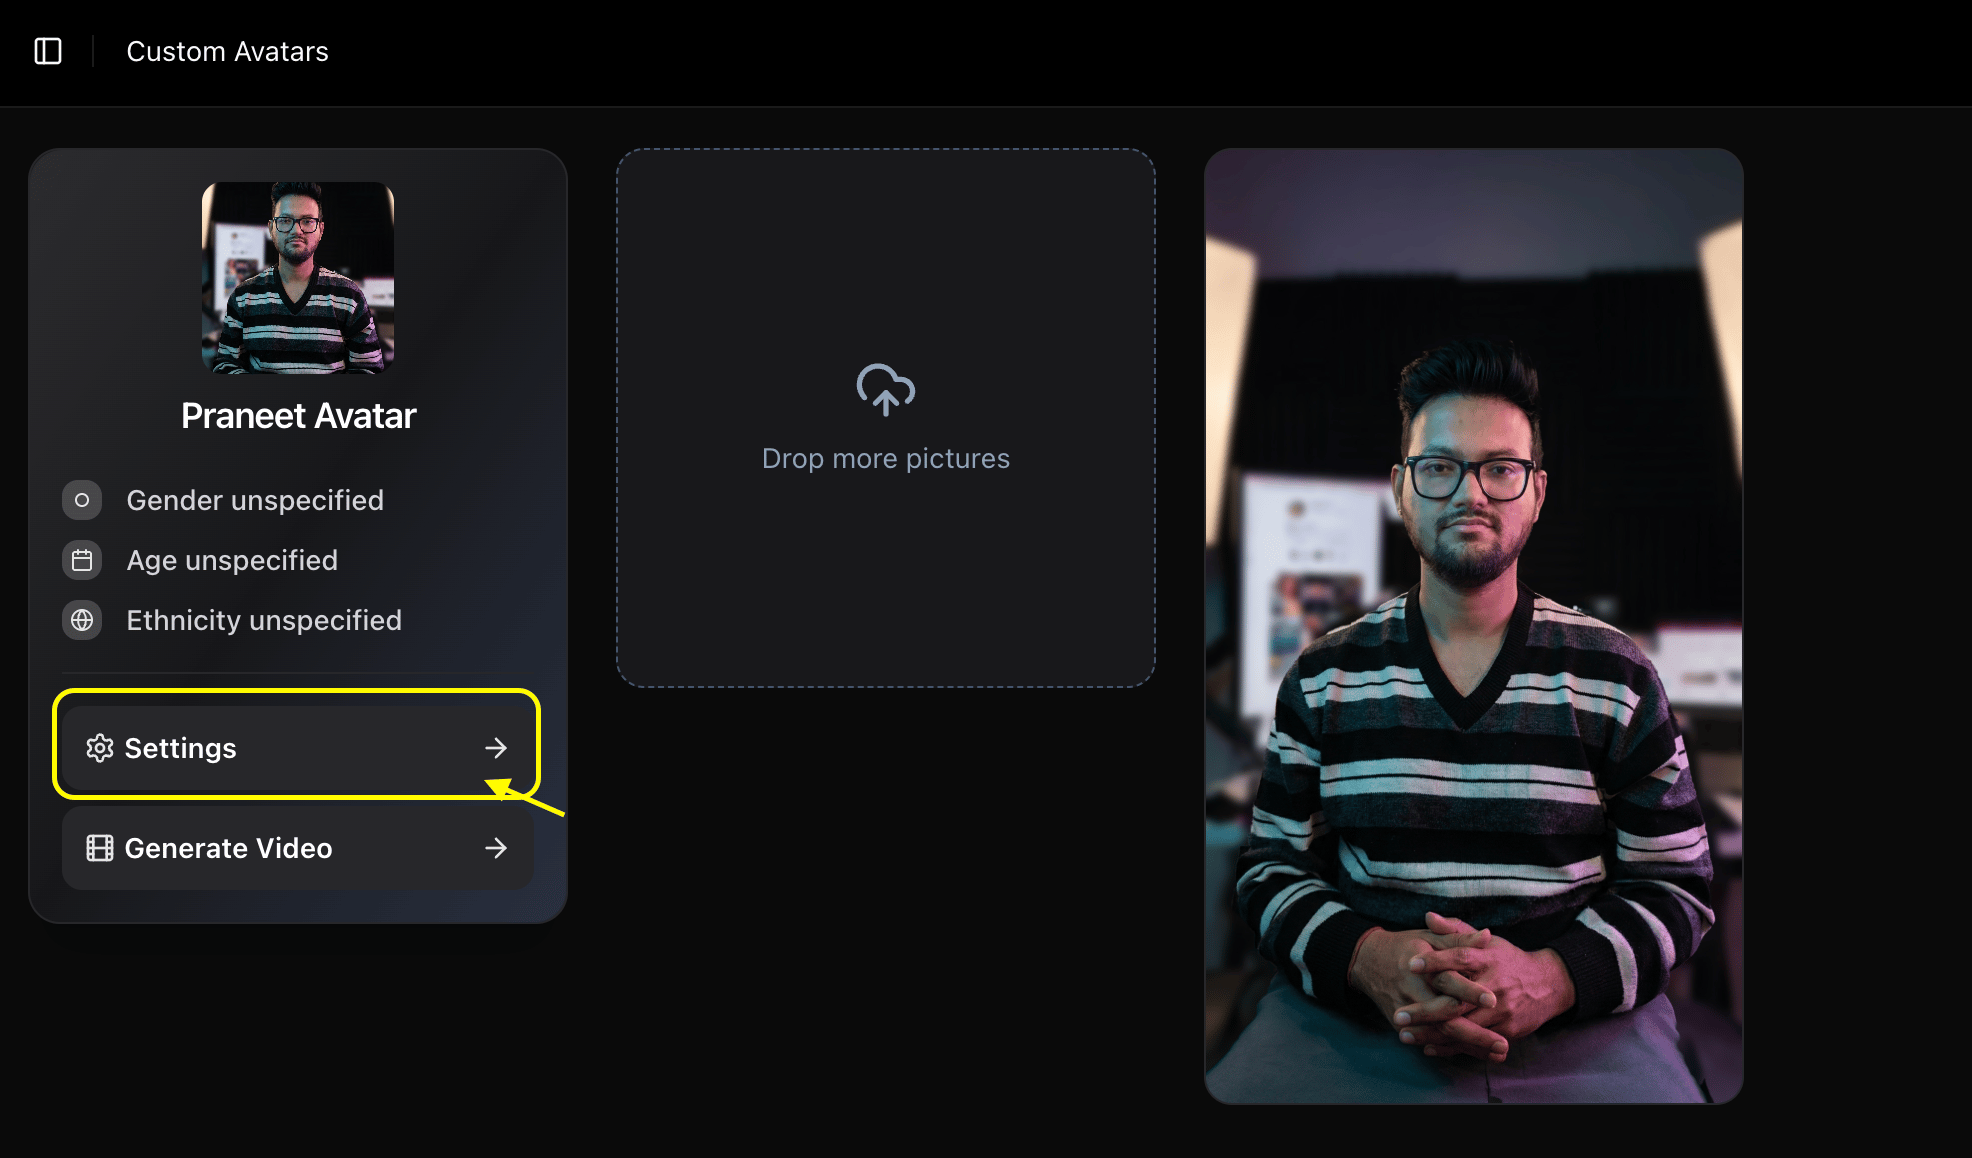
Click on your saved avatar from the custom avatar gallery to select it and click on settings.
Once selected, click on **Settings** and fine-tune your avatar's profile by adjusting settings like **Age**, **Ethnicity**, and **Gender** to match your vision.
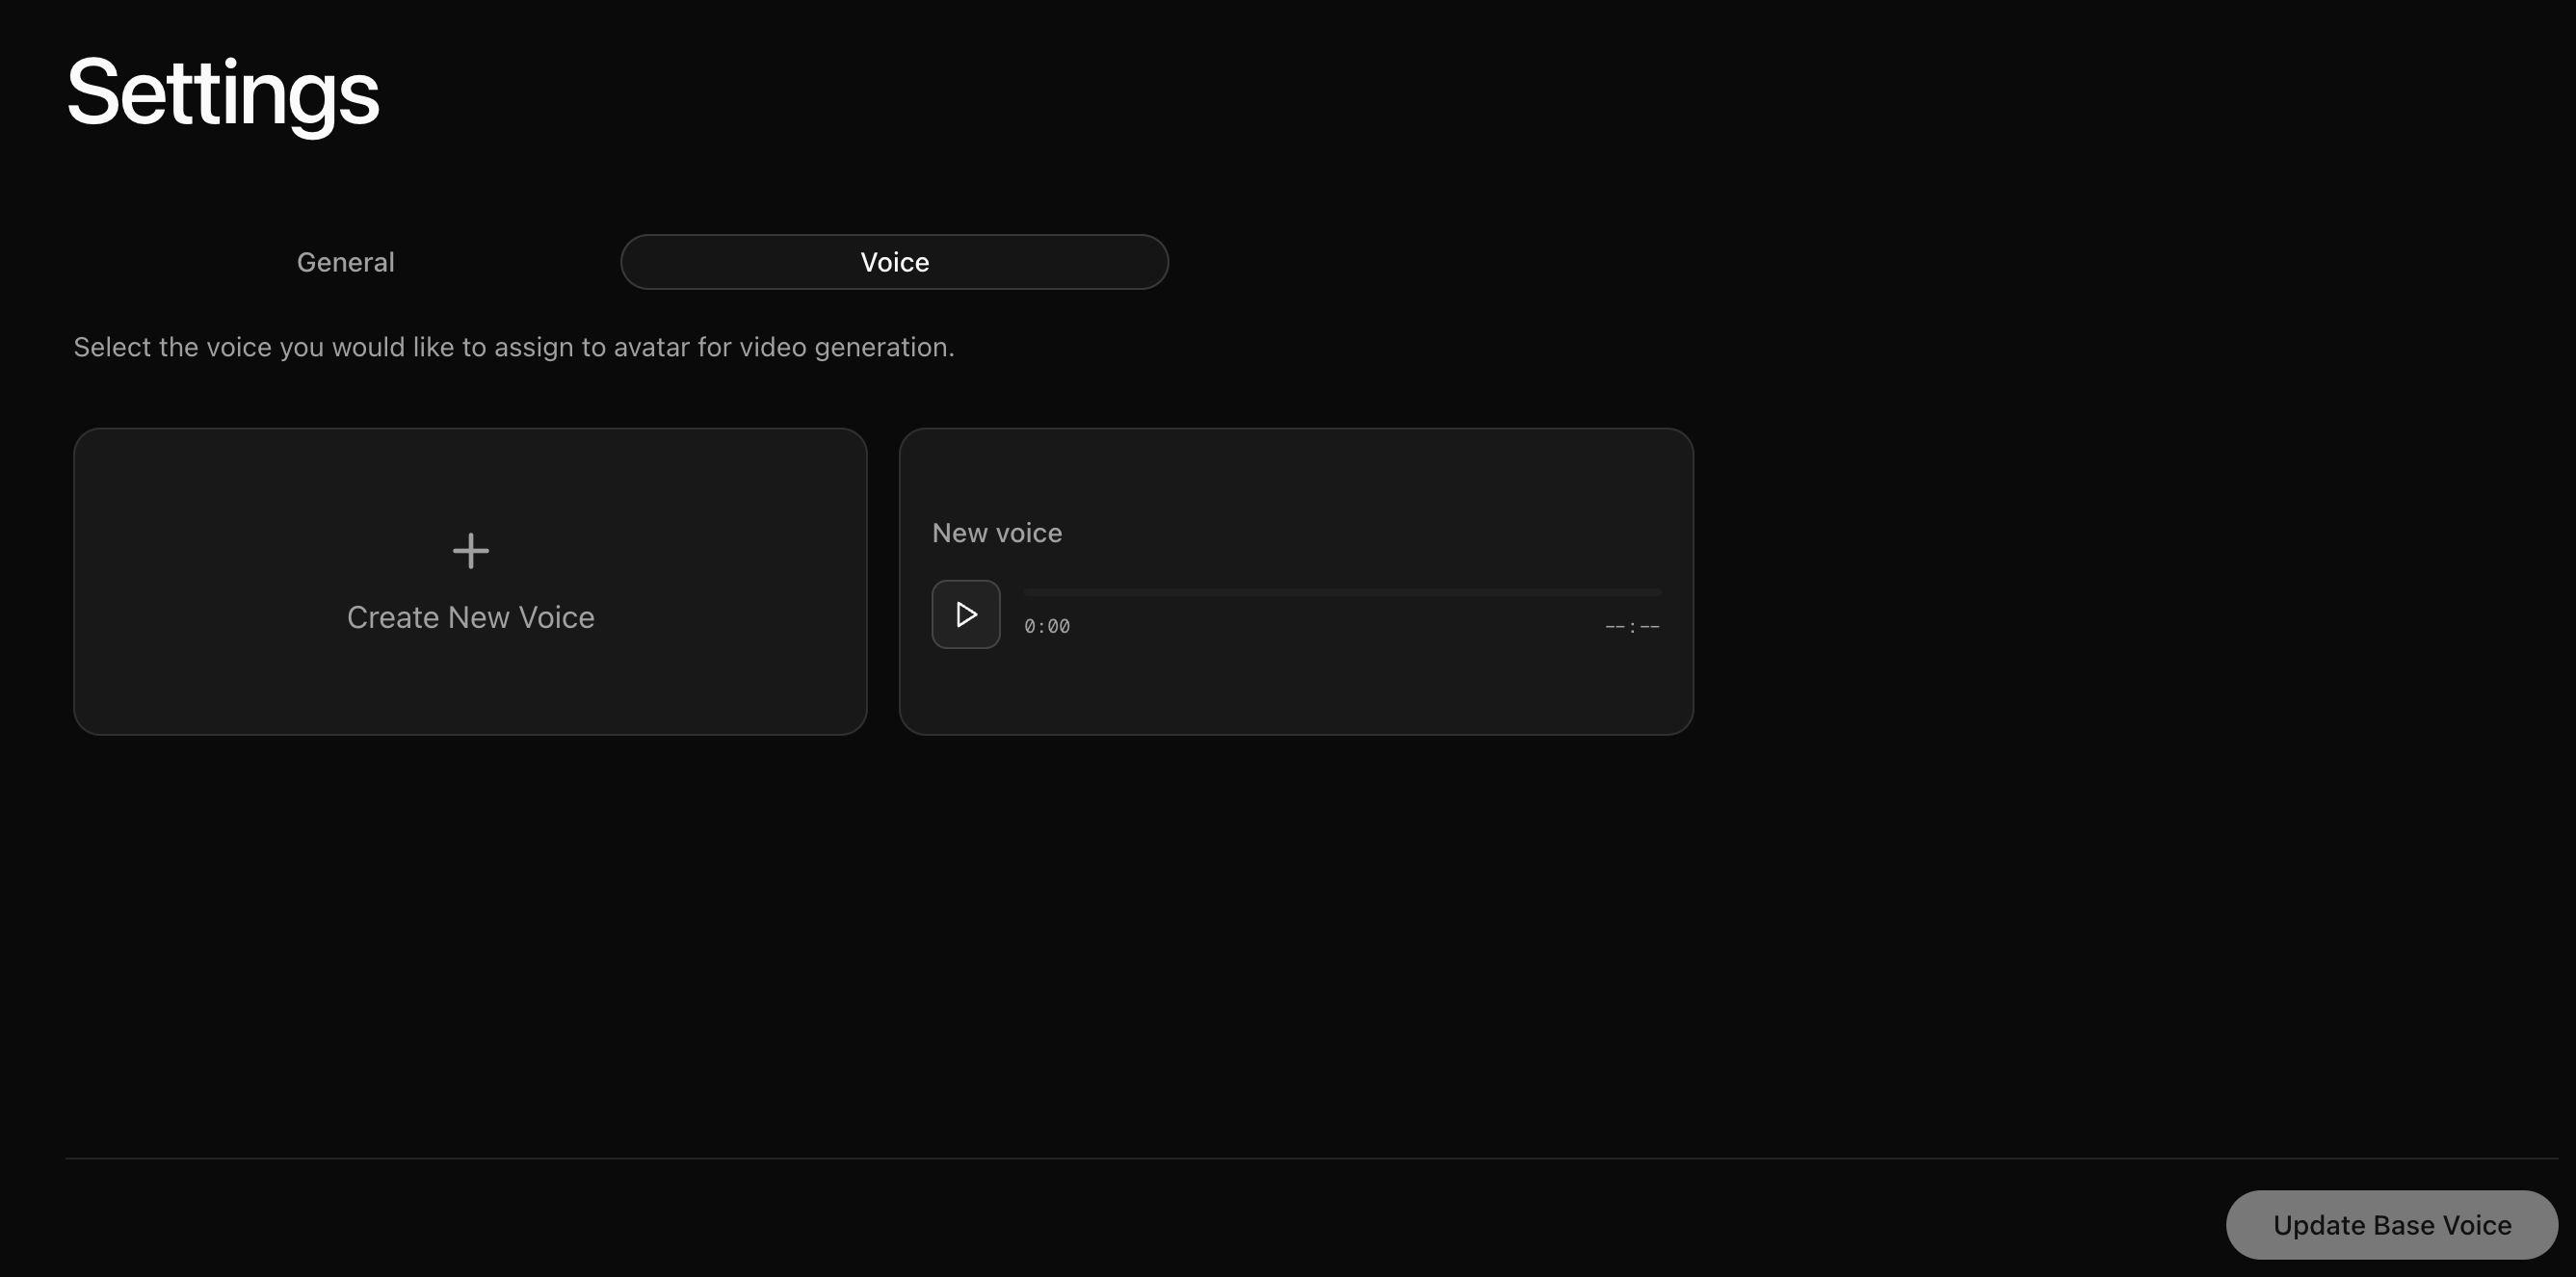
Fill the profile details and move to voice options and click on `Create New Voice`.
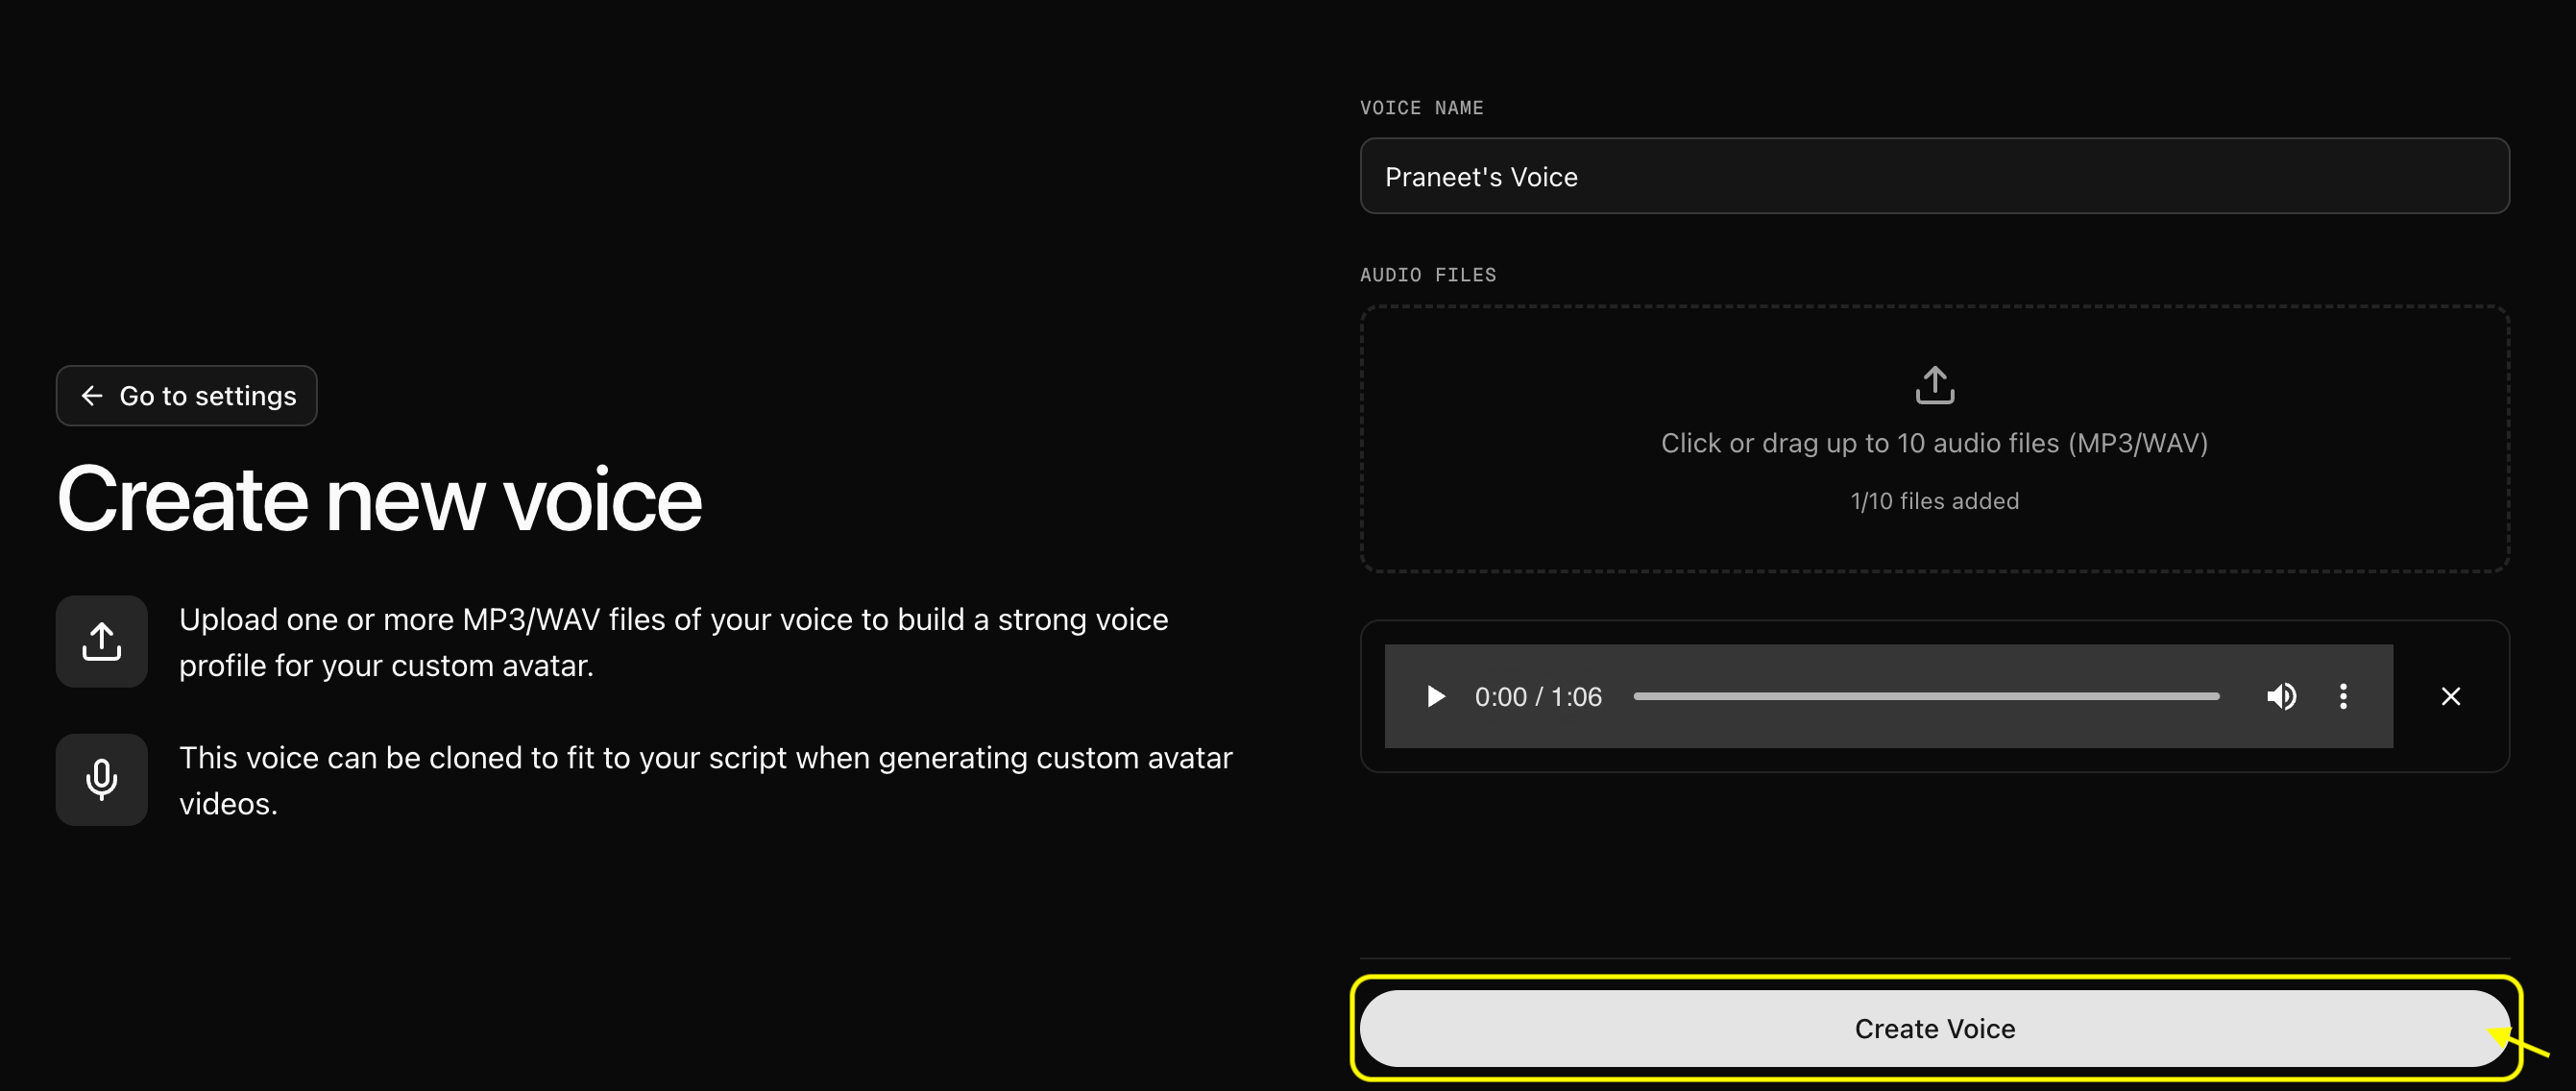
Gives name to your voice and upload audio your audio file We have uploaded the voice and named it as `Praneet` voice. Once Uploded Click on `Create Voice`
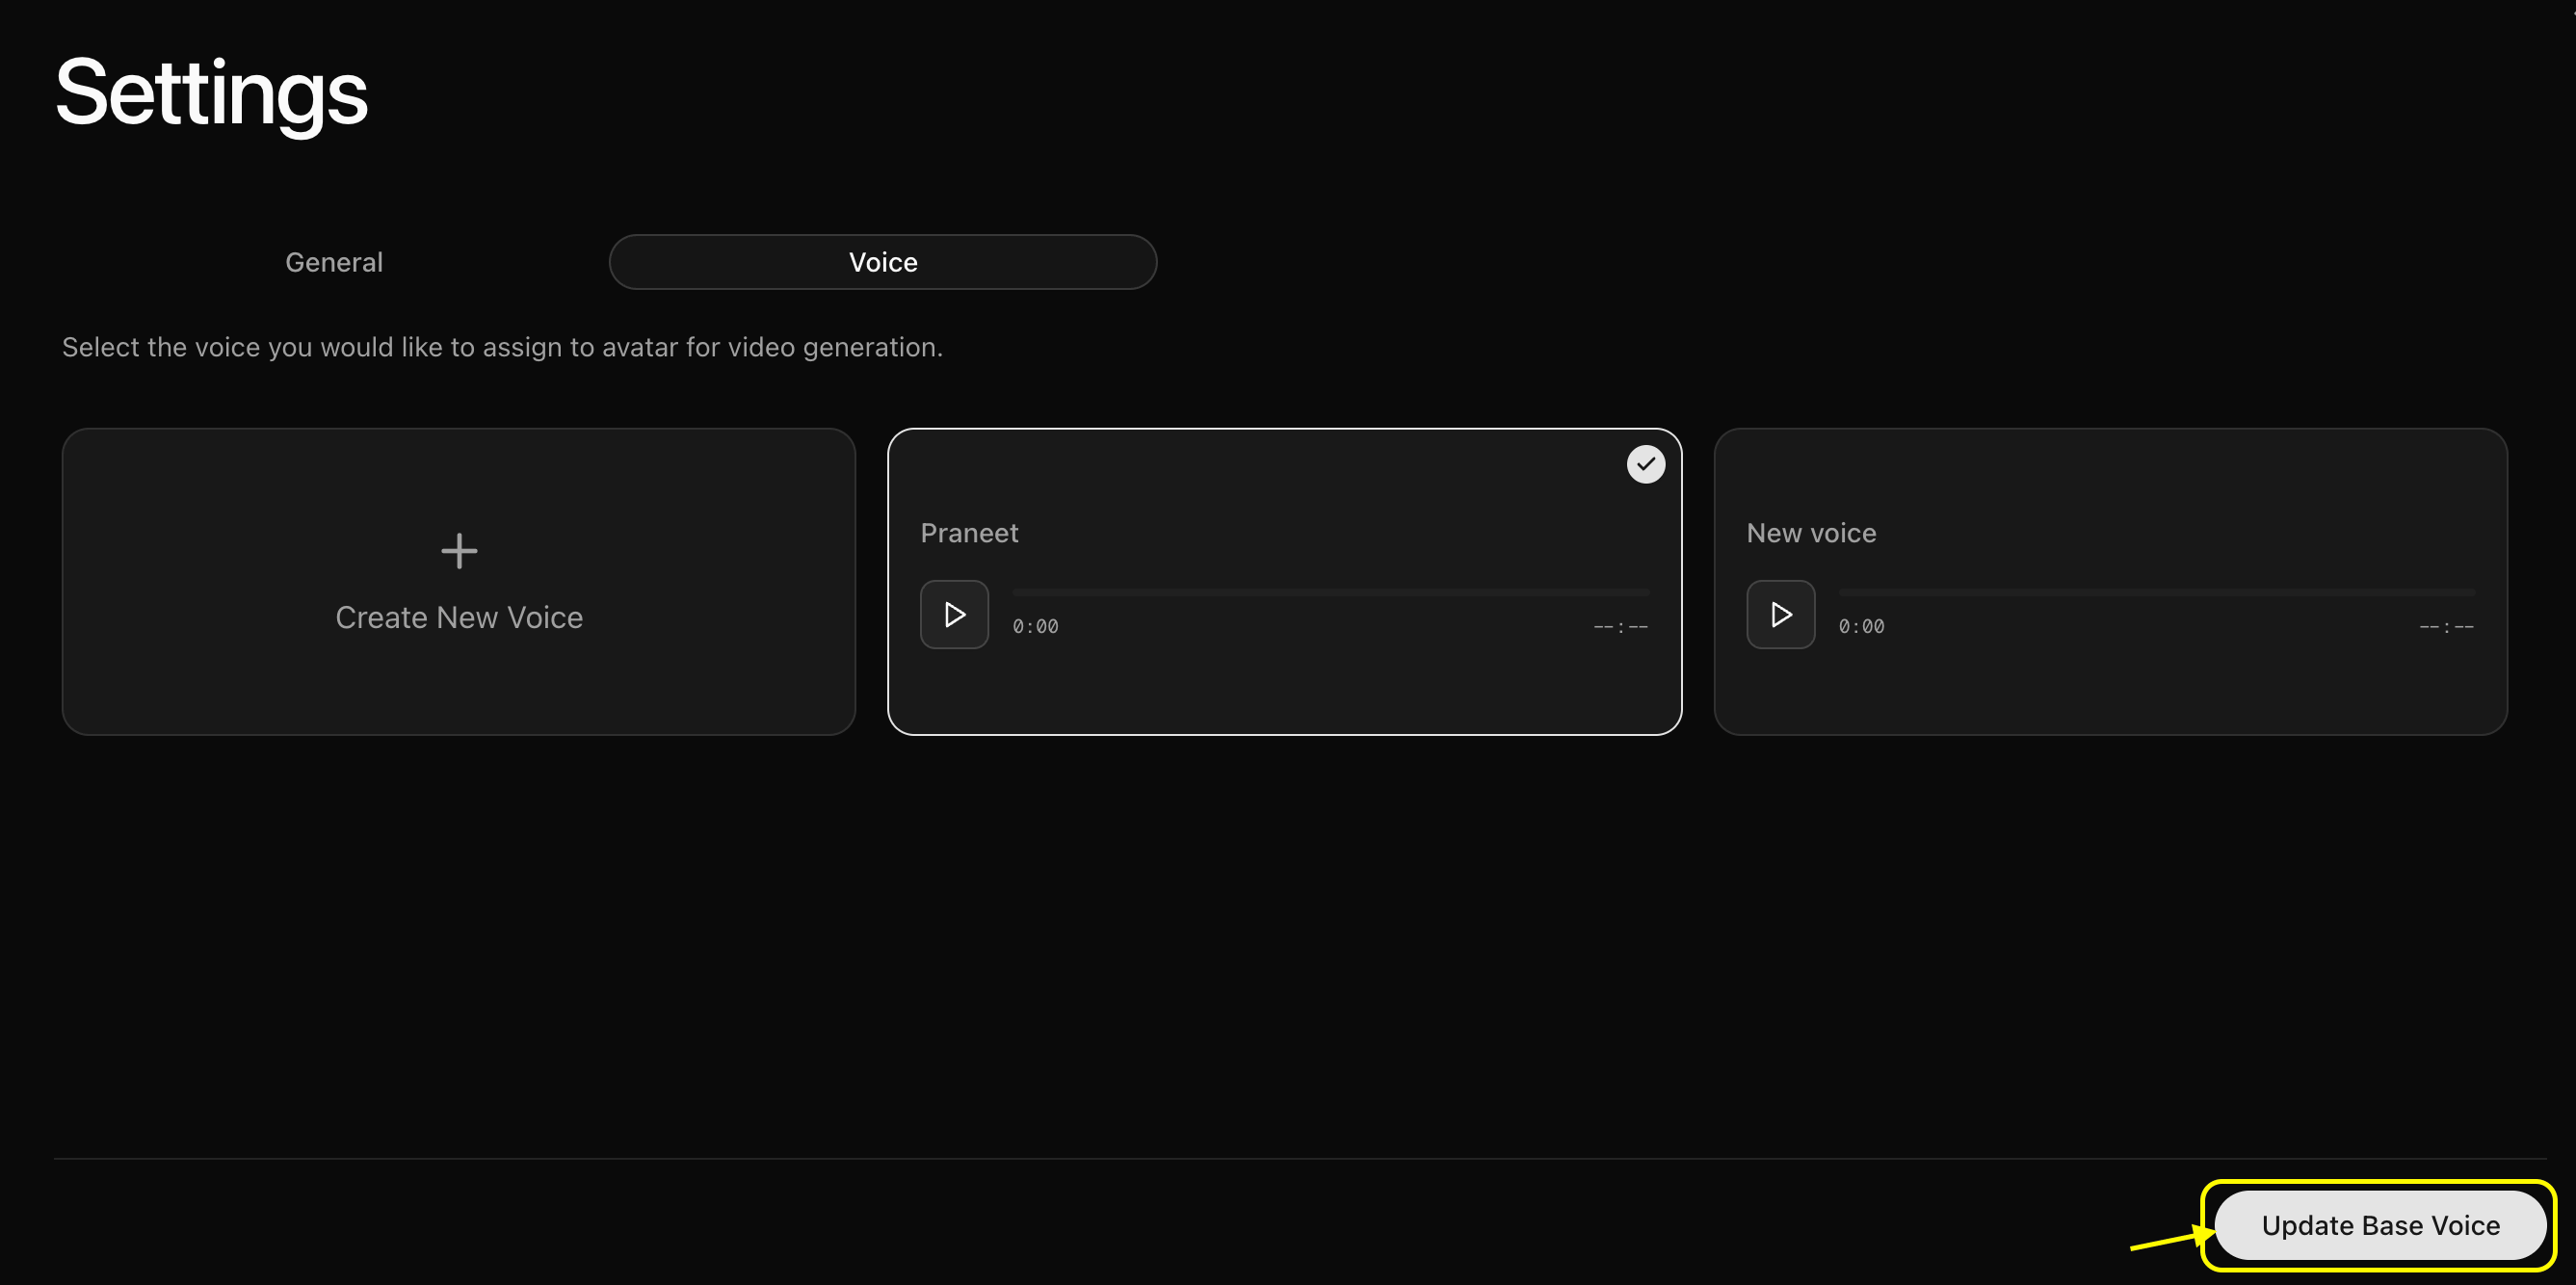
Voice is added and marked as base voice. Now Click on `Update Base Voice`.
Go back to the **New Avatar** section and select **Custom Avatar**.
From here:
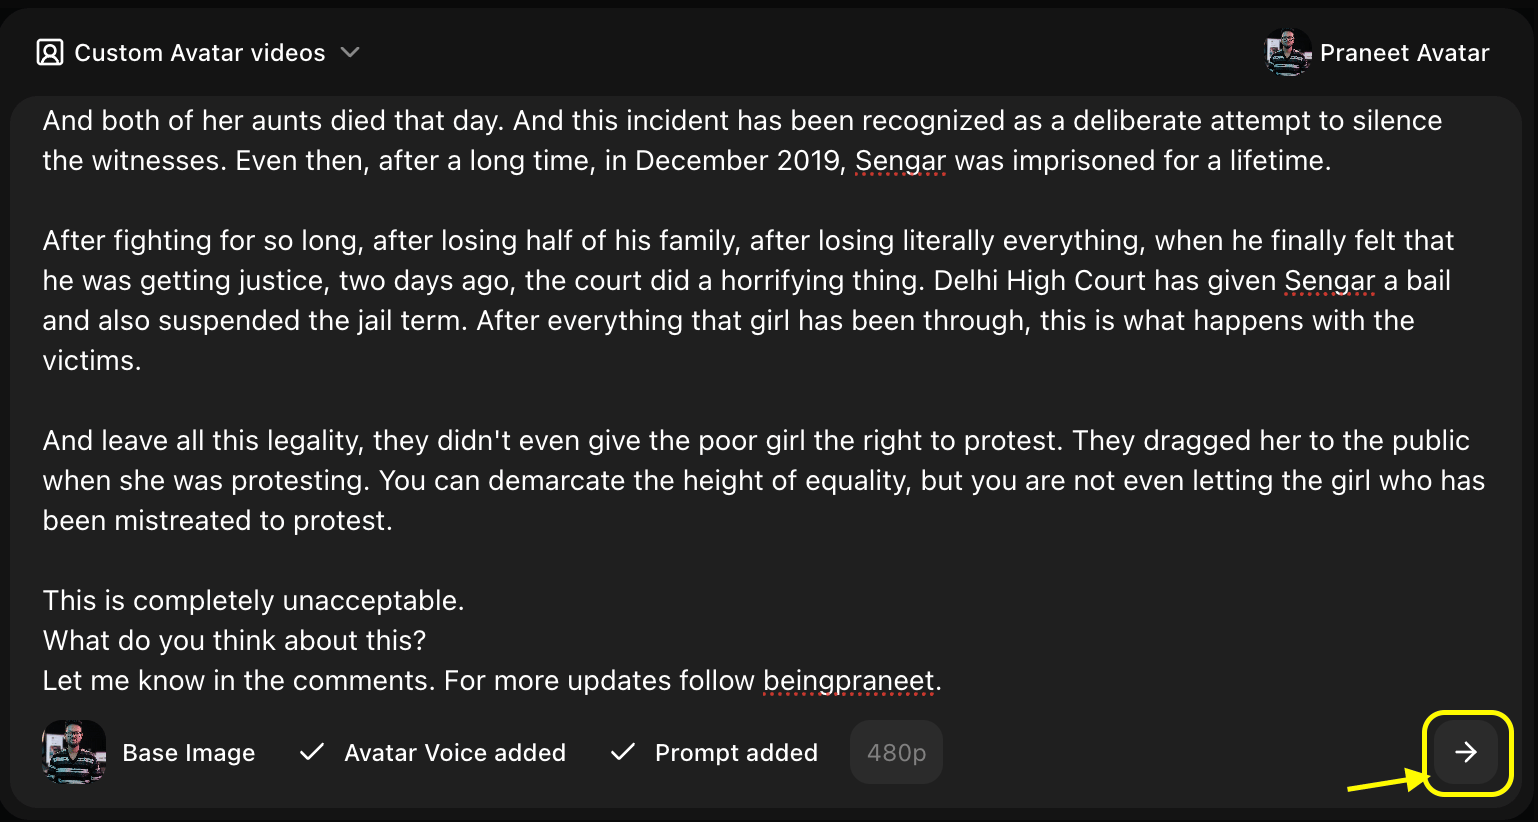
* **Select Avatar**: Select your avatar from the gallery and slect the base image as `Praneet Avatar`.
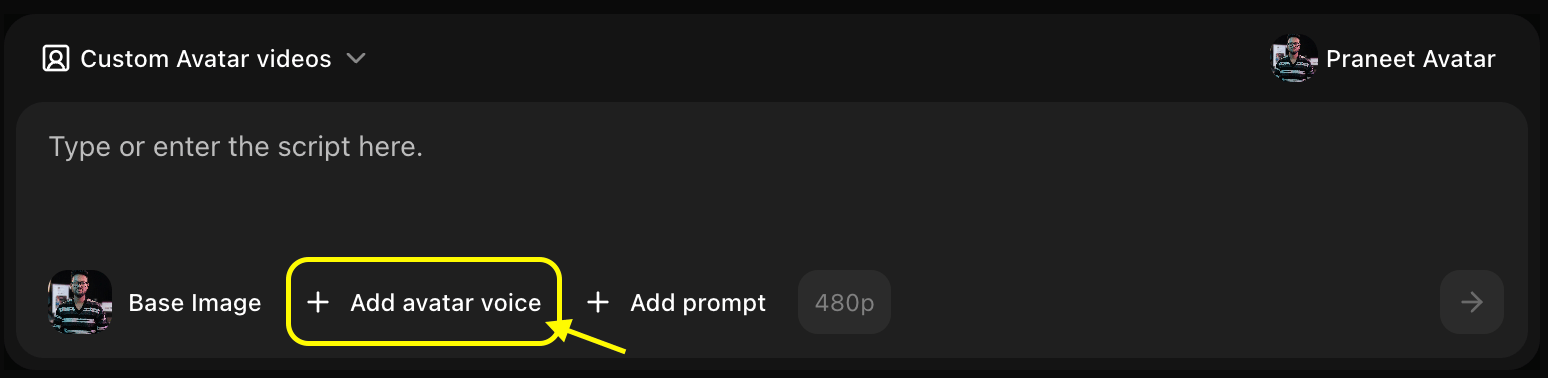
* **Click Add Voice**: Select a voice or upload your own voice sample.
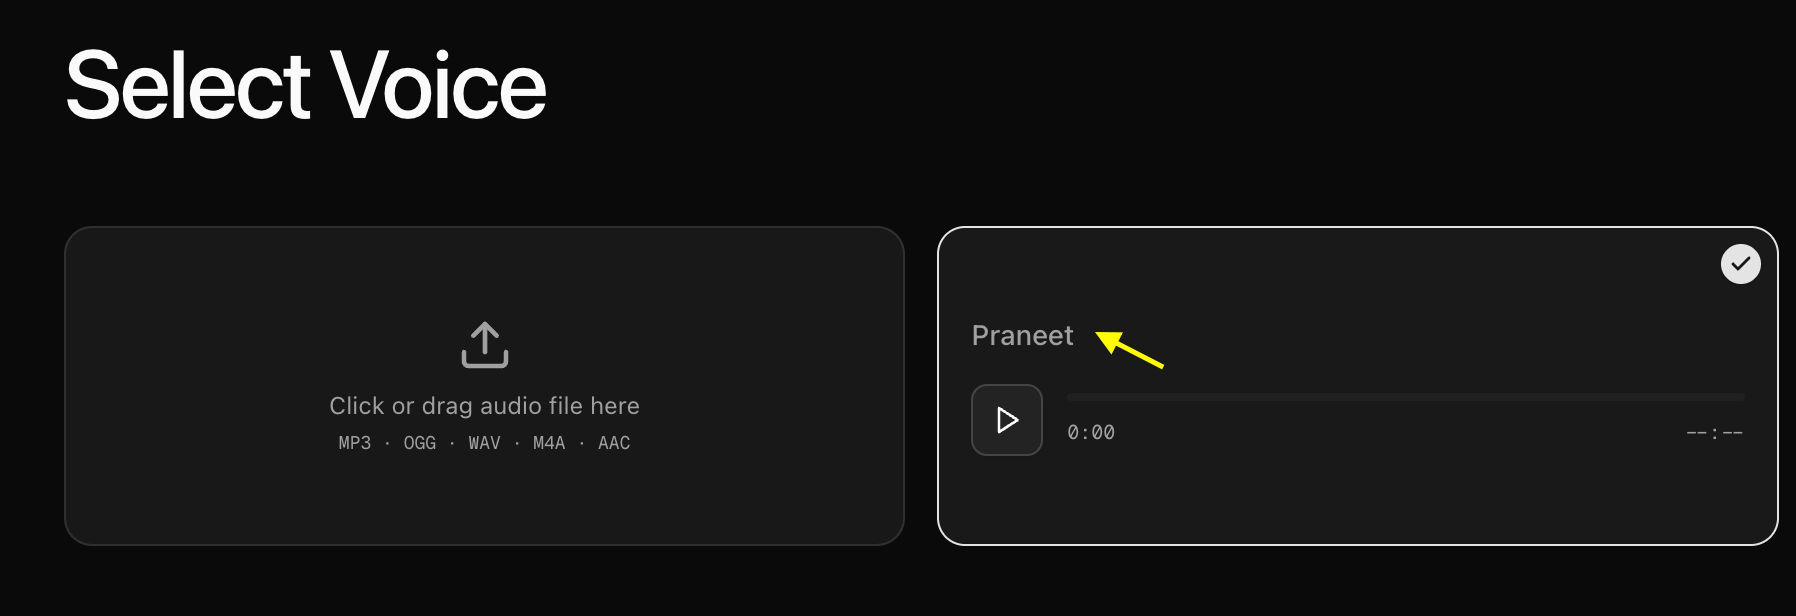
* **Upload Voice Sample**: Upload your voice sample want use for avatar.
* **Add Action**: Define the action you want your avatar to perform like greeting, waving, etc. Click on `Add Prompts`.
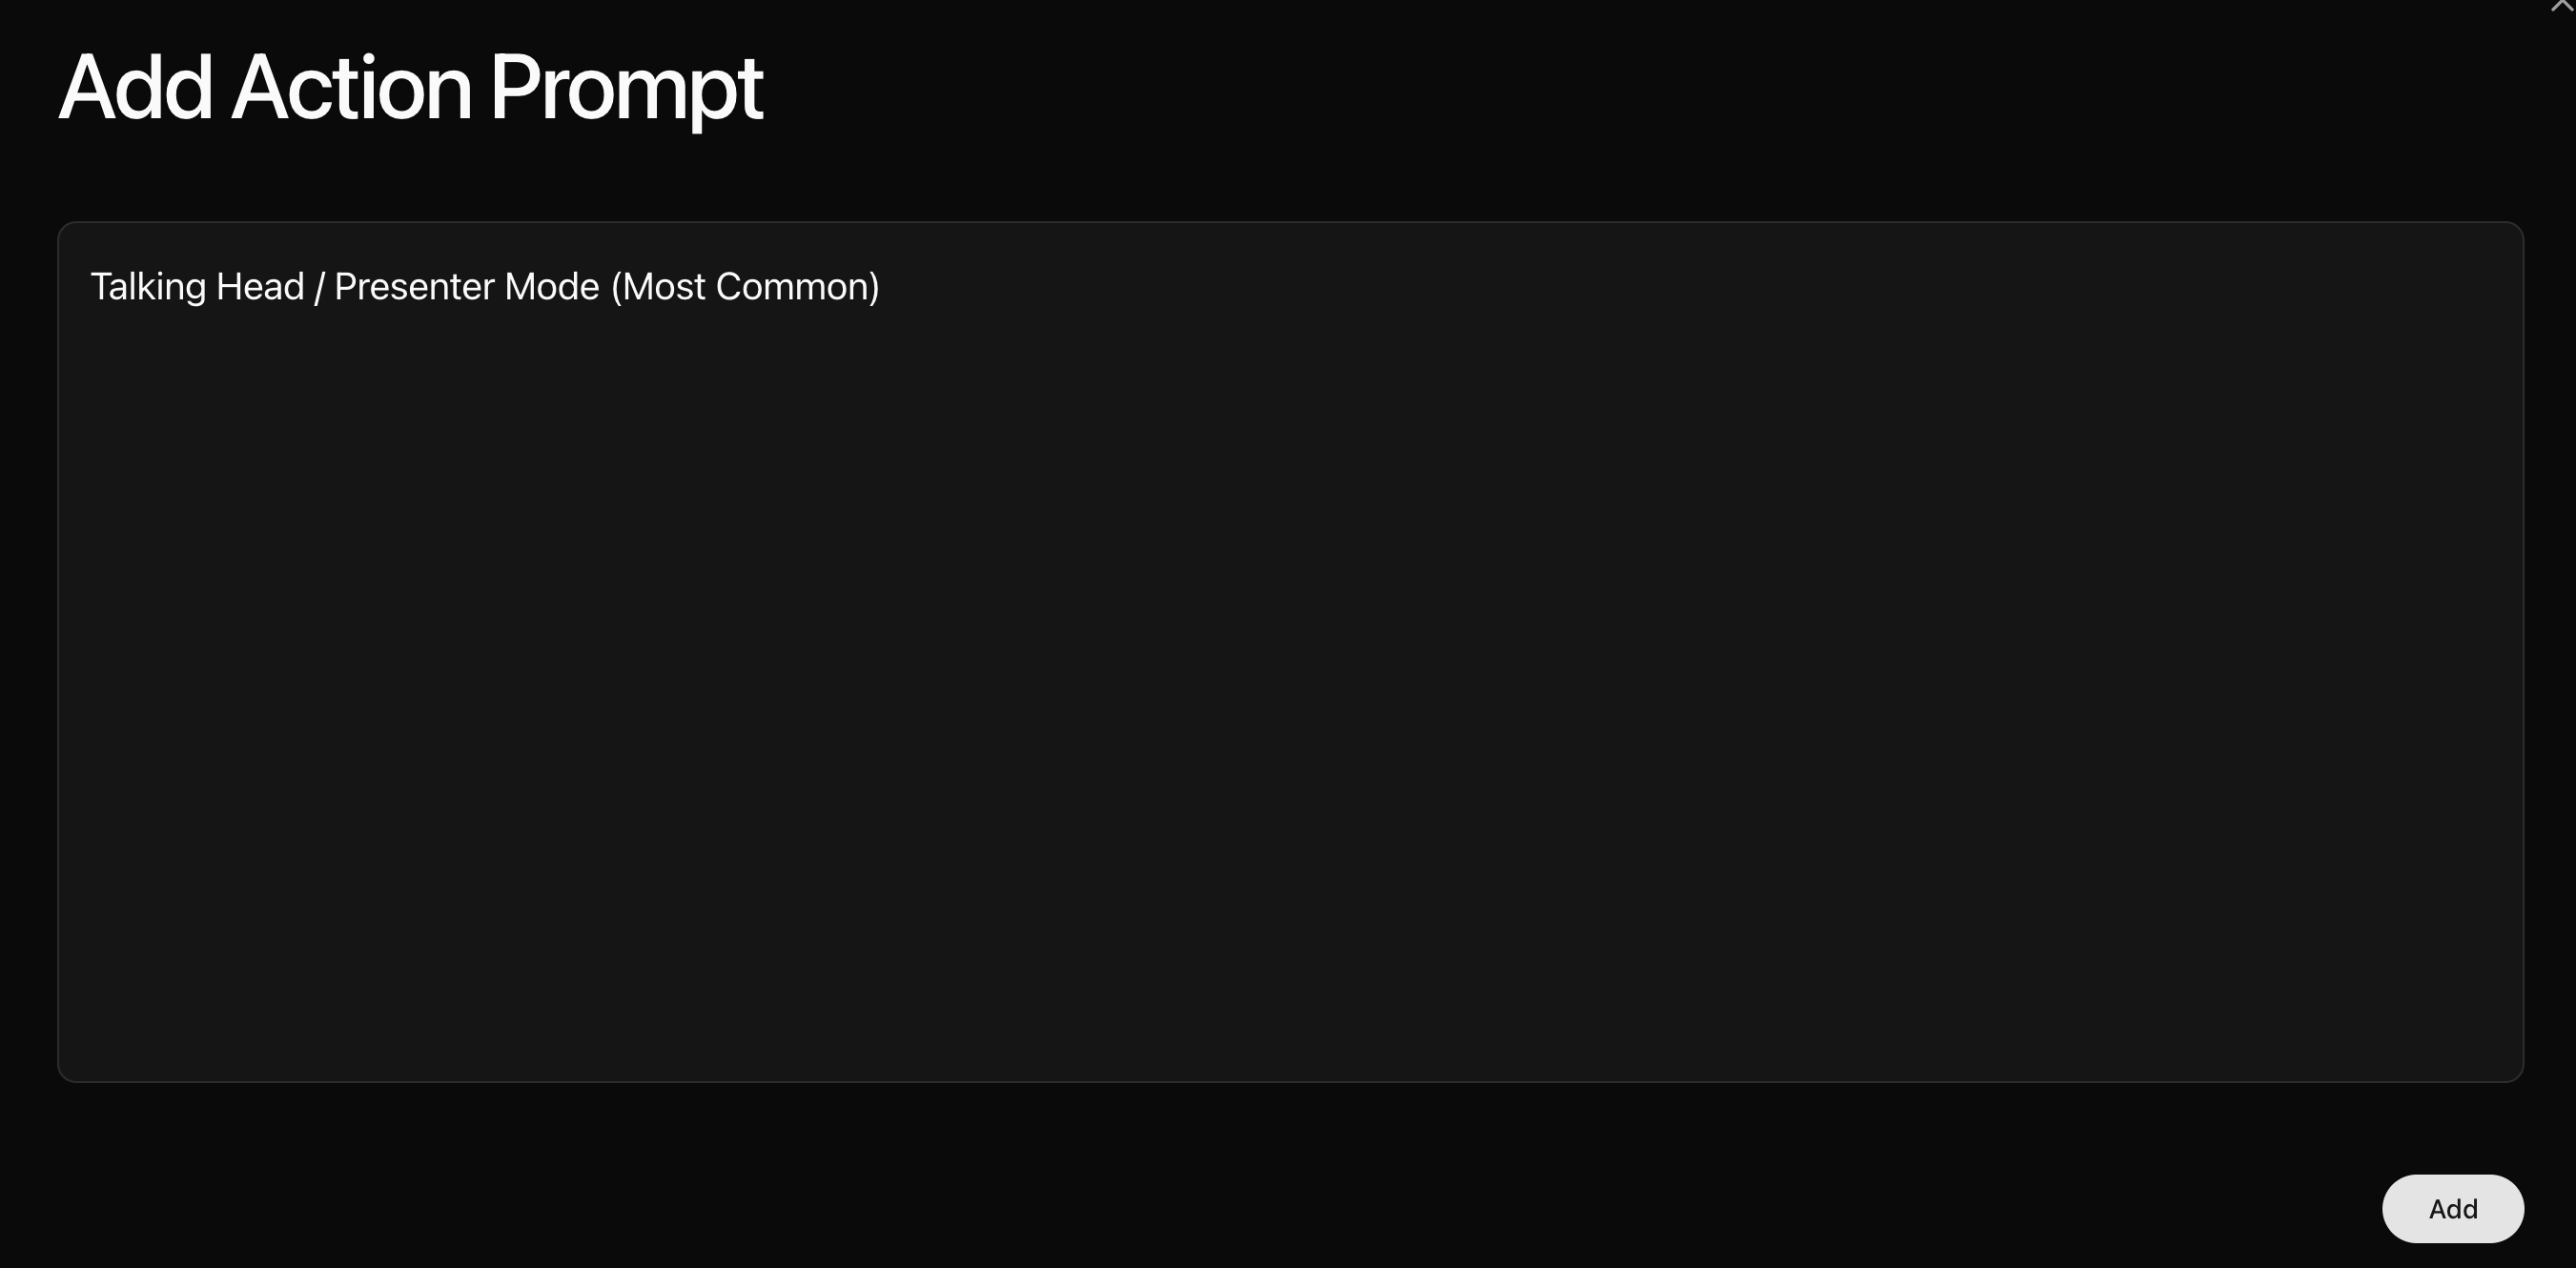
* **Write the Action**: Write the action you want your avatar to perform. We given `Talking Head / Presenter Mode (Most Common)`.
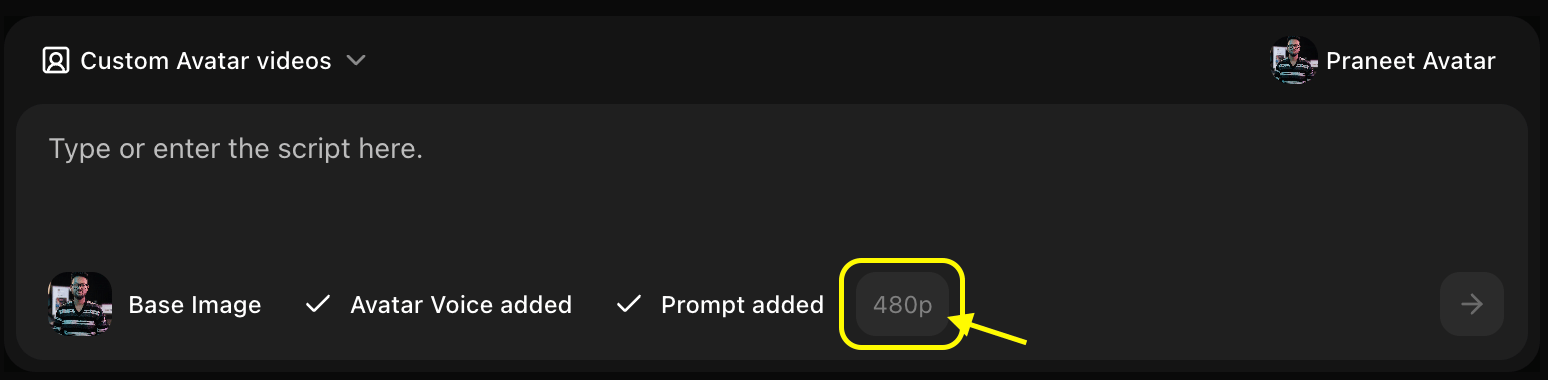
* **Resolution**: Choose your preferred video resolution.
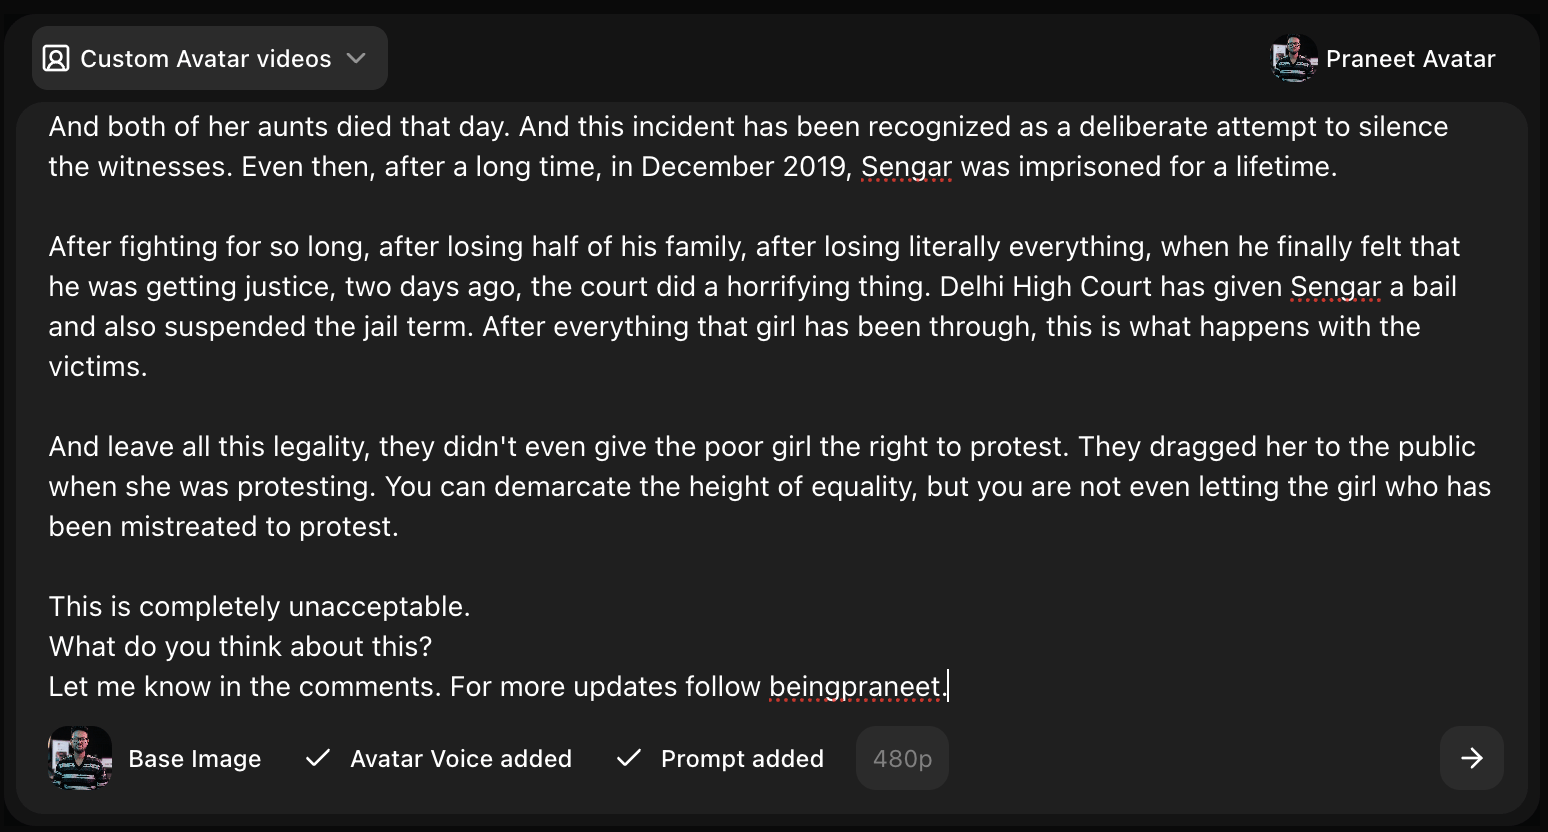
* **Write Script**: Enter the text you want your avatar to speak in the script box.
* **Generate**: Click on **Generate** to create your final video.
## Output
* This was the 4K resolution video generated from the image to avatar tool.
* This was the 1080p resolution video generated from the image to avatar tool.
## Inputs
* **Image**
* **Voice**: `Praneet` voice. ([Listen to voice sample](/images/praneet-voice.mp3))
* **Prompt**: Write the action you want your avatar to perform. We given `Talking Head / Presenter Mode (Most Common)`.
* **Resolution**: Choose your preferred video resolution.
* **Script**: Enter the text you want your avatar to speak in the script box.
For the best results, use a photo with a neutral expression and straightforward gaze.
Generated avatars should not be used to impersonate real individuals without consent.
## Next Steps
Create avatars from text descriptions
Add custom voices to your avatars
Master generation techniques
 We named the `Praneet Avatar` and uploaded the image.
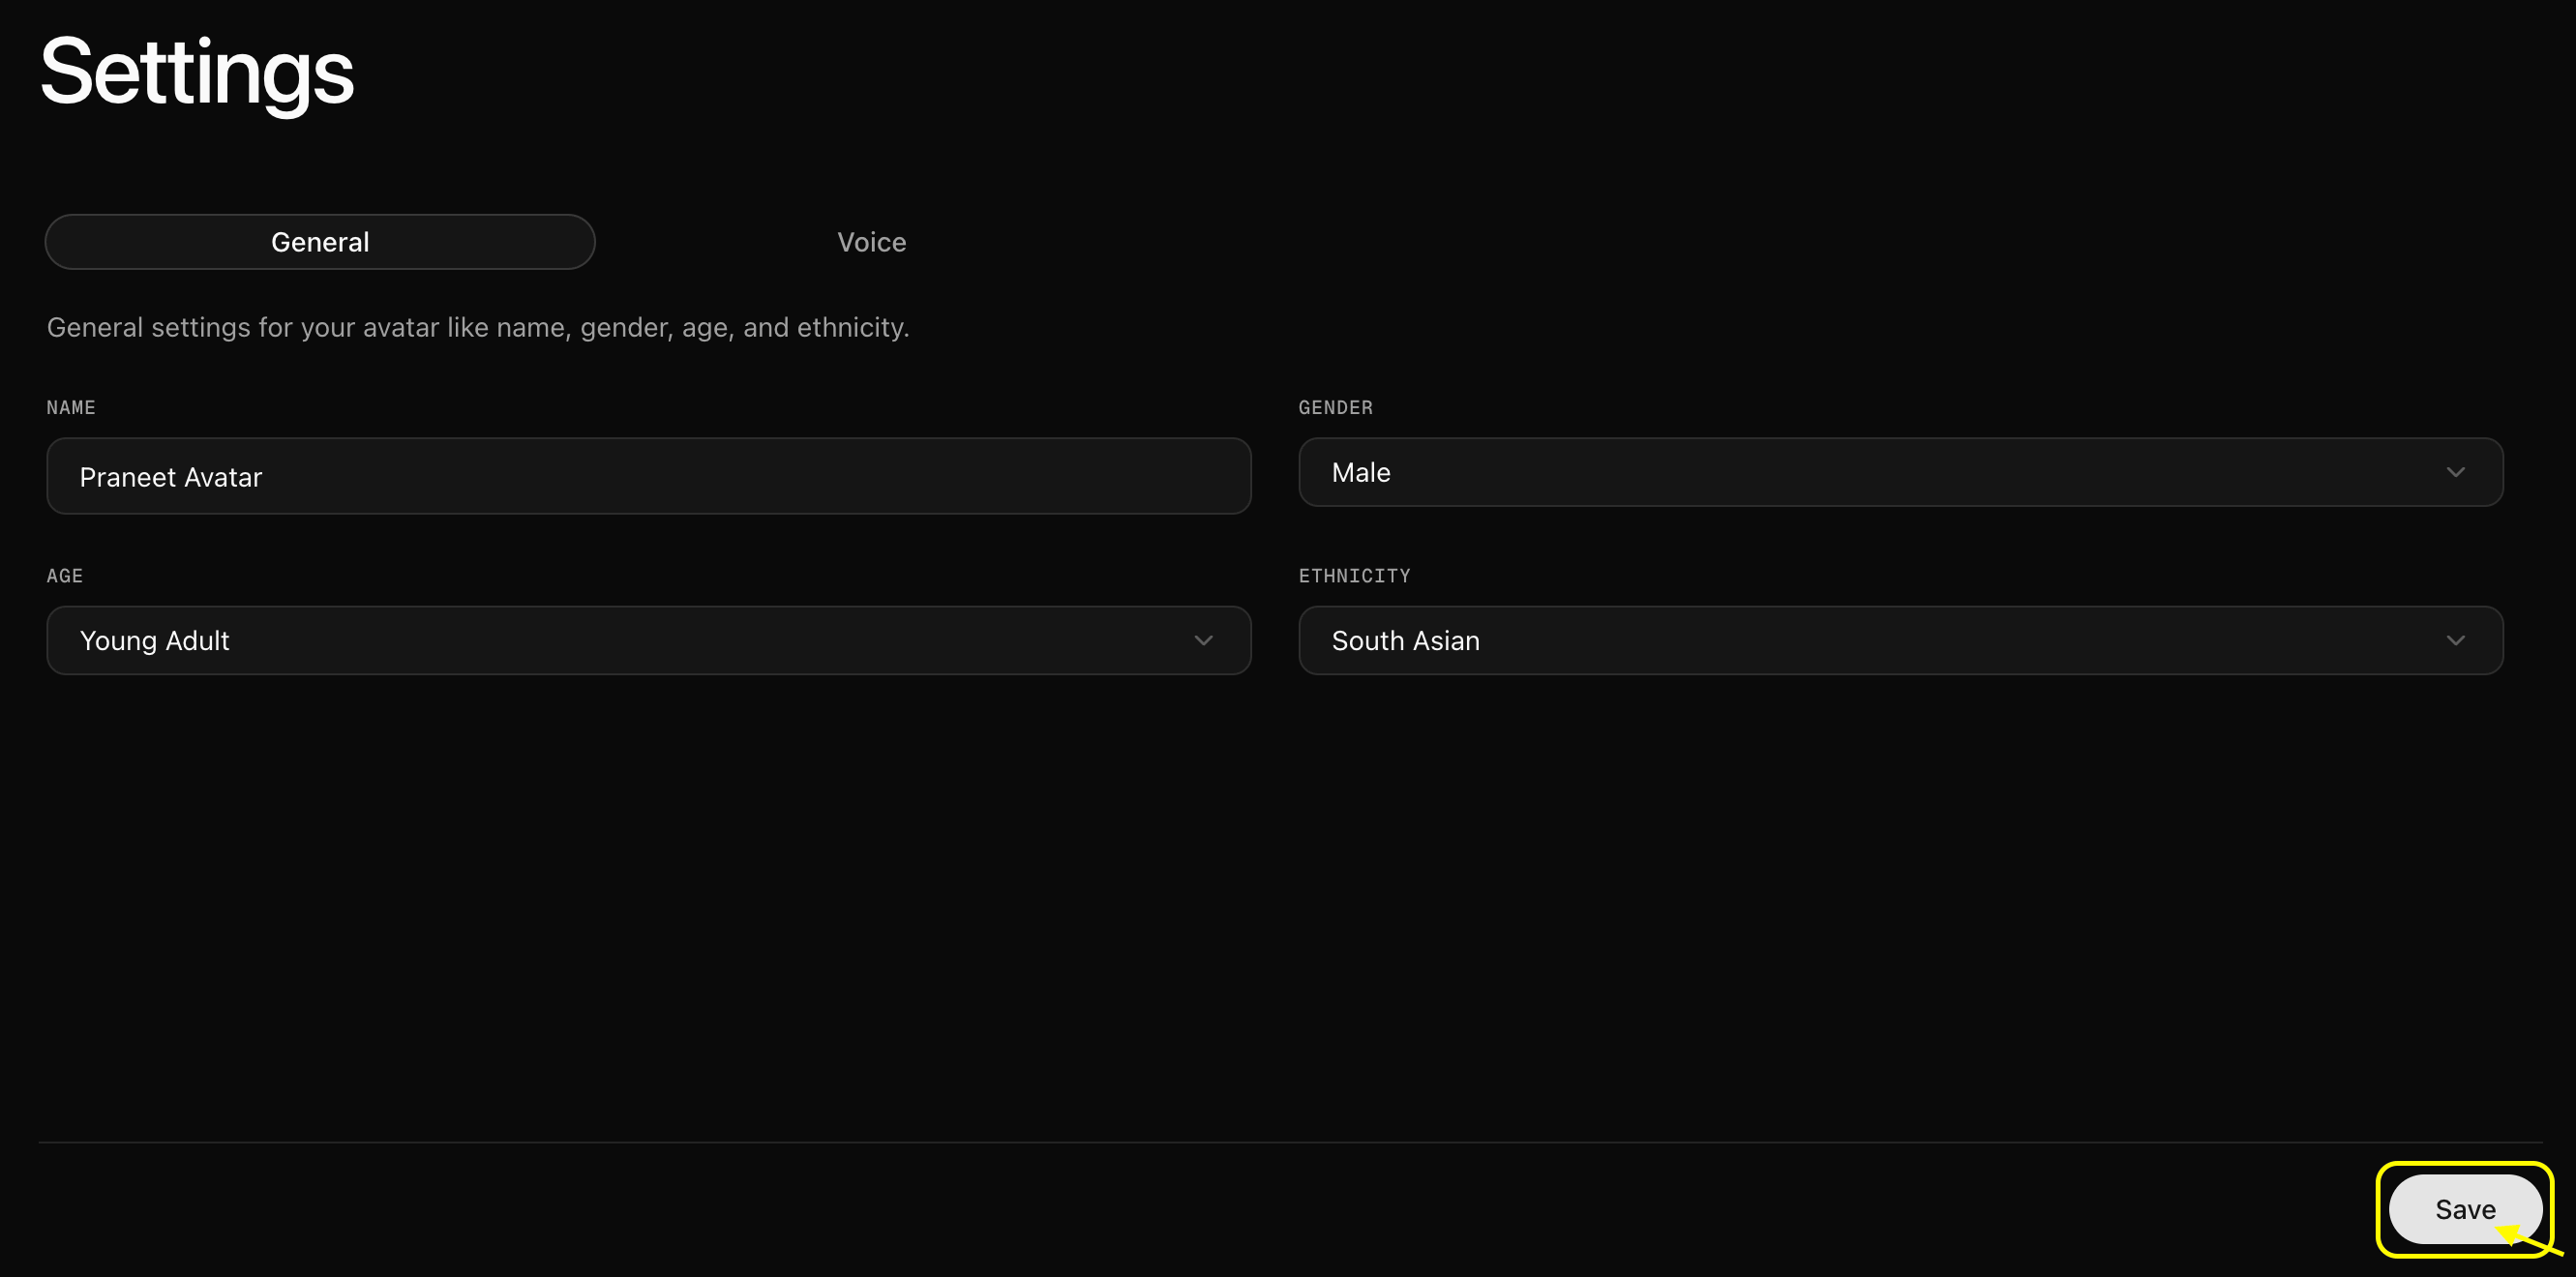 Fill the profile details and move to voice options and click on `Create New Voice`.
 Gives name to your voice and upload audio your audio file We have uploaded the voice and named it as `Praneet` voice. Once Uploded Click on `Create Voice`
 Voice is added and marked as base voice. Now Click on `Update Base Voice`.
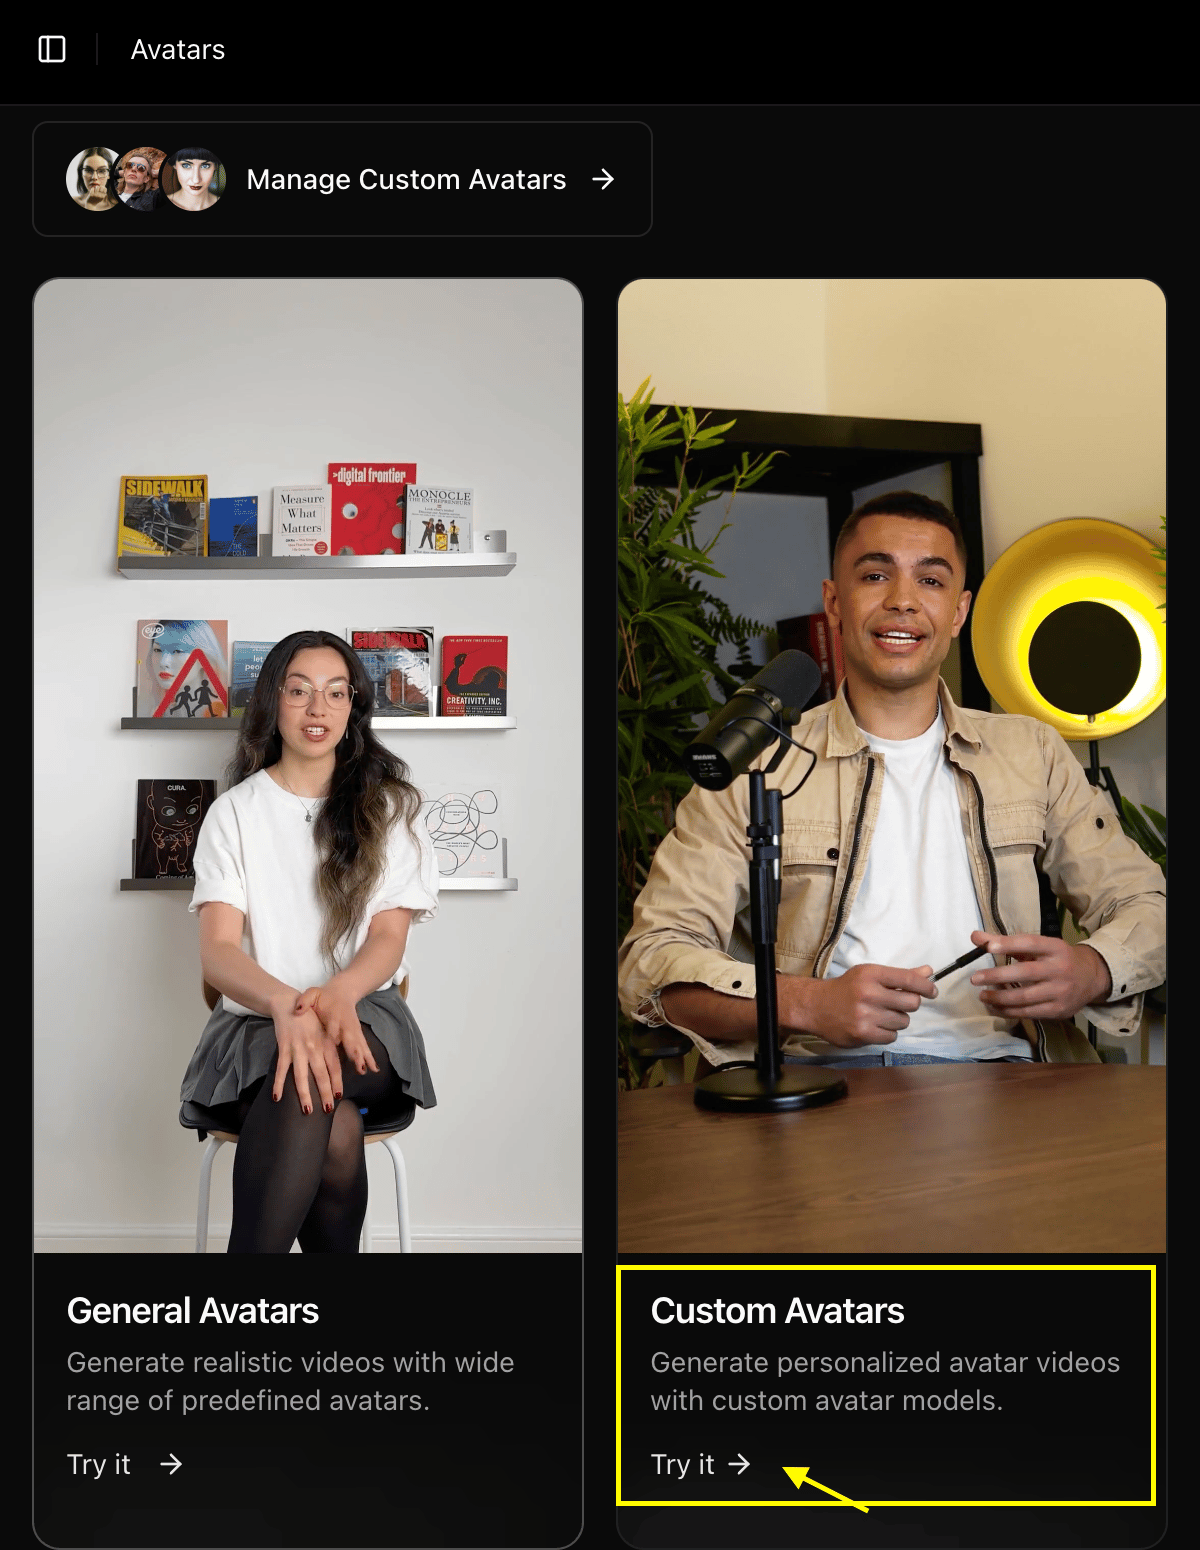 From here:
* **Select Avatar**: Select your avatar from the gallery and slect the base image as `Praneet Avatar`.
From here:
* **Select Avatar**: Select your avatar from the gallery and slect the base image as `Praneet Avatar`.
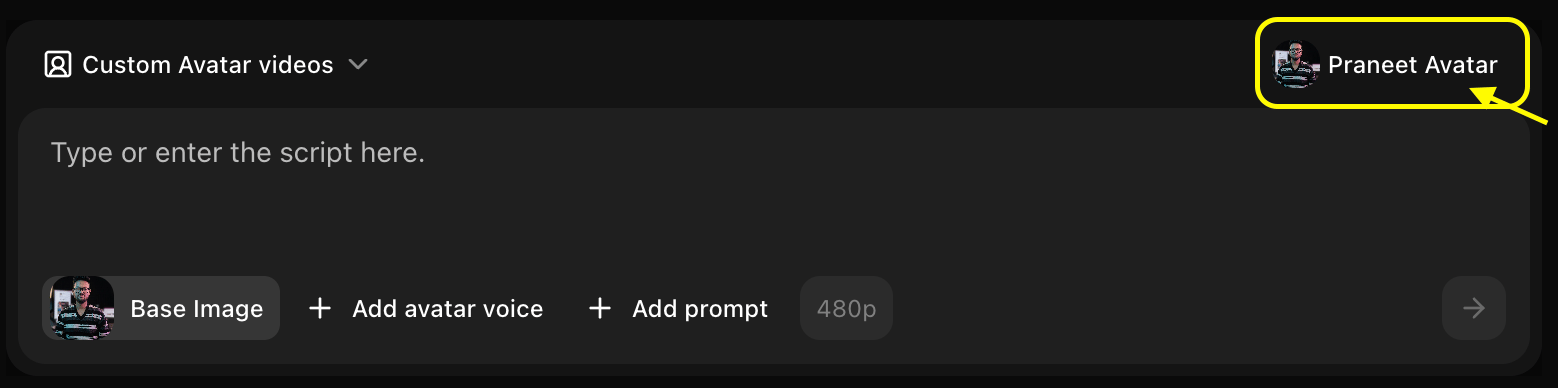 * **Click Add Voice**: Select a voice or upload your own voice sample.
 * **Upload Voice Sample**: Upload your voice sample want use for avatar.
 * **Add Action**: Define the action you want your avatar to perform like greeting, waving, etc. Click on `Add Prompts`.
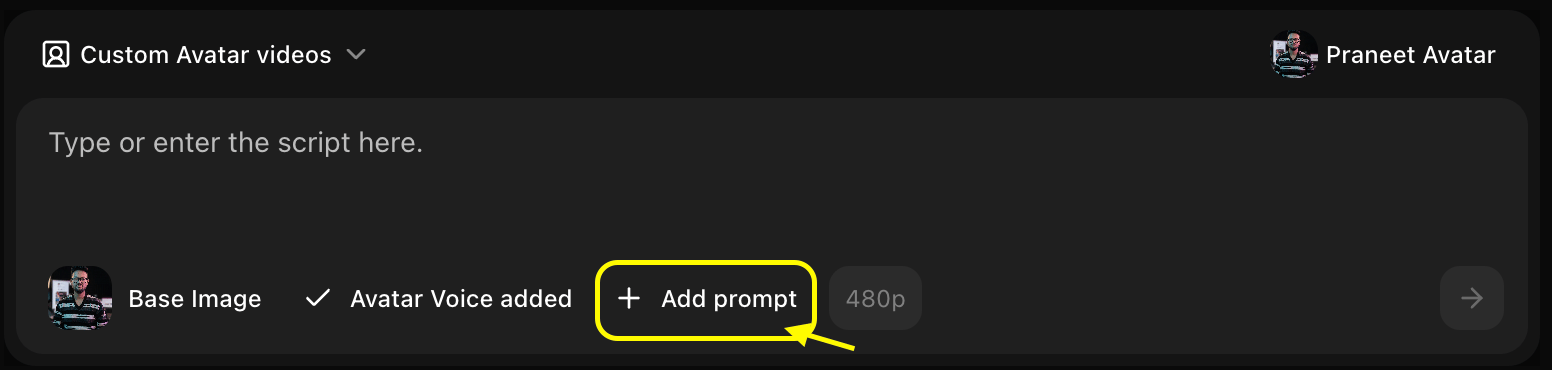 * **Write the Action**: Write the action you want your avatar to perform. We given `Talking Head / Presenter Mode (Most Common)`.
 * **Resolution**: Choose your preferred video resolution.
 * **Write Script**: Enter the text you want your avatar to speak in the script box.
 * **Generate**: Click on **Generate** to create your final video.
 * **Voice**: `Praneet` voice. ([Listen to voice sample](/images/praneet-voice.mp3))
* **Prompt**: Write the action you want your avatar to perform. We given `Talking Head / Presenter Mode (Most Common)`.
* **Resolution**: Choose your preferred video resolution.
* **Script**: Enter the text you want your avatar to speak in the script box.
* **Voice**: `Praneet` voice. ([Listen to voice sample](/images/praneet-voice.mp3))
* **Prompt**: Write the action you want your avatar to perform. We given `Talking Head / Presenter Mode (Most Common)`.
* **Resolution**: Choose your preferred video resolution.
* **Script**: Enter the text you want your avatar to speak in the script box.