> ## Documentation Index
> Fetch the complete documentation index at: https://docs.zoice.com/llms.txt
> Use this file to discover all available pages before exploring further.
# Images to Video
> Create videos from multiple images by combining them into a cohesive sequence.
## Overview
Images-to-Video allows you to create video content by combining multiple images into a single video sequence. Perfect for slideshows, transitions, storytelling, or creating videos from image sequences.
## How It Works
Upload multiple images and Zoice will combine them into a video, with options for transitions, timing, and effects. You can also add AI-generated transitions and motion between images.
## Quick Start
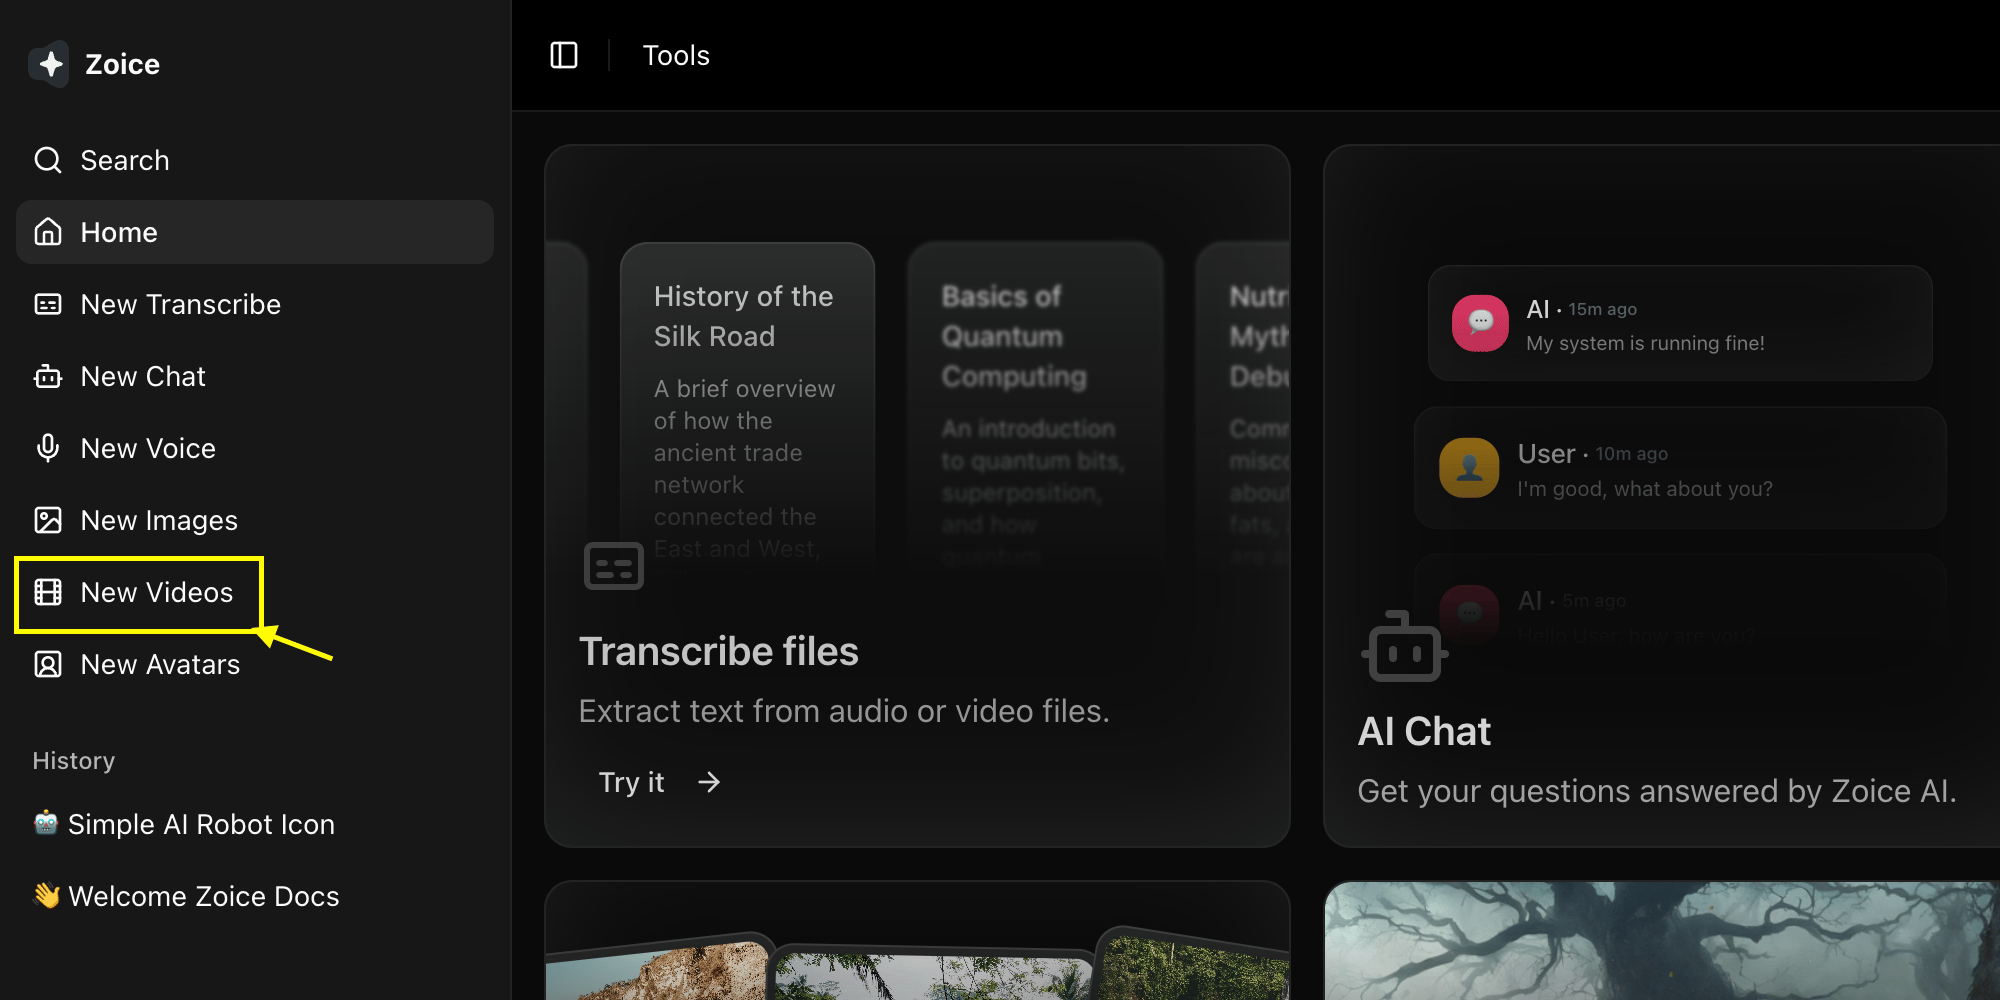
Go to the Video Generator tool in your Zoice dashboard by clicking on **New Video**.
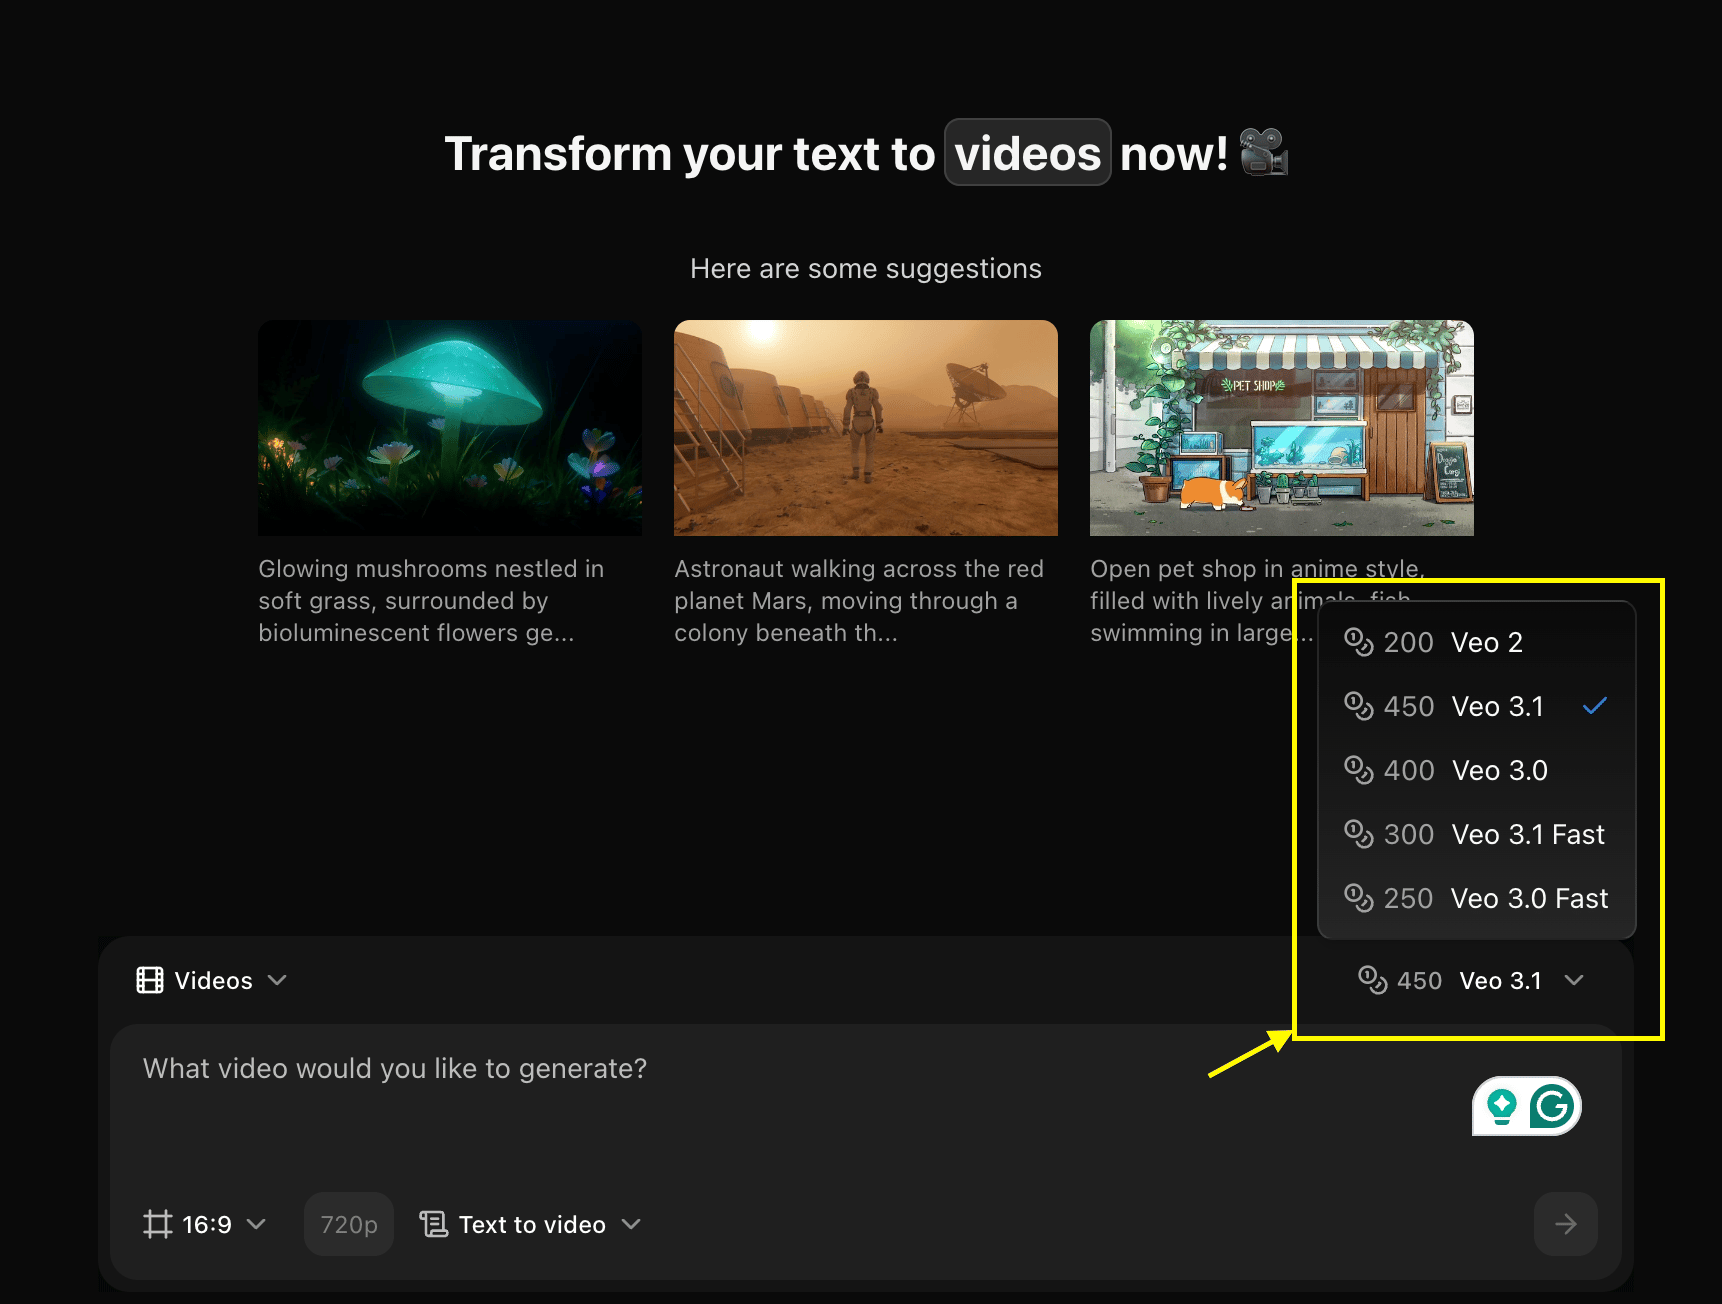
 Choose a Video model like **Veo 3.0** or **Veo 3.1** based on your project needs.
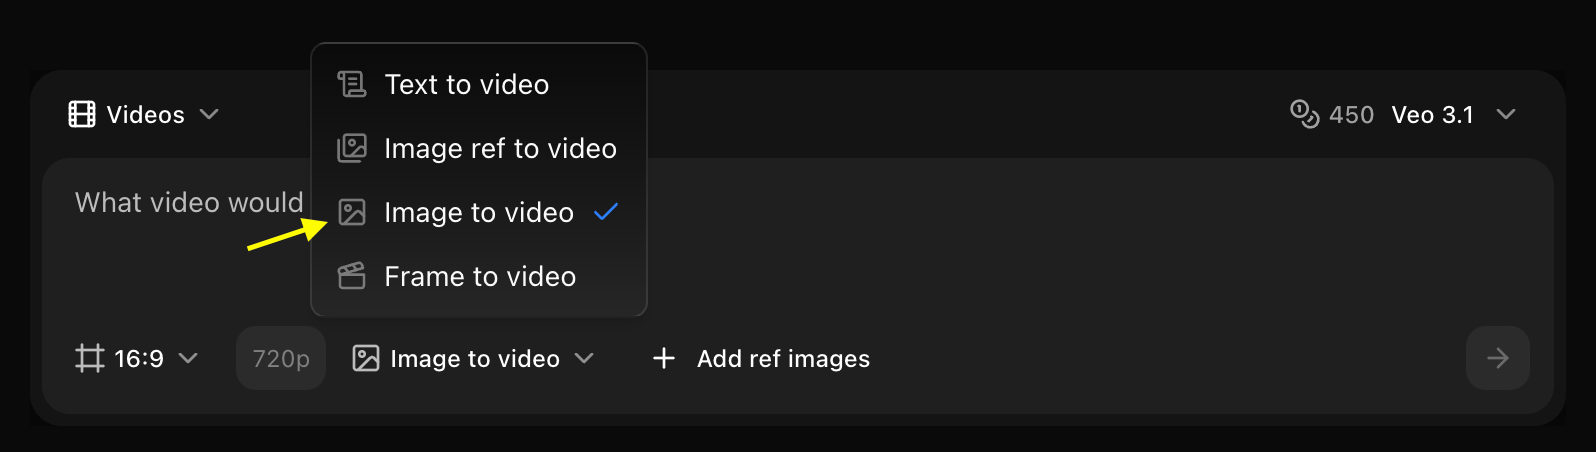
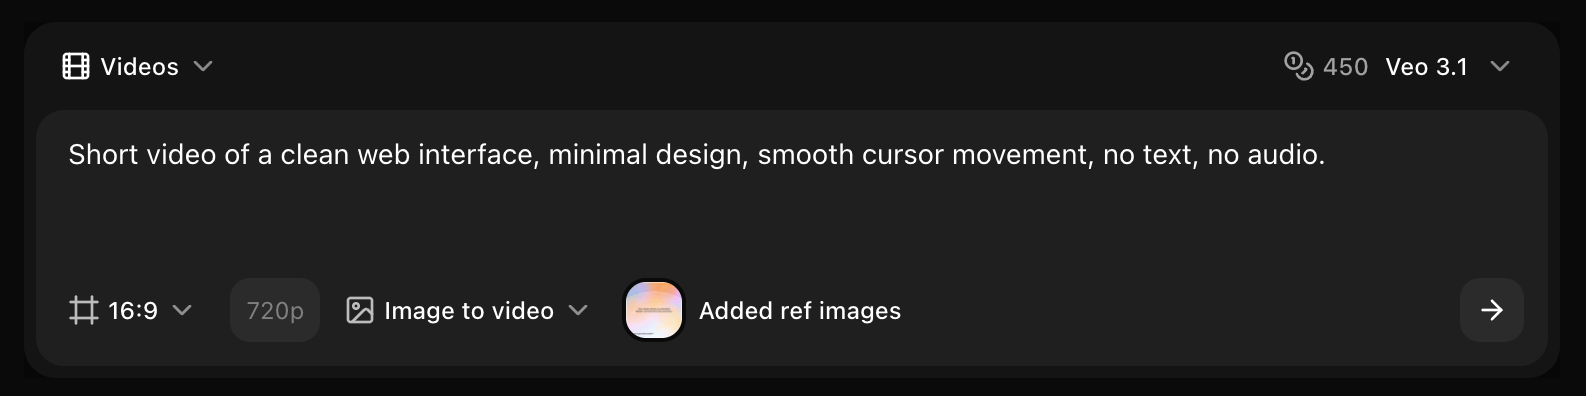
 Set dimensions, resolution, and choose **Images to Video** mode.
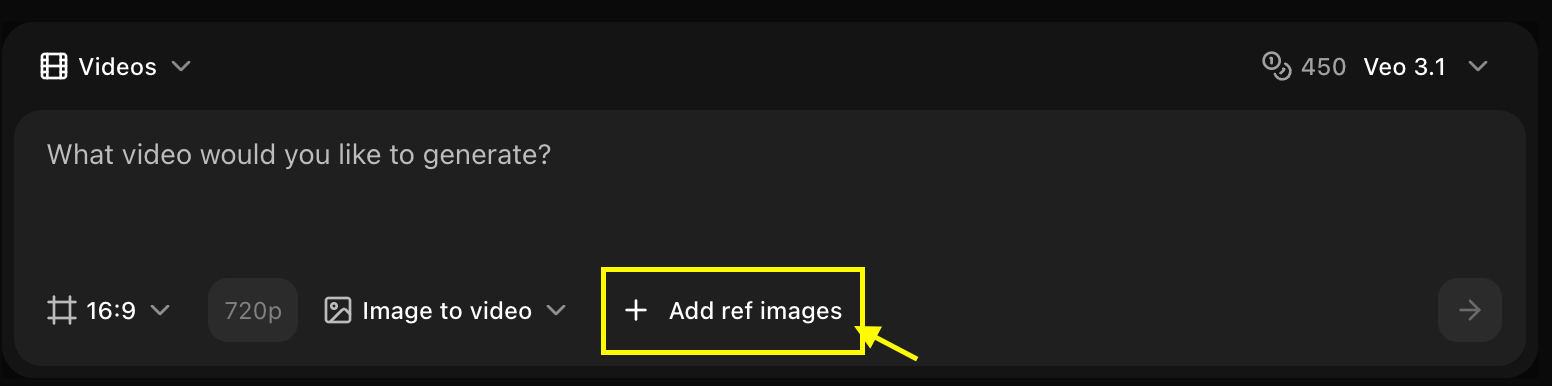
 Click on **Add Ref Images** to select and upload the images you want to use for your video.
 Enter a detailed description of the motion or transitions you want the AI to create between your images.
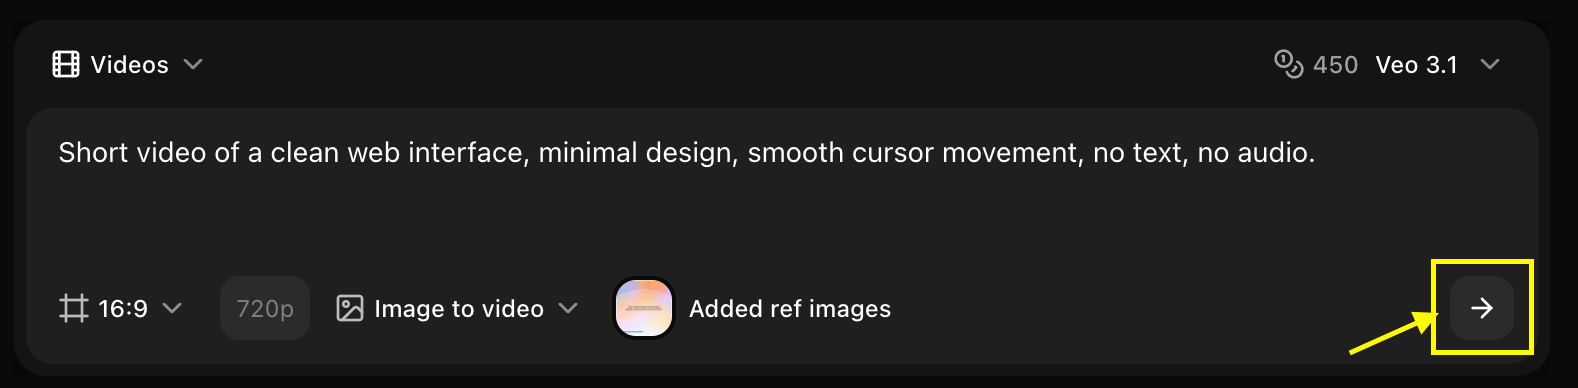
 Click on the **Generate** button to begin creating your video.
 Save your generated video.
## Ref Image Requirements
### Technical Specifications
* **Number of Images**: 2-10 images per video
* **Formats**: JPG, PNG, WebP
* **Max Size**: 10MB per image
* **Recommended Resolution**: 1920x1080 or higher
* **Aspect Ratio**: Consistent across all images recommended
### Content Guidelines
* Related images work best for cohesive videos
* Similar lighting and style create smoother transitions
* Consistent aspect ratios prevent cropping
* High-quality images produce better results
## Transition Styles
**Instant Transition**
* Direct cut between images
* No transition effect
* Fast-paced, dynamic
* Best for: Quick slideshows, montages
**Cross Dissolve**
* Smooth fade between images
* Professional look
* Gentle transition
* Best for: Presentations, portfolios
**Directional Slide**
* Images slide in from direction
* Options: left, right, up, down
* Modern, clean
* Best for: Product showcases, galleries
**AI-Generated Transition**
* Smooth morphing between images
* AI fills in between frames
* Creative, seamless
* Best for: Artistic videos, transformations
## Timing Settings
### Per-Image Duration
* **Fast**: 1-2 seconds per image
* **Medium**: 3-4 seconds per image
* **Slow**: 5-6 seconds per image
* **Custom**: Set individual timing for each image
### Transition Duration
* **Quick**: 0.3-0.5 seconds
* **Standard**: 0.8-1.0 seconds
* **Slow**: 1.5-2.0 seconds
## Motion Effects
Add dynamic movement to static images:
Slow zoom and pan across images
* Creates cinematic feel
* Adds depth to static images
* Customizable zoom direction
* Adjustable speed
Layered movement effect
* Creates depth perception
* Works best with foreground/background
* Subtle 3D effect
* Modern, dynamic look
Zoom in or out on images
* Emphasizes subjects
* Creates focus
* Smooth or dramatic
* Directional options
Horizontal or vertical camera movement
* Reveals image gradually
* Works well with wide images
* Smooth scrolling effect
* Customizable direction
## Use Cases
### Slideshow Presentations
Create professional presentations from images
```
Settings:
- Transition: Fade (1 second)
- Duration: 4 seconds per image
- Effect: Subtle Ken Burns
- Style: Professional
```
### Product Showcases
Display multiple product angles
```
Settings:
- Transition: Slide left
- Duration: 3 seconds per image
- Effect: Slight zoom in
- Style: Commercial
```
### Before/After Comparisons
Show transformations or progress
```
Settings:
- Transition: AI Morph
- Duration: 2 seconds per image
- Effect: None (let transition shine)
- Style: Dramatic
```
### Storytelling Sequences
Create narrative from image series
```
Settings:
- Transition: Fade
- Duration: Variable (2-5 seconds)
- Effect: Ken Burns
- Style: Cinematic
```
## Best Practices
* Choose related images that tell a story
* Maintain consistent quality across images
* Use similar color palettes for cohesion
* Order images logically
* Match transition style to content
* Use AI Morph for creative projects
* Keep it simple for professional content
* Consistent transitions throughout
* Allow enough time to view each image
* Match pace to content type
* Vary timing for emphasis
* Consider viewer reading time if text present
* Don't overuse effects
* Match effect intensity to style
* Use Ken Burns for static scenes
* Keep movements subtle for professional look
## Advanced Features
### Custom Sequencing
Control the exact order and timing:
1. Upload all images
2. Drag to reorder
3. Set individual durations
4. Choose transition for each pair
5. Preview and adjust
### Audio Integration
Add background music or narration:
* Upload audio file
* Auto-sync to video length
* Fade in/out options
* Volume control
### Text Overlays
Add captions or titles:
* Text on each image
* Customizable fonts and colors
* Animation options
* Position control
## Common Scenarios
Showcase work with smooth transitions
Combine travel photos into video
Create event highlights from photos
Show product from multiple angles
## Tips for Different Content Types
### Photography Portfolios
* Use fade transitions
* 4-5 seconds per image
* Subtle Ken Burns effect
* Consistent pacing
### Product Catalogs
* Slide transitions
* 3 seconds per image
* Slight zoom on product
* Clean, professional
### Event Highlights
* Mix of cuts and fades
* Variable timing (2-4 seconds)
* Dynamic effects
* Energetic pacing
### Educational Content
* Simple transitions
* Longer duration (5-6 seconds)
* Minimal effects
* Clear, focused
## Troubleshooting
* Use images of similar resolution
* Ensure all images are high quality
* Match aspect ratios
* Avoid mixing portrait and landscape
* Increase transition duration
* Use softer transition styles
* Ensure images are related
* Reduce motion effects
* Adjust per-image duration
* Add or remove images
* Modify transition lengths
* Use custom timing
Preview your video before final generation to ensure timing and transitions work well together.
## Export Options
* **Resolution**: 720p, 1080p, or 4K
* **Format**: MP4 (H.264)
* **Frame Rate**: 24, 30, or 60 fps
* **Quality**: Standard, High, or Maximum
## Next Steps
Create videos from frame sequences
Use single image as reference
Generate videos from text prompts
Save your generated video.
## Ref Image Requirements
### Technical Specifications
* **Number of Images**: 2-10 images per video
* **Formats**: JPG, PNG, WebP
* **Max Size**: 10MB per image
* **Recommended Resolution**: 1920x1080 or higher
* **Aspect Ratio**: Consistent across all images recommended
### Content Guidelines
* Related images work best for cohesive videos
* Similar lighting and style create smoother transitions
* Consistent aspect ratios prevent cropping
* High-quality images produce better results
## Transition Styles
**Instant Transition**
* Direct cut between images
* No transition effect
* Fast-paced, dynamic
* Best for: Quick slideshows, montages
**Cross Dissolve**
* Smooth fade between images
* Professional look
* Gentle transition
* Best for: Presentations, portfolios
**Directional Slide**
* Images slide in from direction
* Options: left, right, up, down
* Modern, clean
* Best for: Product showcases, galleries
**AI-Generated Transition**
* Smooth morphing between images
* AI fills in between frames
* Creative, seamless
* Best for: Artistic videos, transformations
## Timing Settings
### Per-Image Duration
* **Fast**: 1-2 seconds per image
* **Medium**: 3-4 seconds per image
* **Slow**: 5-6 seconds per image
* **Custom**: Set individual timing for each image
### Transition Duration
* **Quick**: 0.3-0.5 seconds
* **Standard**: 0.8-1.0 seconds
* **Slow**: 1.5-2.0 seconds
## Motion Effects
Add dynamic movement to static images:
Slow zoom and pan across images
* Creates cinematic feel
* Adds depth to static images
* Customizable zoom direction
* Adjustable speed
Layered movement effect
* Creates depth perception
* Works best with foreground/background
* Subtle 3D effect
* Modern, dynamic look
Zoom in or out on images
* Emphasizes subjects
* Creates focus
* Smooth or dramatic
* Directional options
Horizontal or vertical camera movement
* Reveals image gradually
* Works well with wide images
* Smooth scrolling effect
* Customizable direction
## Use Cases
### Slideshow Presentations
Create professional presentations from images
```
Settings:
- Transition: Fade (1 second)
- Duration: 4 seconds per image
- Effect: Subtle Ken Burns
- Style: Professional
```
### Product Showcases
Display multiple product angles
```
Settings:
- Transition: Slide left
- Duration: 3 seconds per image
- Effect: Slight zoom in
- Style: Commercial
```
### Before/After Comparisons
Show transformations or progress
```
Settings:
- Transition: AI Morph
- Duration: 2 seconds per image
- Effect: None (let transition shine)
- Style: Dramatic
```
### Storytelling Sequences
Create narrative from image series
```
Settings:
- Transition: Fade
- Duration: Variable (2-5 seconds)
- Effect: Ken Burns
- Style: Cinematic
```
## Best Practices
* Choose related images that tell a story
* Maintain consistent quality across images
* Use similar color palettes for cohesion
* Order images logically
* Match transition style to content
* Use AI Morph for creative projects
* Keep it simple for professional content
* Consistent transitions throughout
* Allow enough time to view each image
* Match pace to content type
* Vary timing for emphasis
* Consider viewer reading time if text present
* Don't overuse effects
* Match effect intensity to style
* Use Ken Burns for static scenes
* Keep movements subtle for professional look
## Advanced Features
### Custom Sequencing
Control the exact order and timing:
1. Upload all images
2. Drag to reorder
3. Set individual durations
4. Choose transition for each pair
5. Preview and adjust
### Audio Integration
Add background music or narration:
* Upload audio file
* Auto-sync to video length
* Fade in/out options
* Volume control
### Text Overlays
Add captions or titles:
* Text on each image
* Customizable fonts and colors
* Animation options
* Position control
## Common Scenarios
Showcase work with smooth transitions
Combine travel photos into video
Create event highlights from photos
Show product from multiple angles
## Tips for Different Content Types
### Photography Portfolios
* Use fade transitions
* 4-5 seconds per image
* Subtle Ken Burns effect
* Consistent pacing
### Product Catalogs
* Slide transitions
* 3 seconds per image
* Slight zoom on product
* Clean, professional
### Event Highlights
* Mix of cuts and fades
* Variable timing (2-4 seconds)
* Dynamic effects
* Energetic pacing
### Educational Content
* Simple transitions
* Longer duration (5-6 seconds)
* Minimal effects
* Clear, focused
## Troubleshooting
* Use images of similar resolution
* Ensure all images are high quality
* Match aspect ratios
* Avoid mixing portrait and landscape
* Increase transition duration
* Use softer transition styles
* Ensure images are related
* Reduce motion effects
* Adjust per-image duration
* Add or remove images
* Modify transition lengths
* Use custom timing
Preview your video before final generation to ensure timing and transitions work well together.
## Export Options
* **Resolution**: 720p, 1080p, or 4K
* **Format**: MP4 (H.264)
* **Frame Rate**: 24, 30, or 60 fps
* **Quality**: Standard, High, or Maximum
## Next Steps
Create videos from frame sequences
Use single image as reference
Generate videos from text prompts