

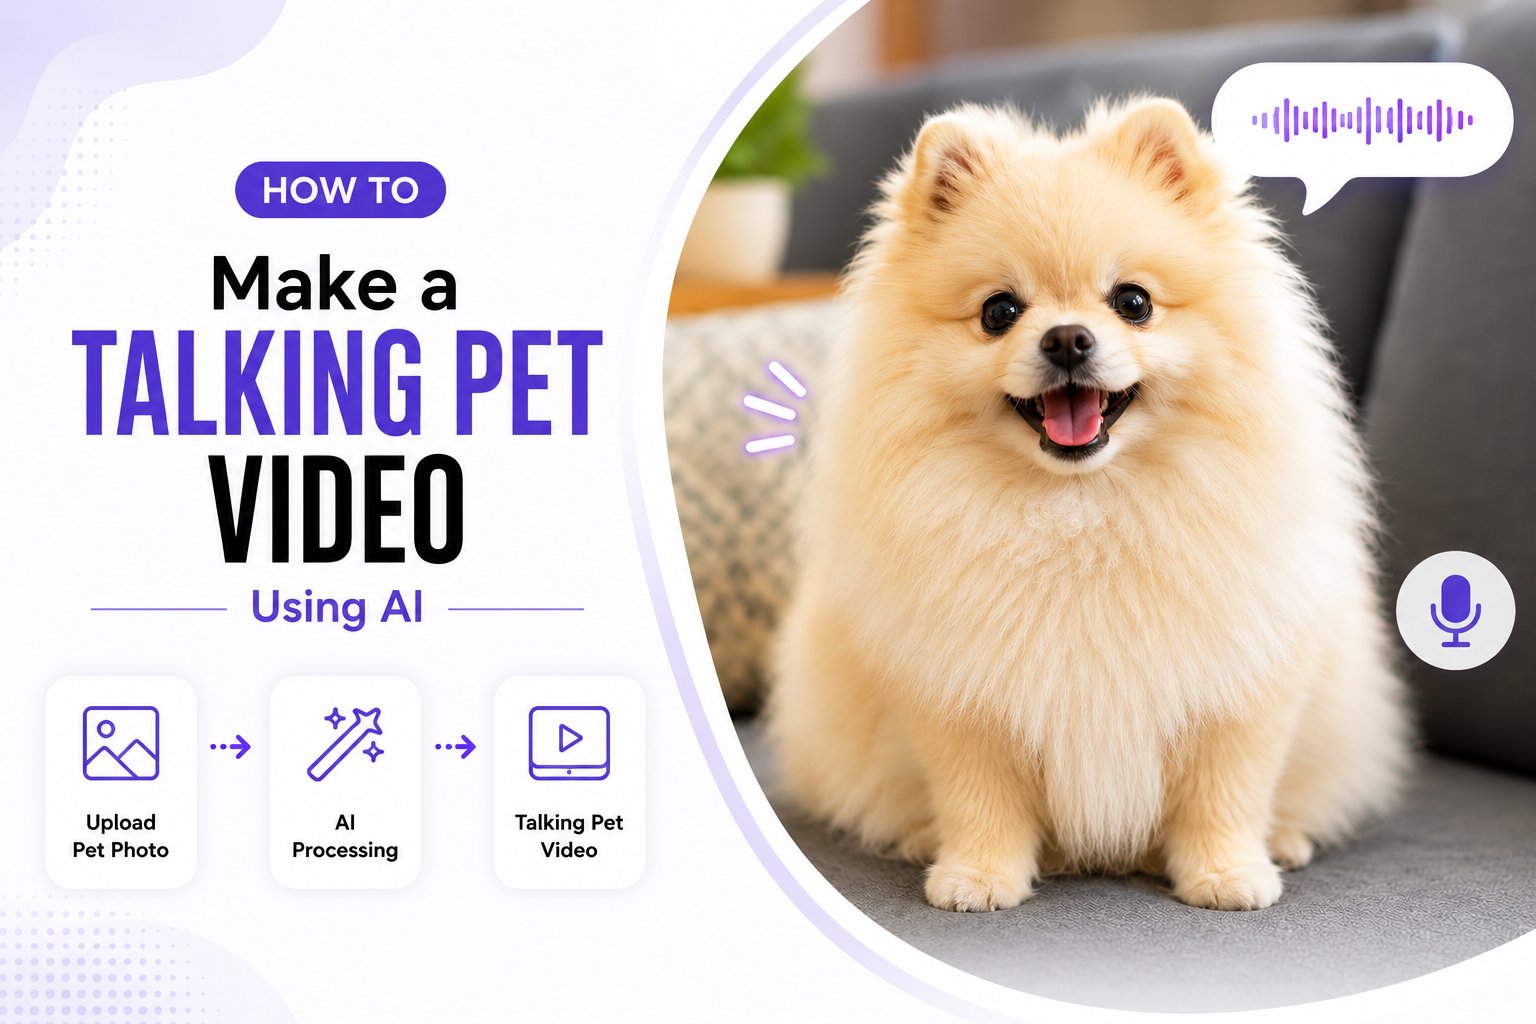
What is a Talking Pet AI Avatar?
A talking pet AI avatar is a digital animated character that speaks and moves using artificial intelligence. Instead of manually animating a pet frame by frame, AI analyzes your uploaded pet image and generates realistic lip movements, facial expressions, and head motions synchronized with your script or audio. Talking pet avatars are widely used for:- YouTube animations and educational content
- Brand mascot videos
- Children’s storytelling
- Social media entertainment
- Marketing campaigns
- Online courses
How to Make Pet Talk Using AI
Creating a talking pet video with Zoice only takes a few minutes. First, create or choose an AI avatar using your pet image, add your script or audio, customize the output settings, and generate your video. Follow the detailed steps below.Step 1: Visit Zoice and Click Sign In
Go to the Zoice website and click the Sign In button at the top-right corner of the homepage. This will open the login page where you can access your Zoice account.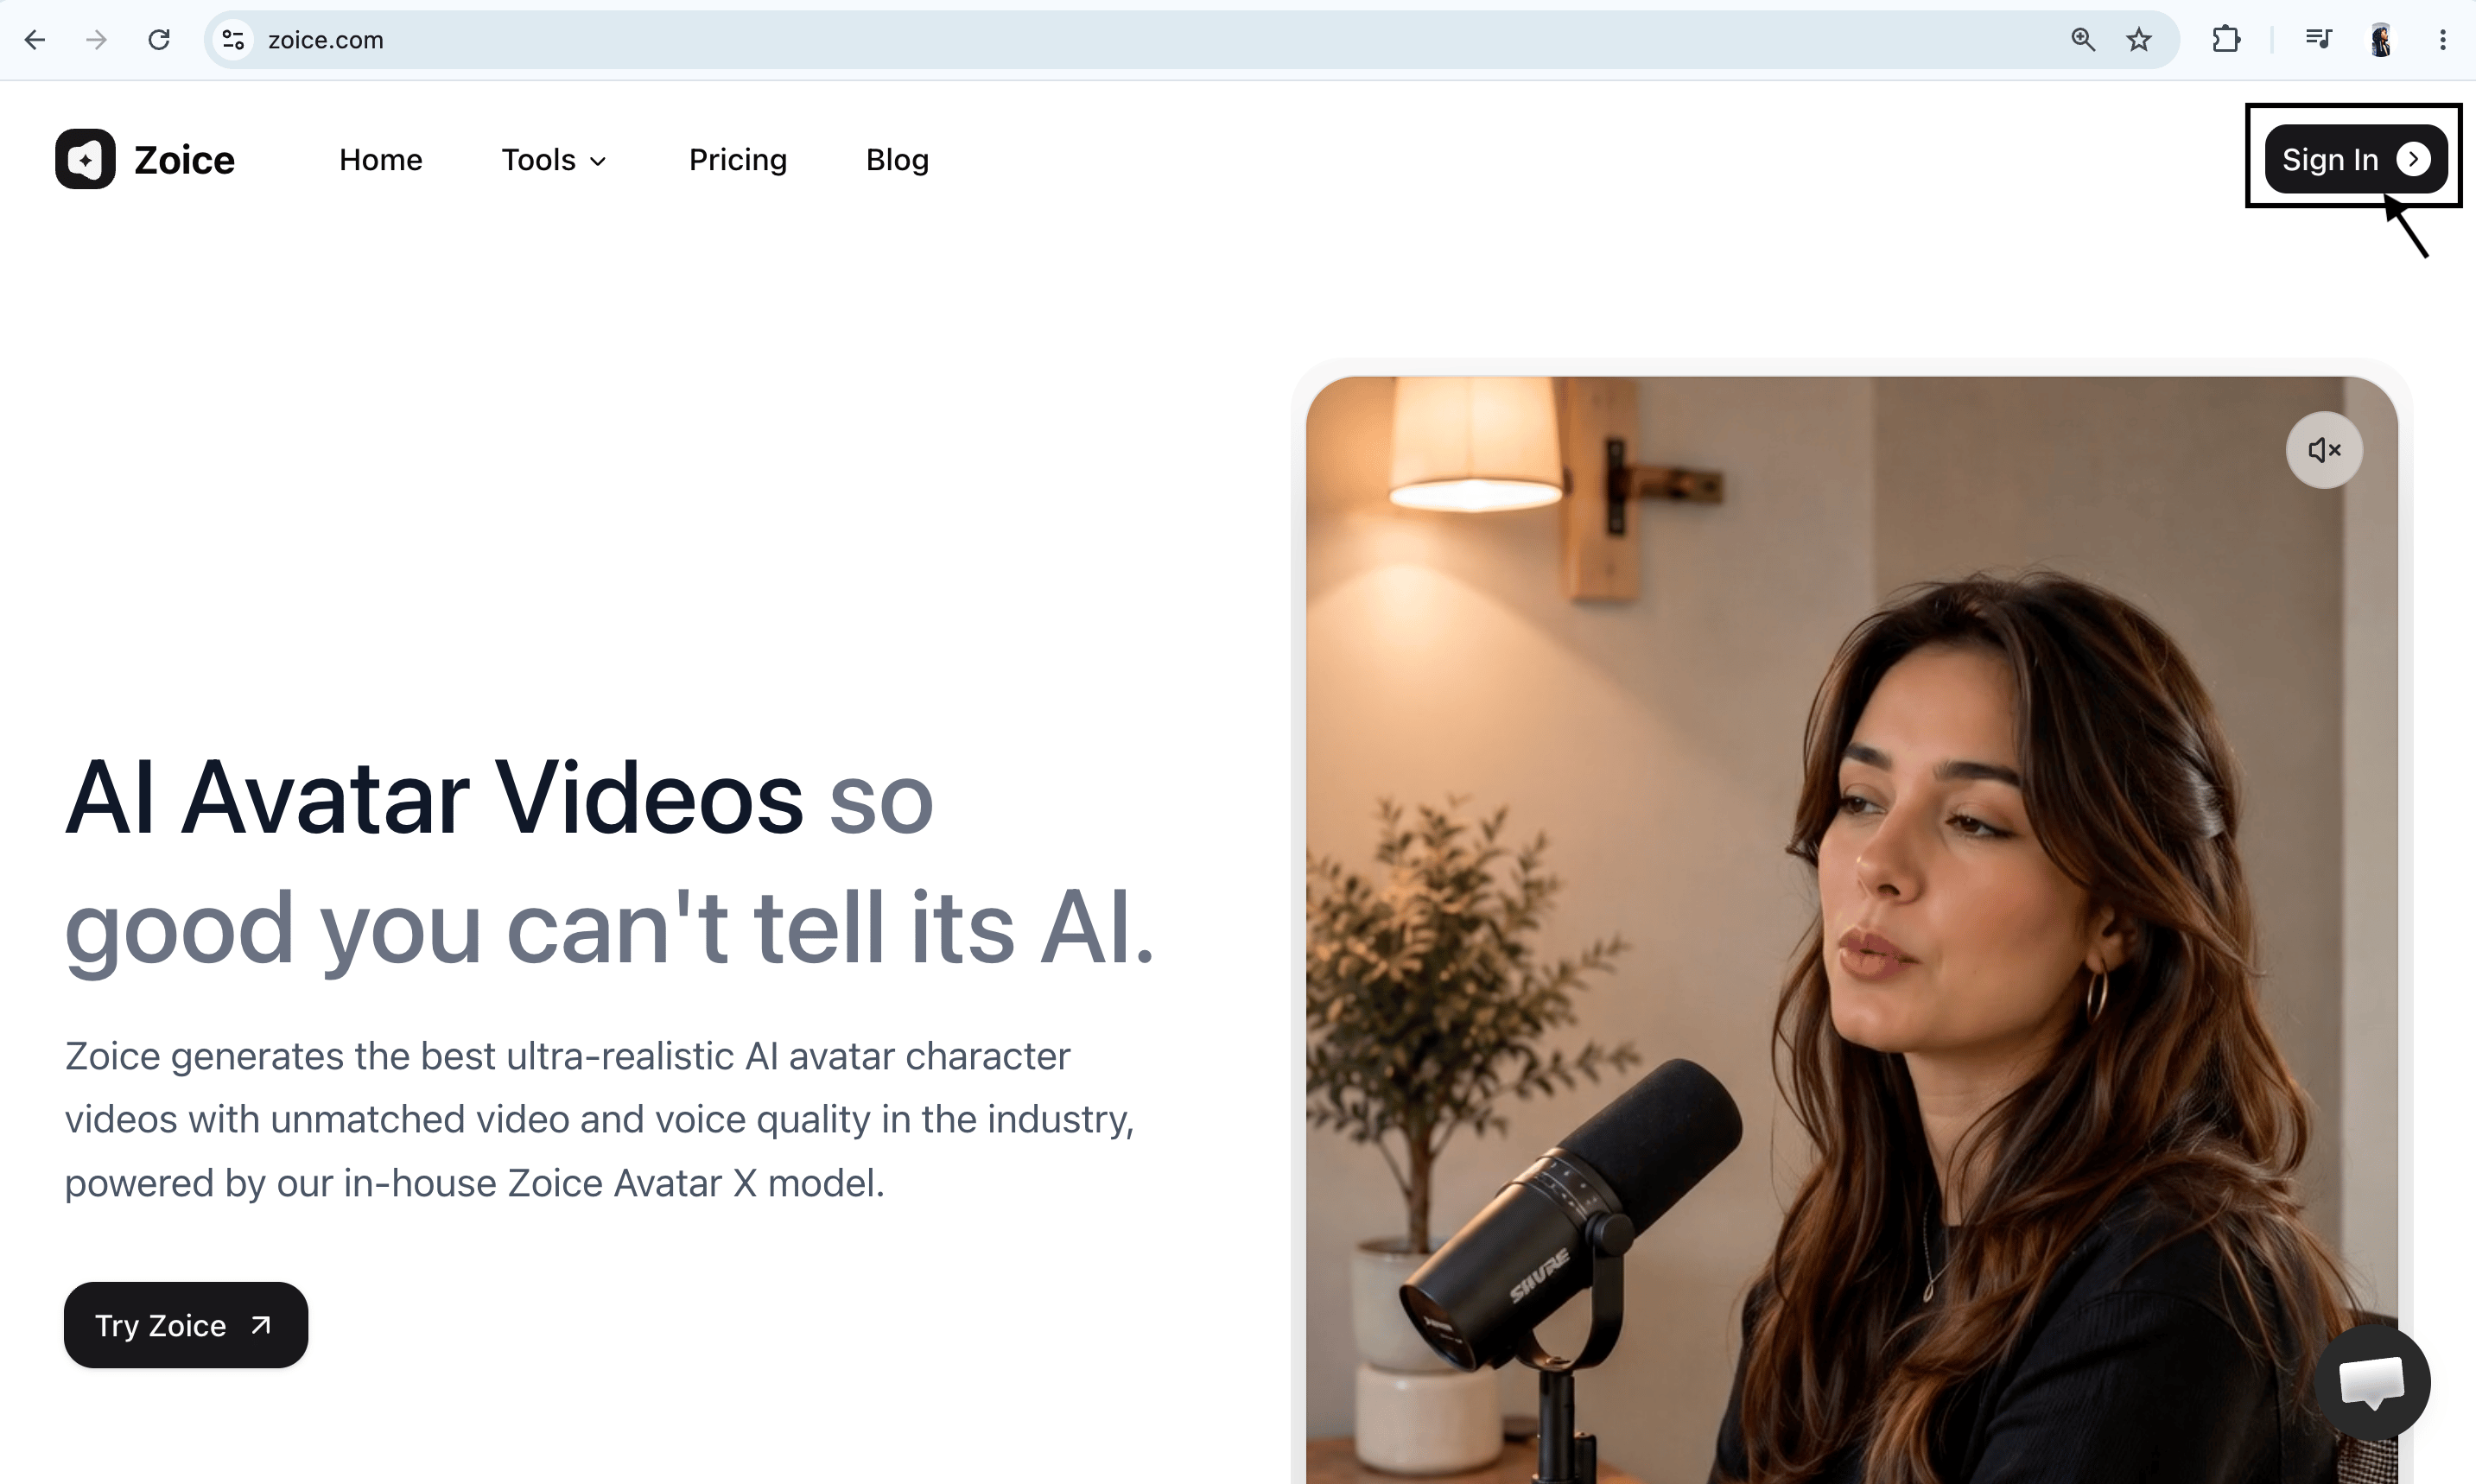
Step 2: Create a New Zoice Account
If you are using Zoice for the first time, click Sign Up to create a new account.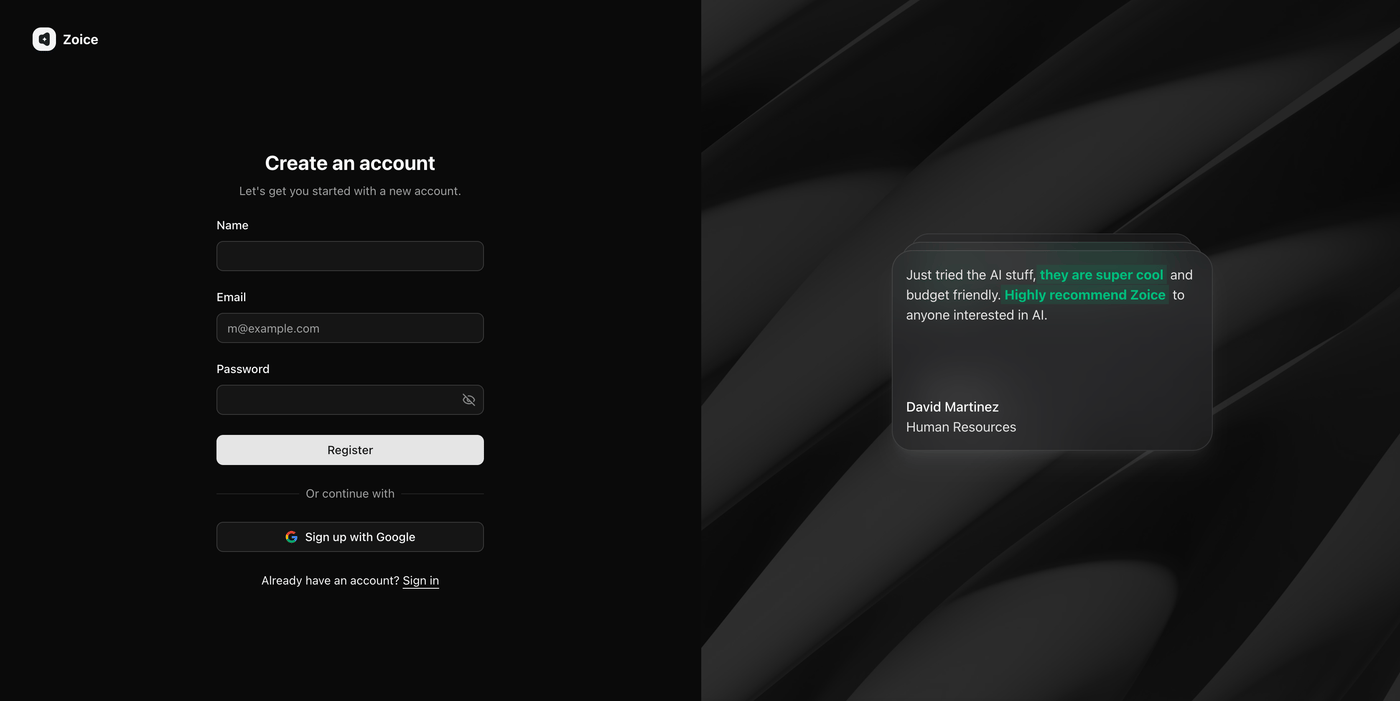
- Name
- Email address
- Password
Step 3: Sign In to Your Zoice Account
After creating your account, return to the sign-in page and log in using your registered email and password. You can also choose Sign in with Google if your account is connected with Google. Once signed in, you will be redirected to the Zoice dashboard.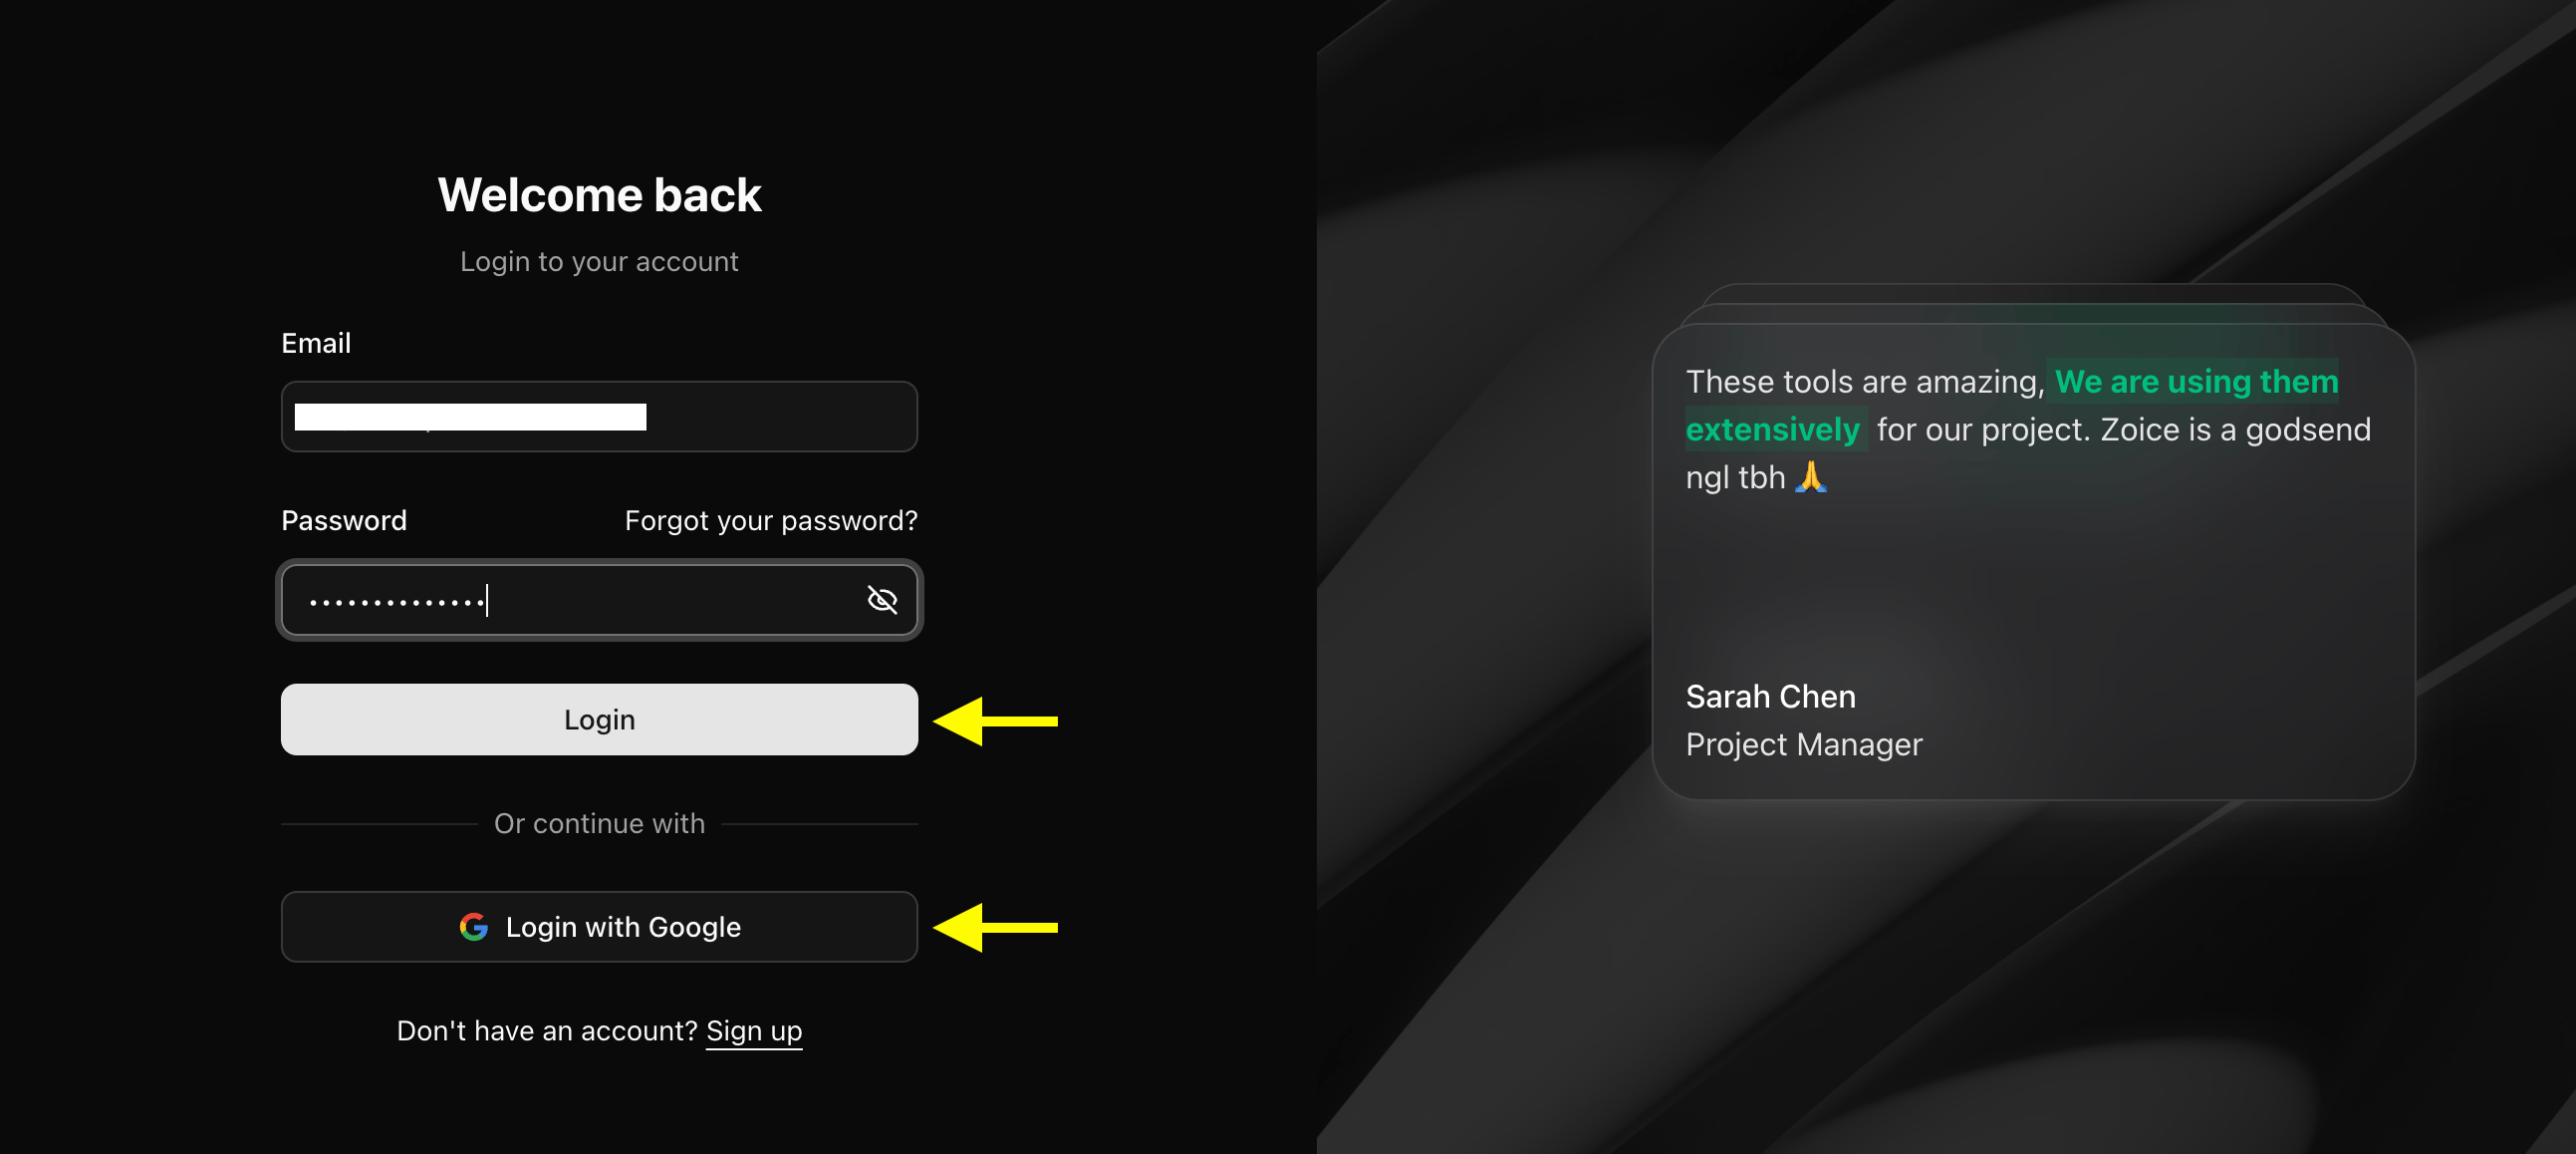
Step 4: Navigate to Avatar Characters
After logging in, you will reach the Zoice dashboard. From the left sidebar, click Avatar Characters under the Manage section.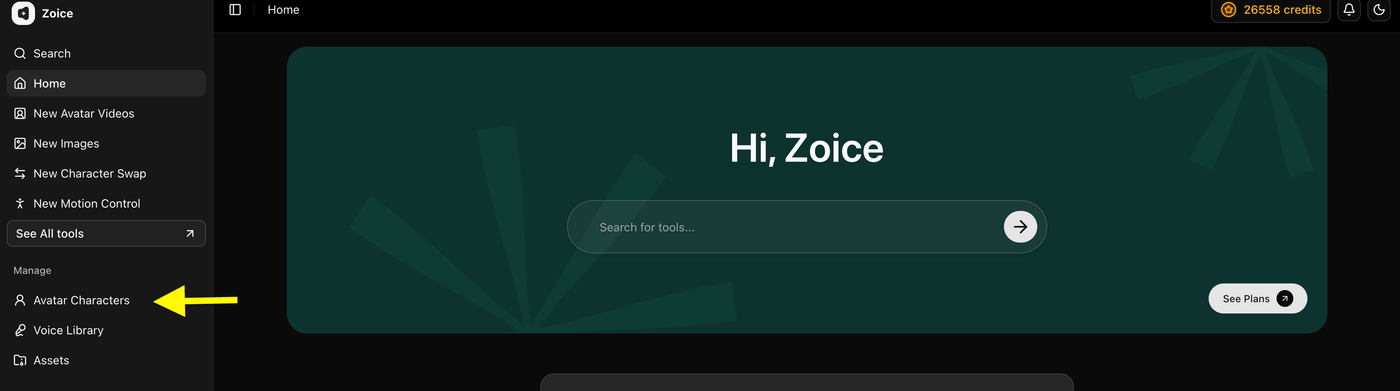
Step 5: Click Create New Avatar
On the Avatar Characters page, click the Create New button to start creating your custom pet avatar.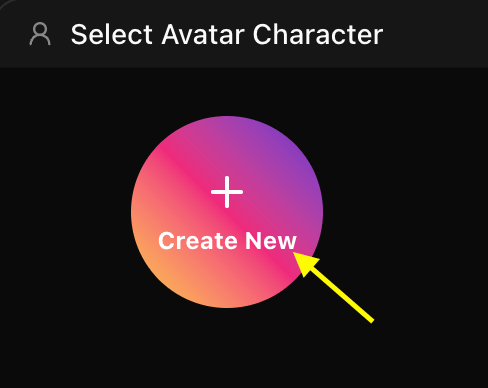
Step 6: Upload Your Pet Image and Name Your Avatar
Upload a clear, high-quality pet image that you want to bring to life.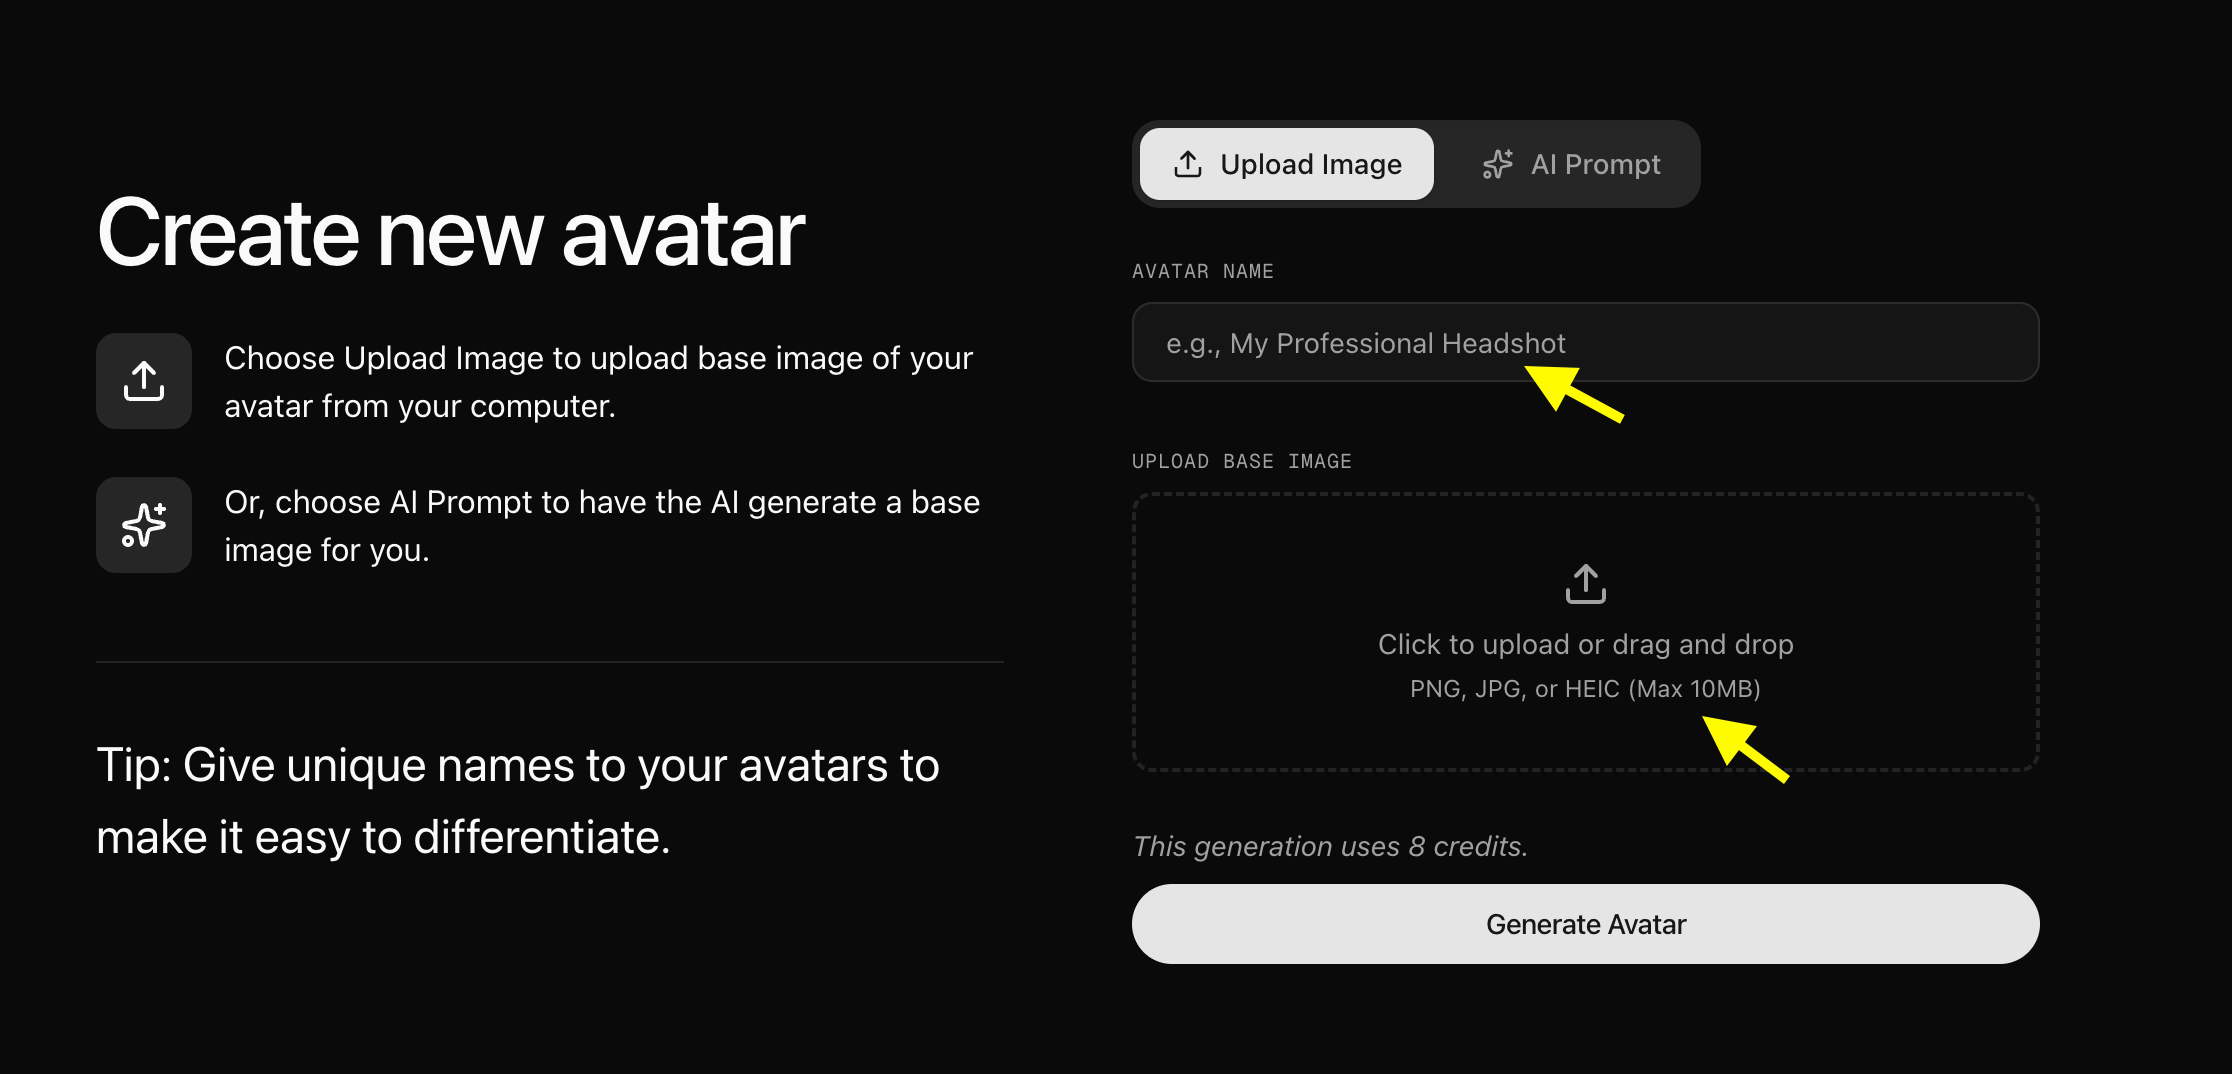
- Clear face visibility and forward-facing angle
- Good contrast between character and background
- Closed or neutral mouth position
-
No blurry or low-quality images
- Upload Your Image or Generate an Avatar Using AI Prompt
- Upload Image: Upload a clear pet image directly from your device.
- AI Prompt: If you don’t have an image, select the AI Prompt option and describe the pet you want to create. Zoice will generate a custom AI image based on your prompt.
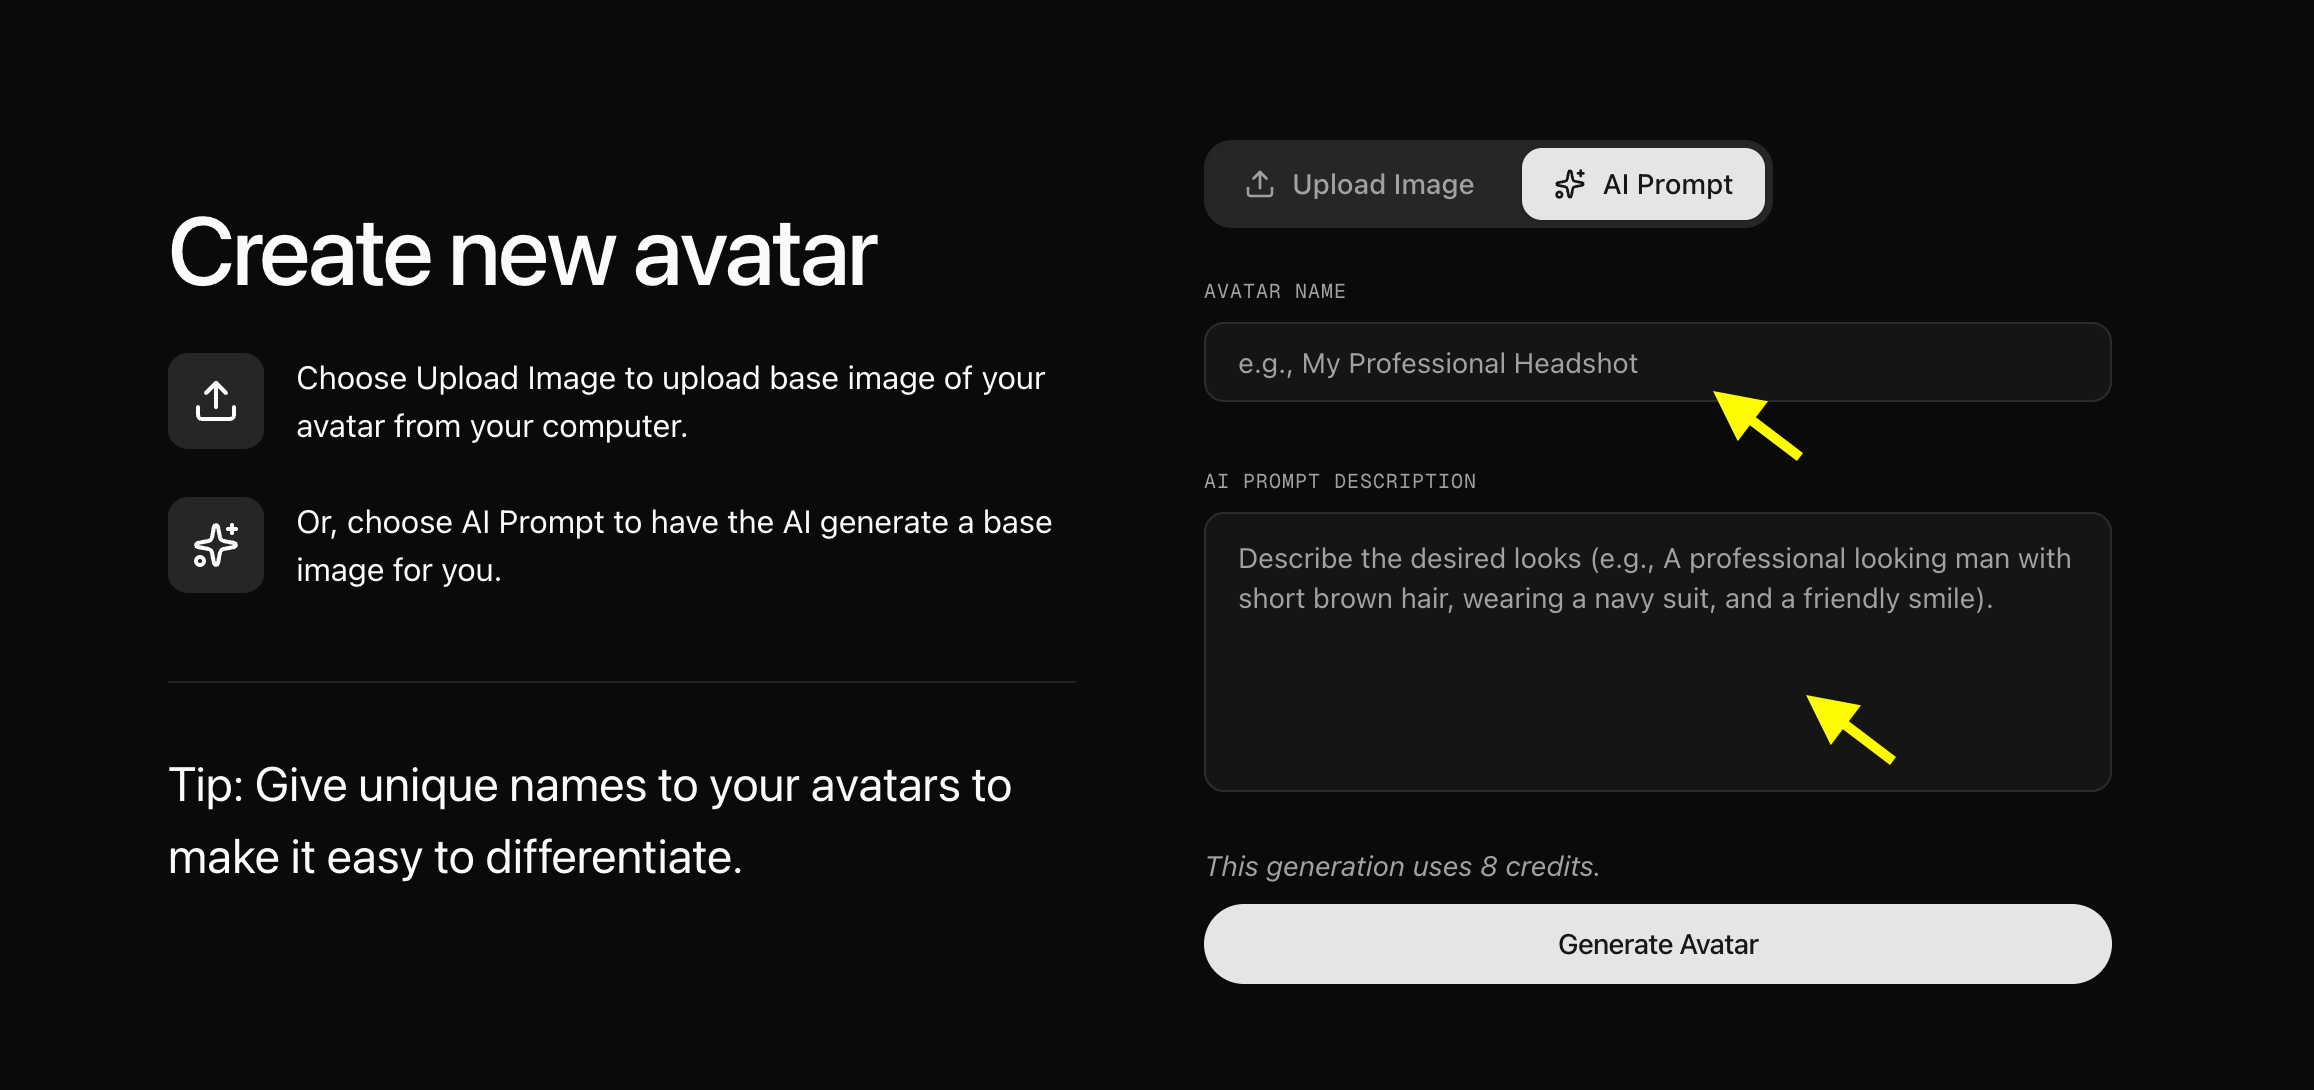
- We upload the image of our pet.
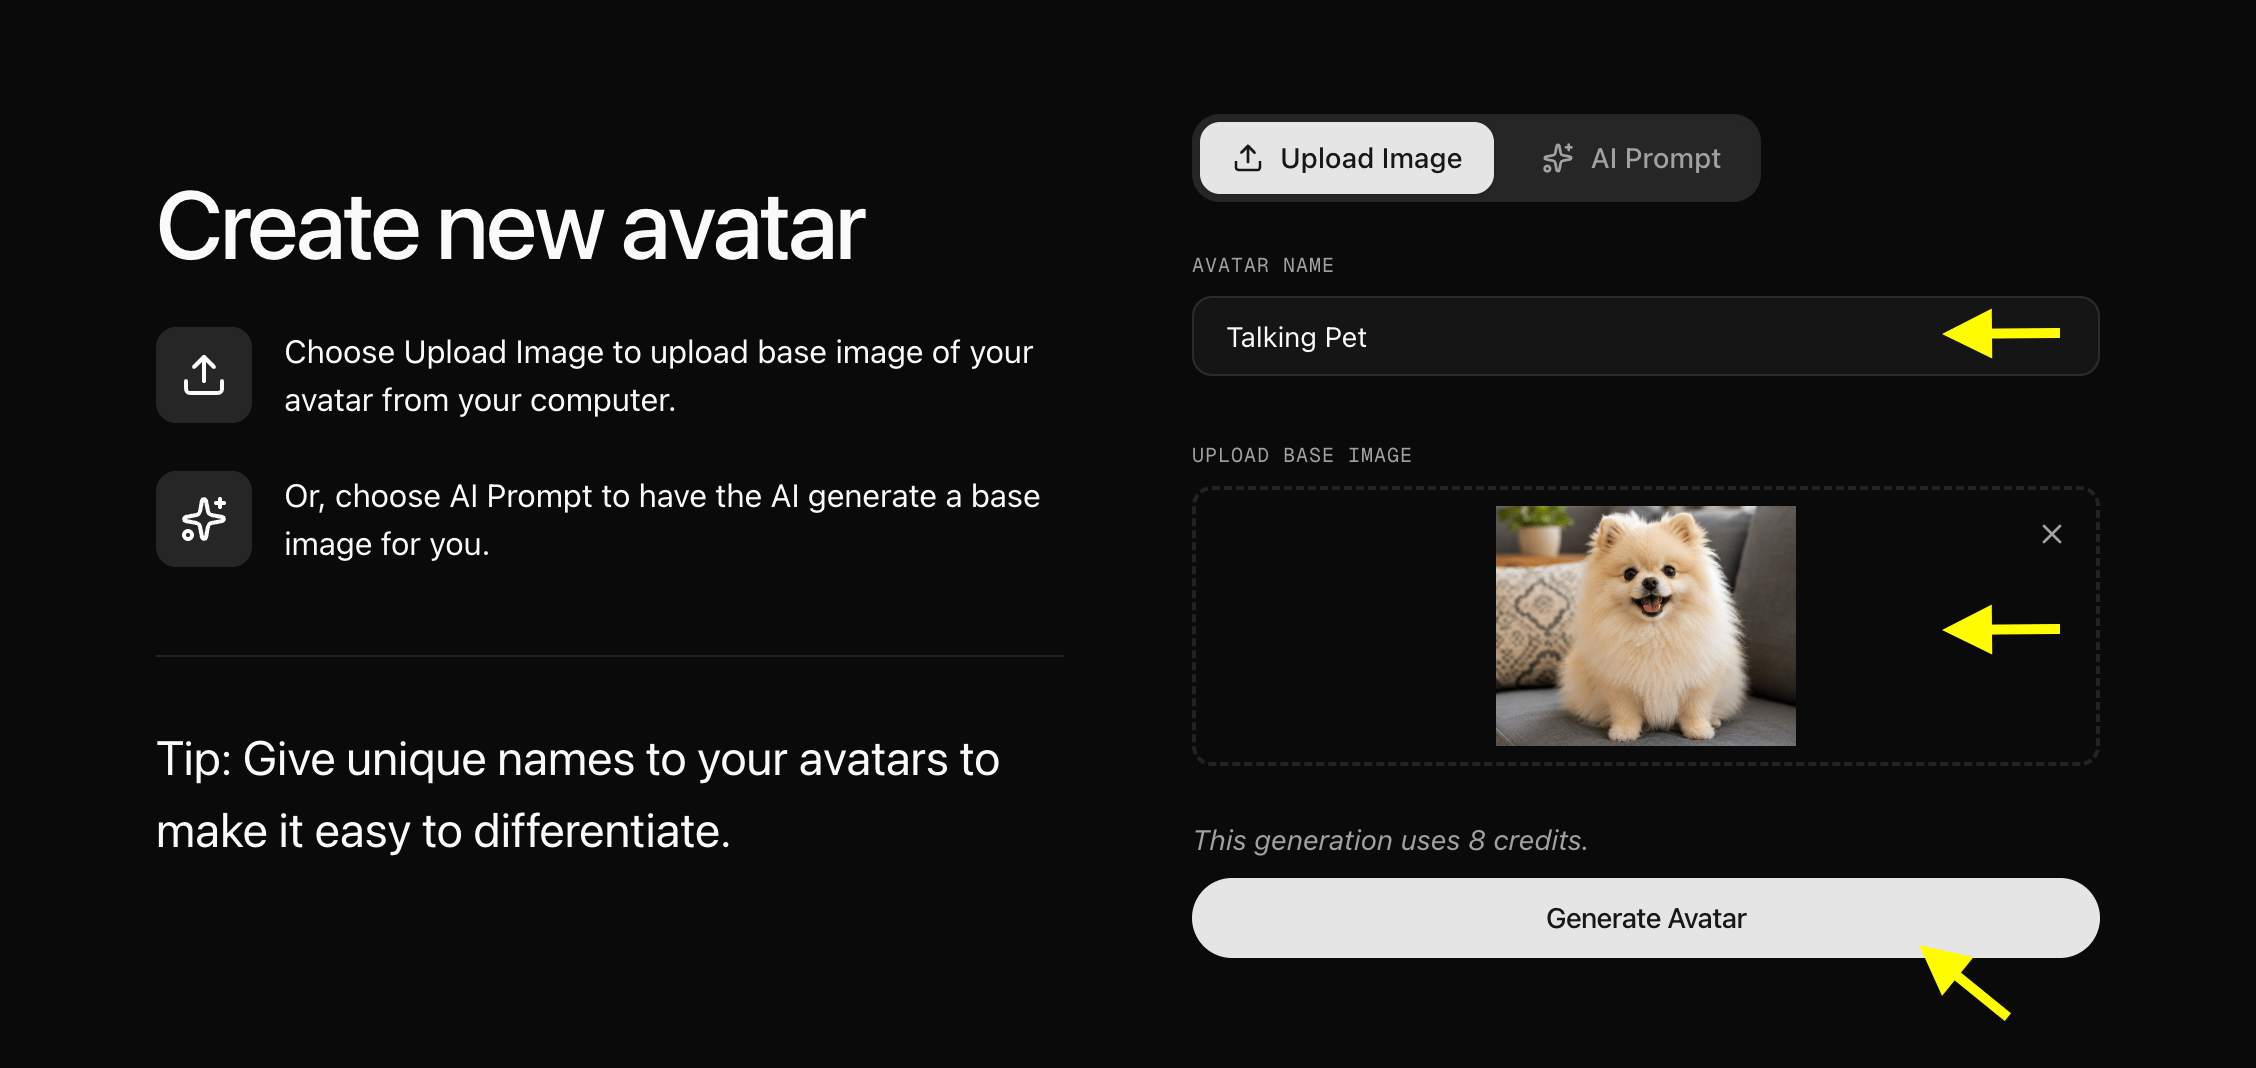
Step 7: Click Generate Video
Once you selected your pet avatar, click the Generate Video button to open the video generation settings panel.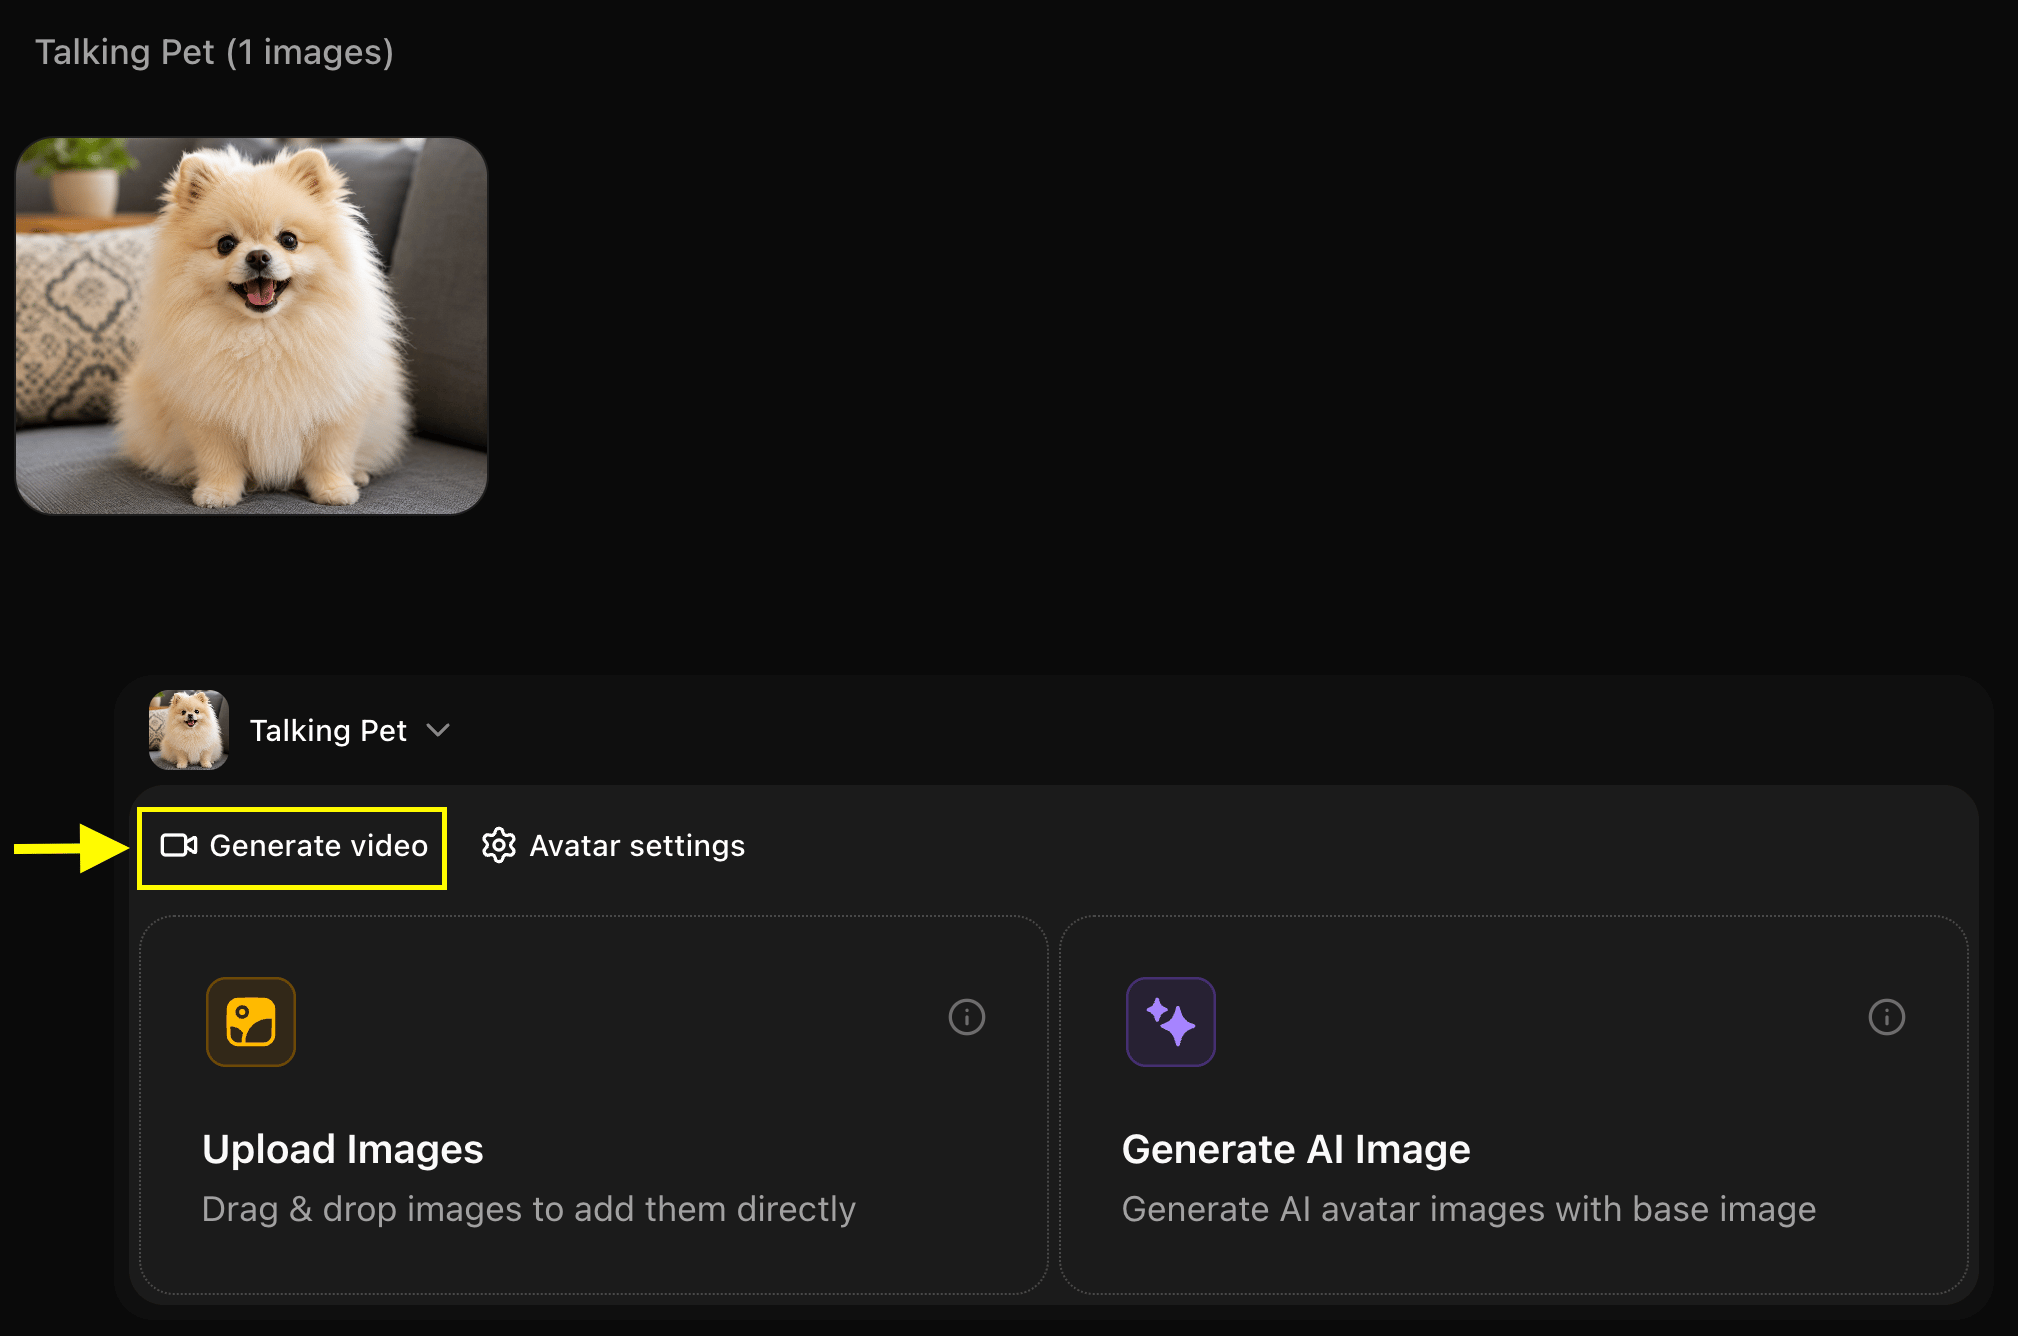
Step 8: Add Your Script
In the video generation panel, Click on script box the popup window will appear here we write the detailed script also select the voice model and audio tag like emotion accent, delivery and then click on Add Script.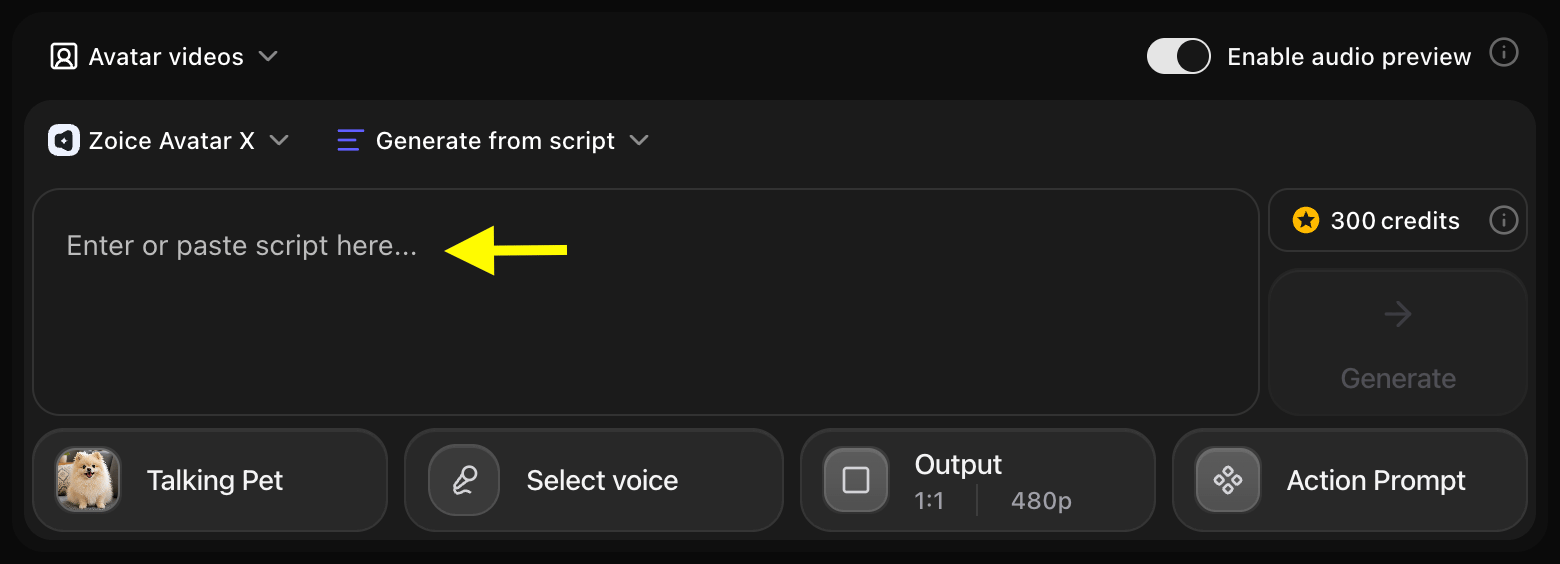
- Once the window pops up then we have to write the script in the script box and also select the voice model and audio tag like emotion accent, delivery and then click on Add Script.
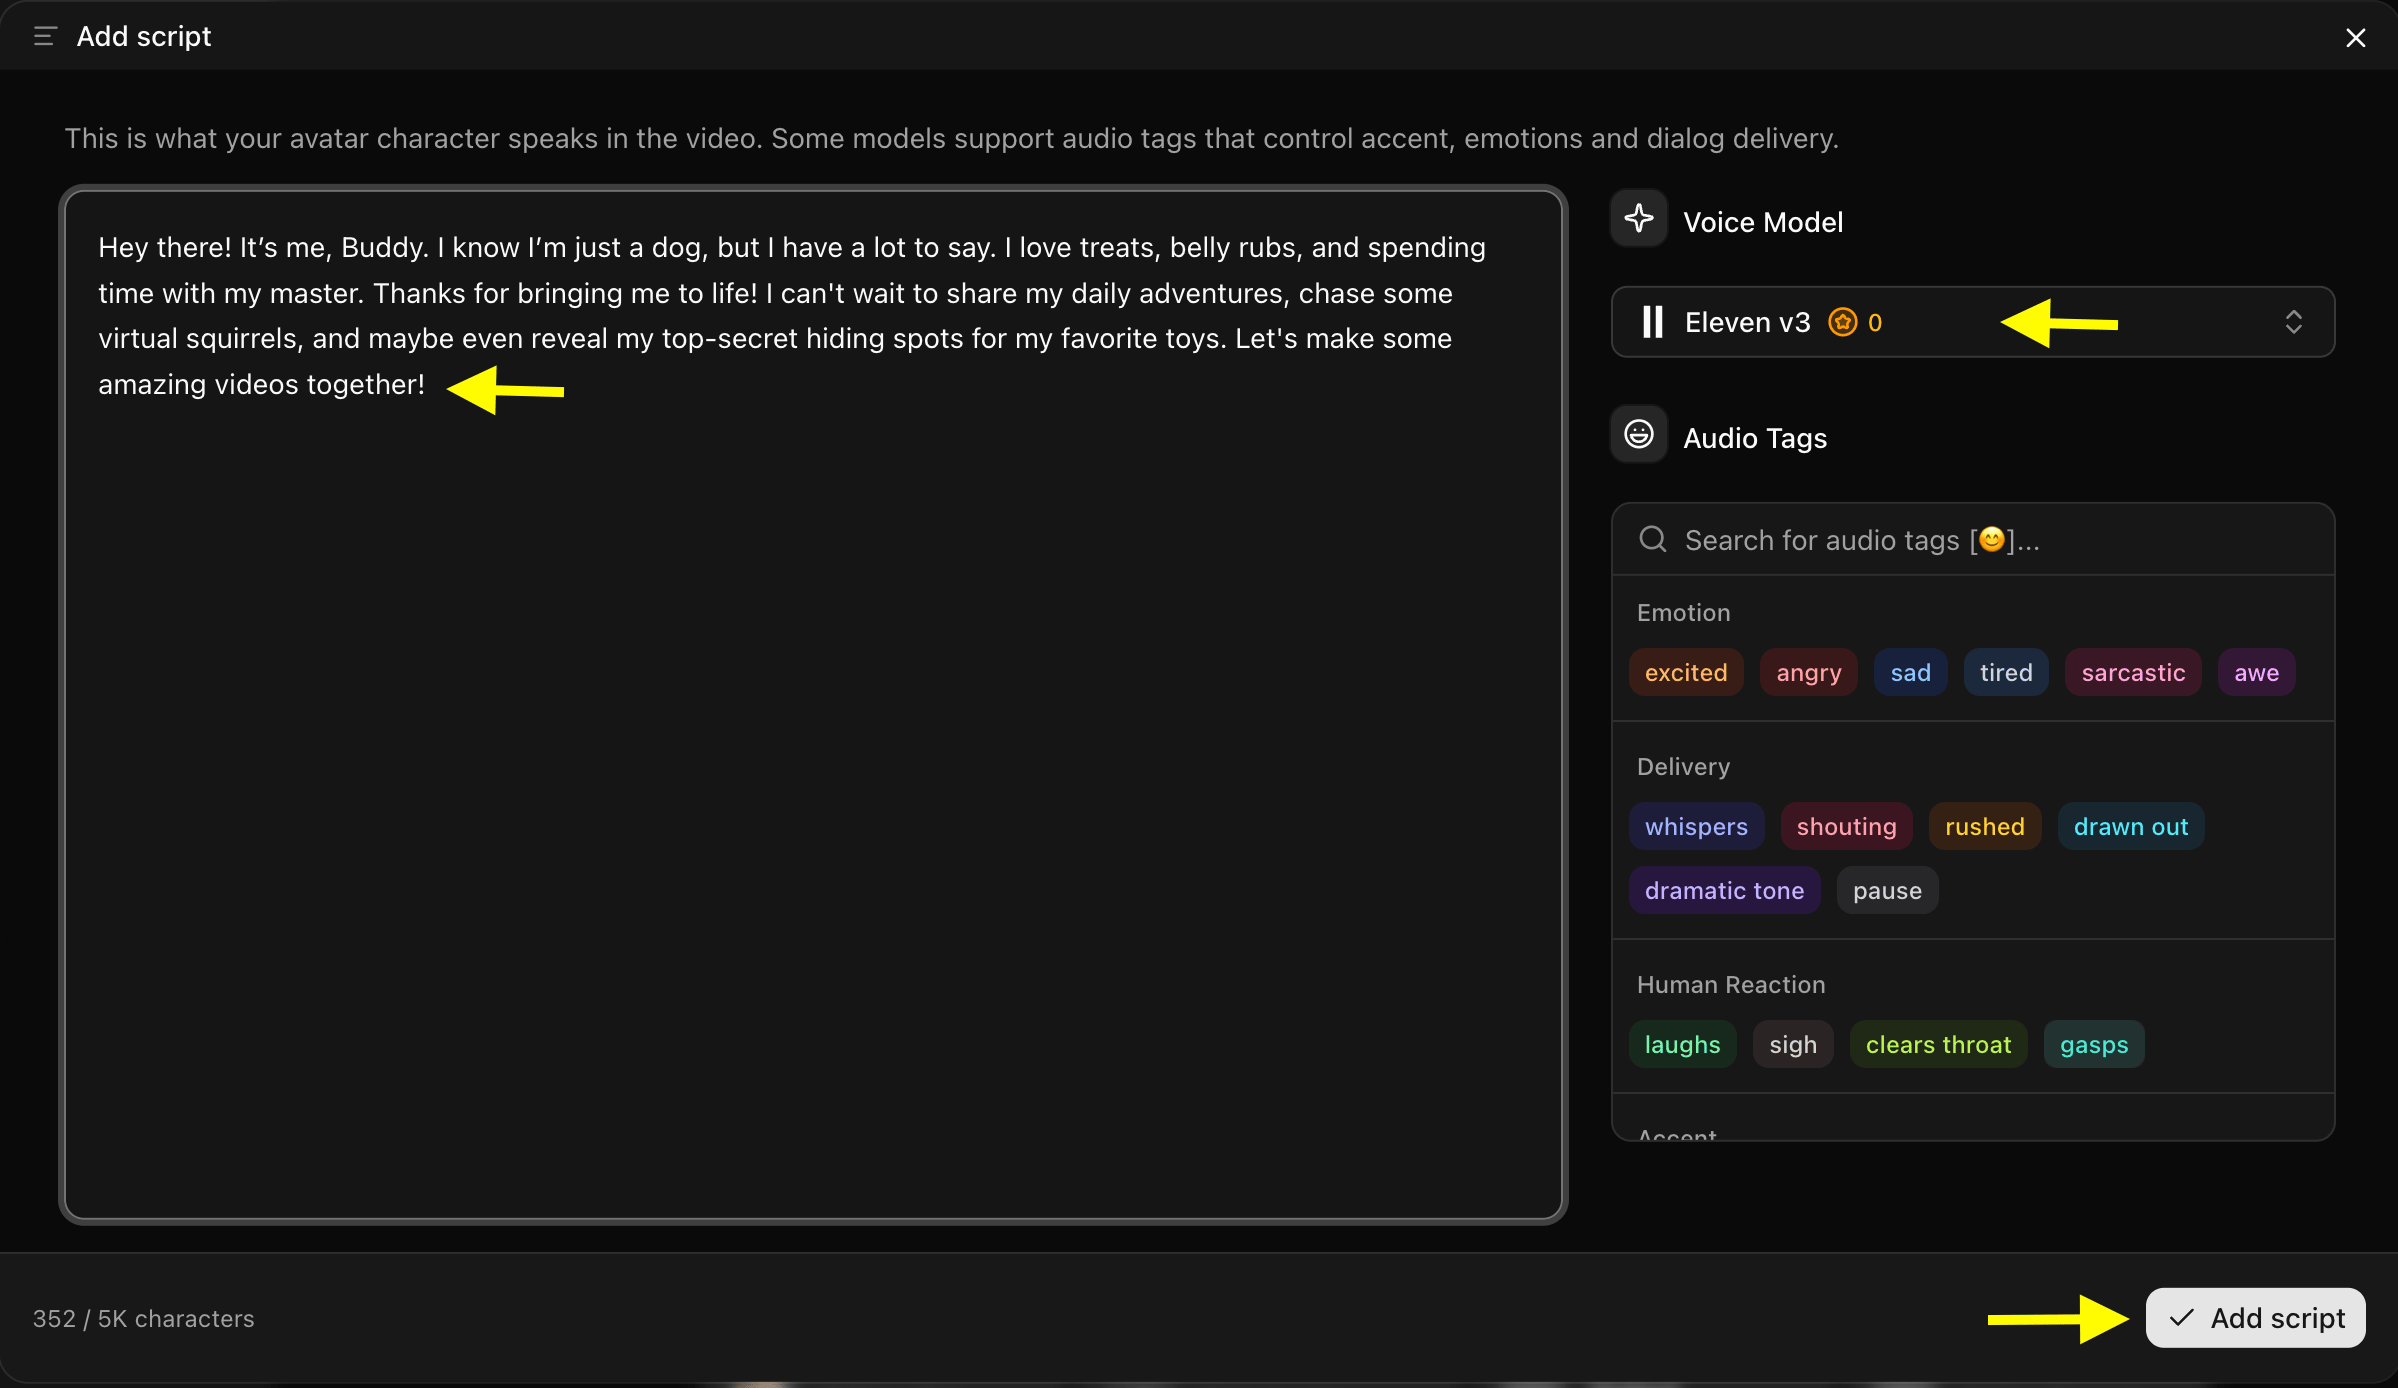
Step 9: Click on Select Voice
After adding the script, Click on Select Voice option, and you will see few public voice and also you can upload your own voice for pet avatar.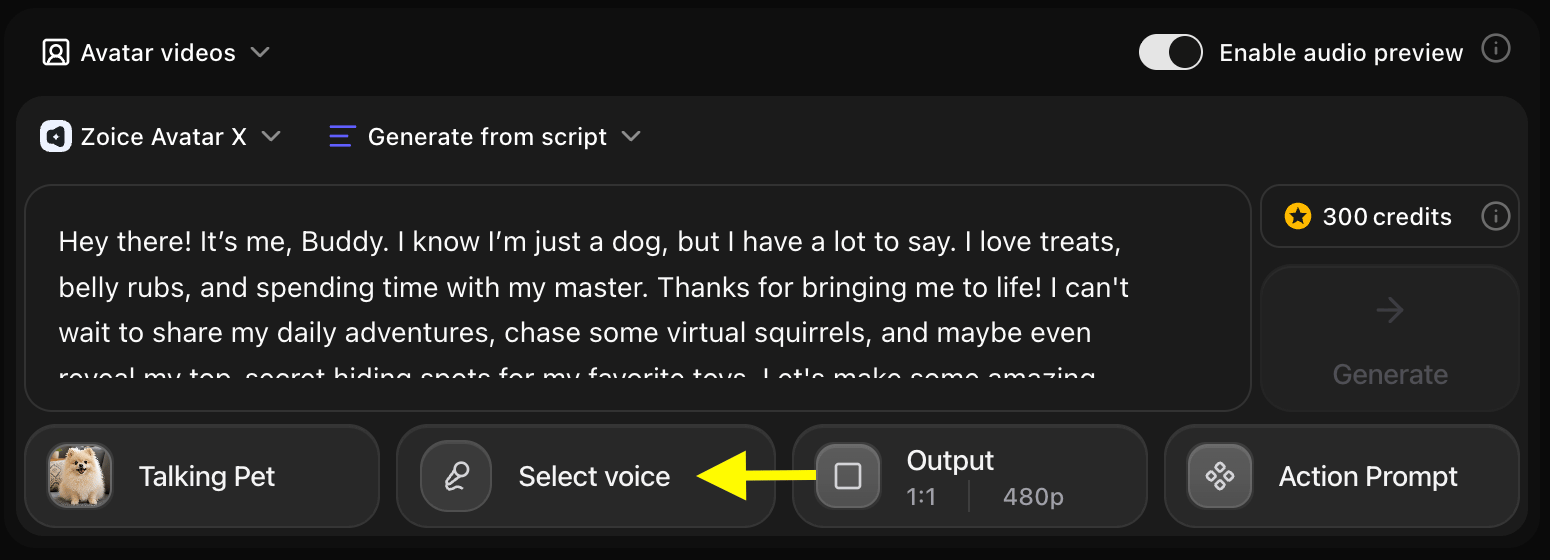
Step 10: Choose a Voice for Your Pet Avatar
Browse through the available voices and click on the one that matches your pet’s style. You can preview each voice before selecting it to make sure it fits your pet’s personality.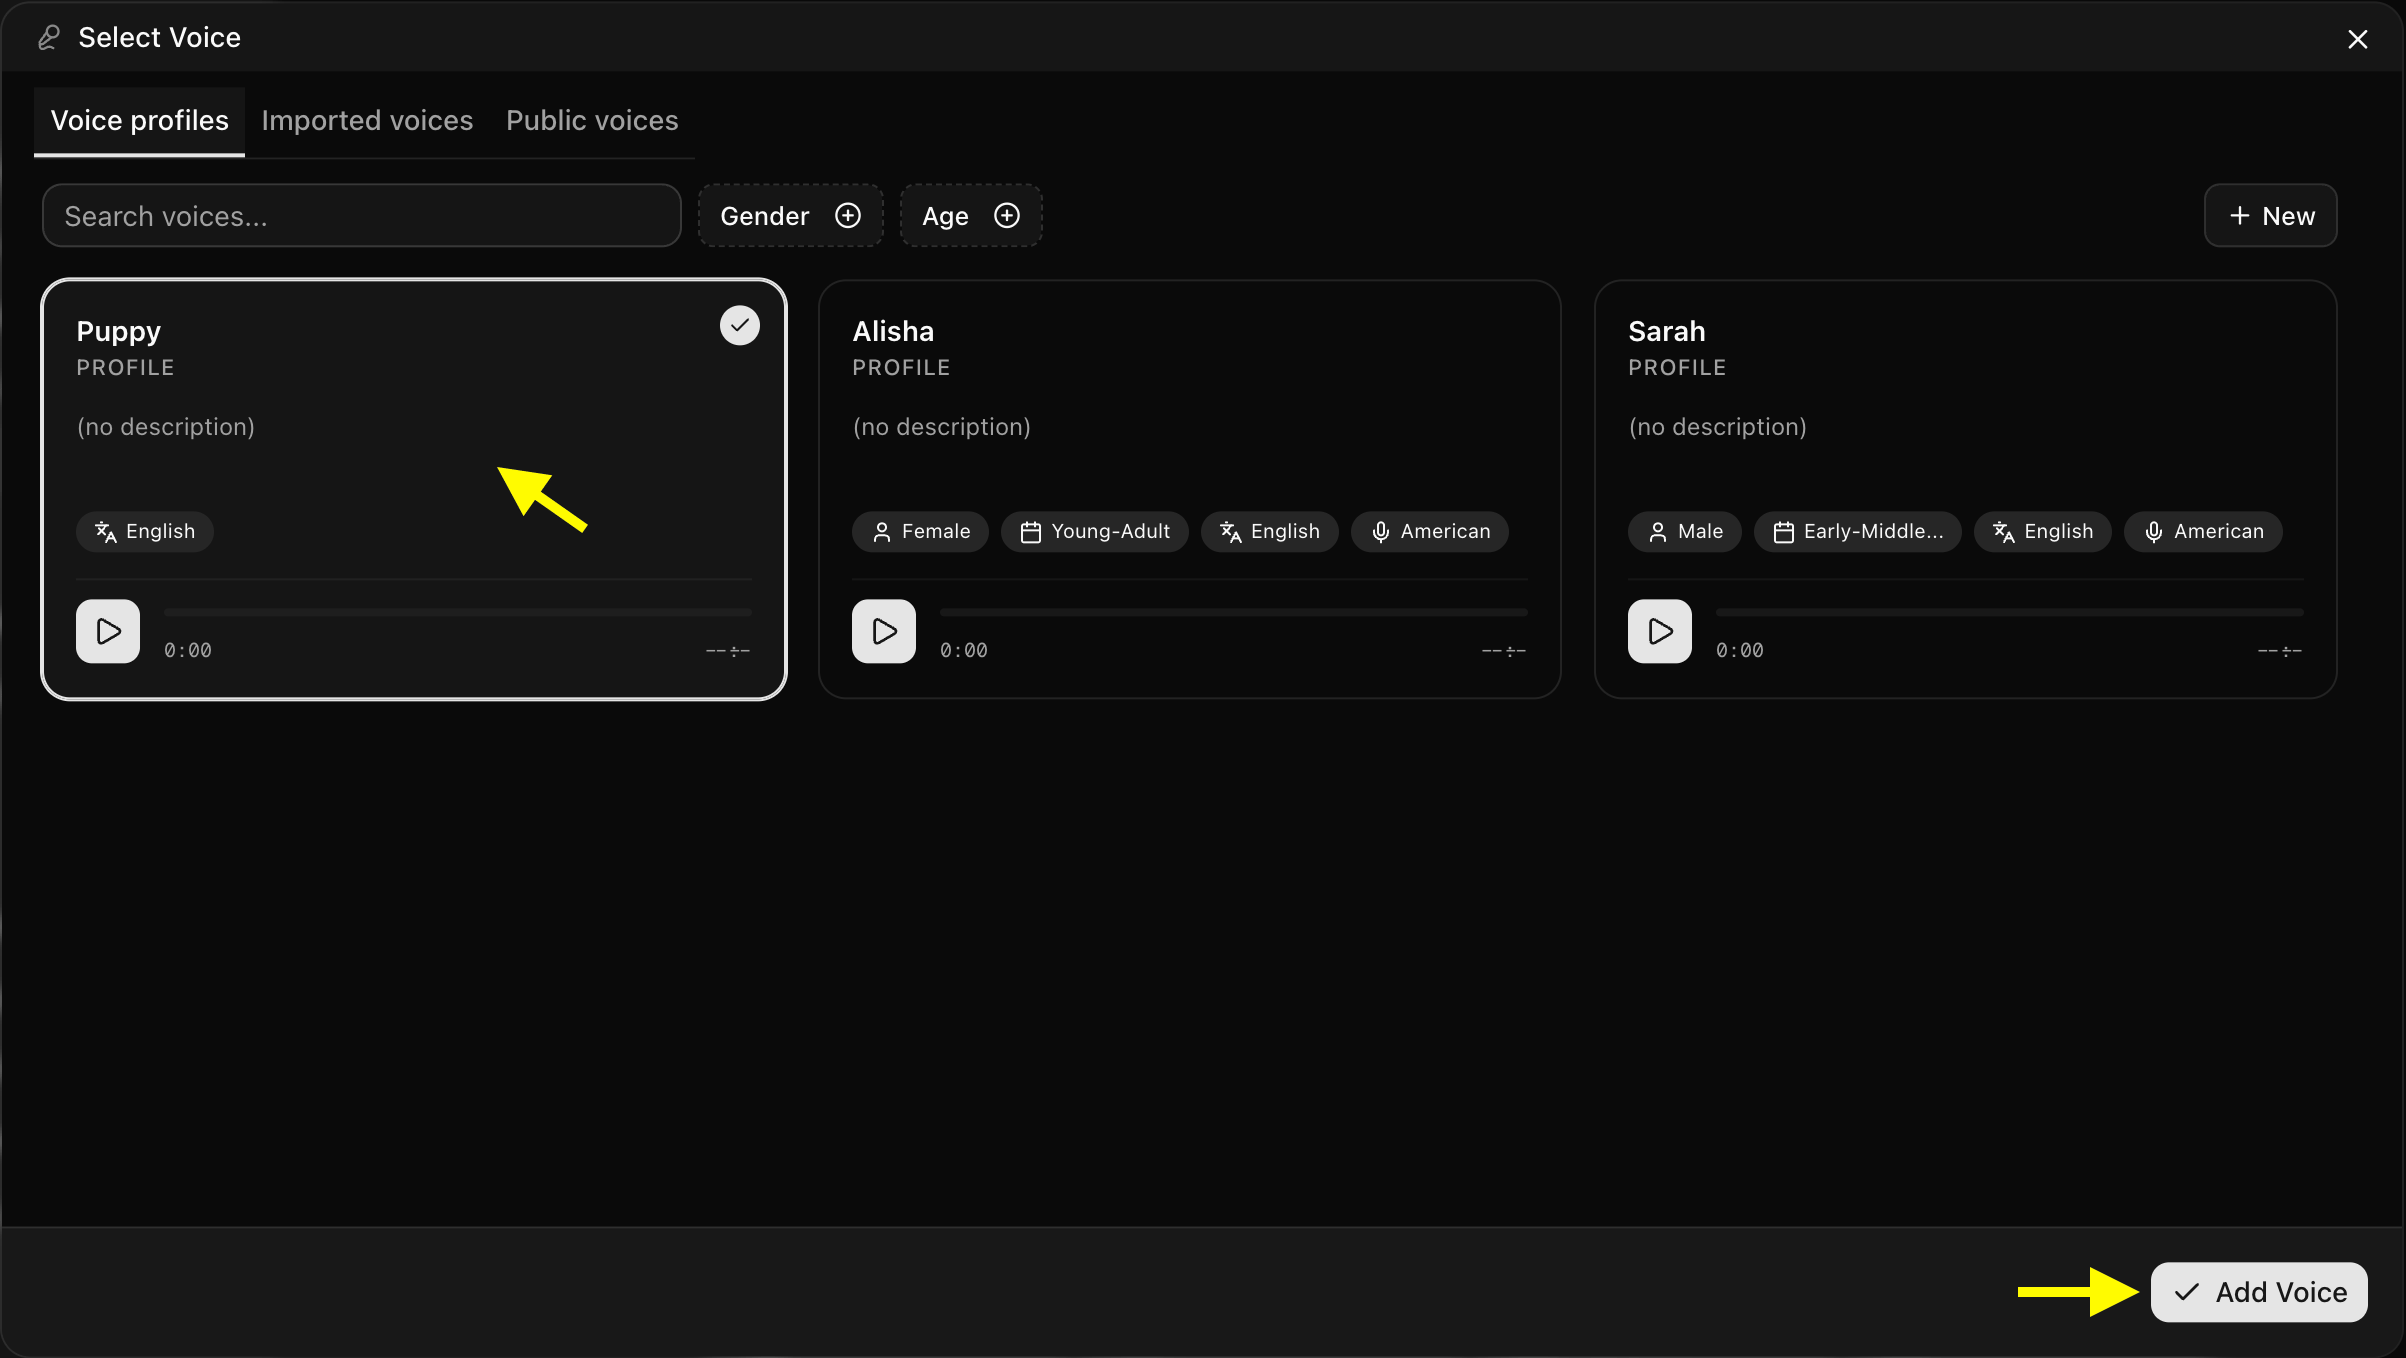
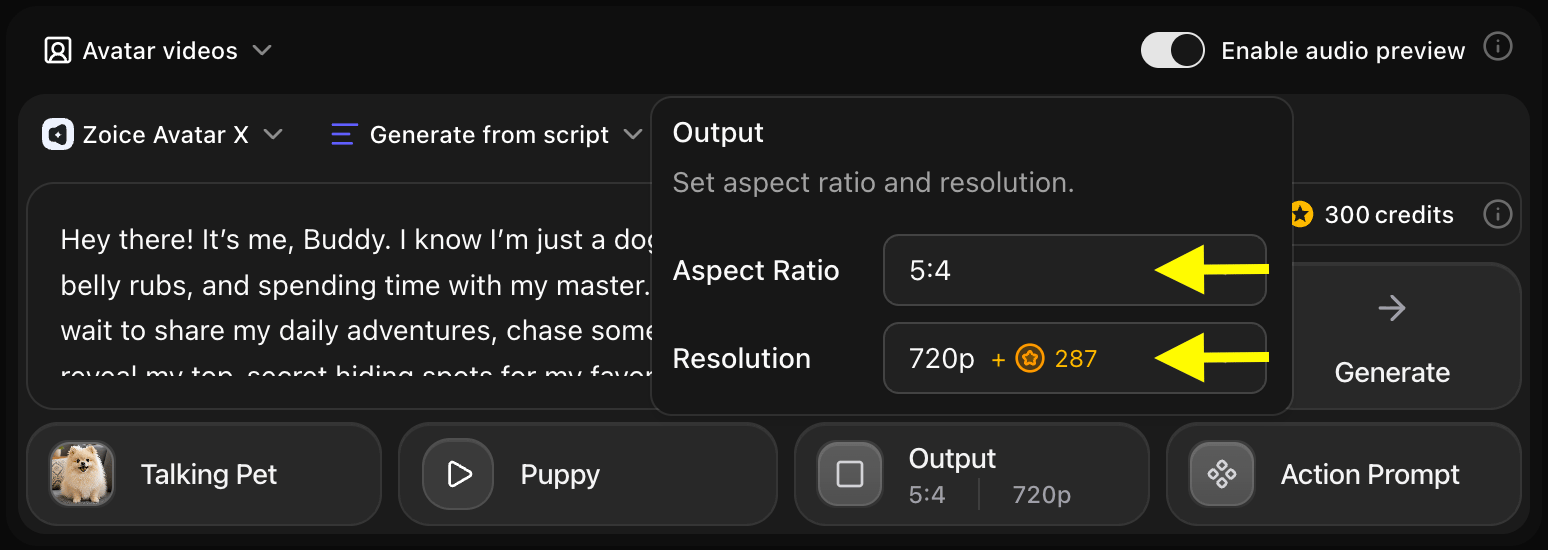
Step 11: Choose Output Settings
After selecting a voice, customize the video output settings based on your platform needs:- Aspect Ratio: 16:9 for YouTube, 9:16 for TikTok or Instagram Reels, 1:1 for social media posts
- Resolution: Up to 4K for high-quality output
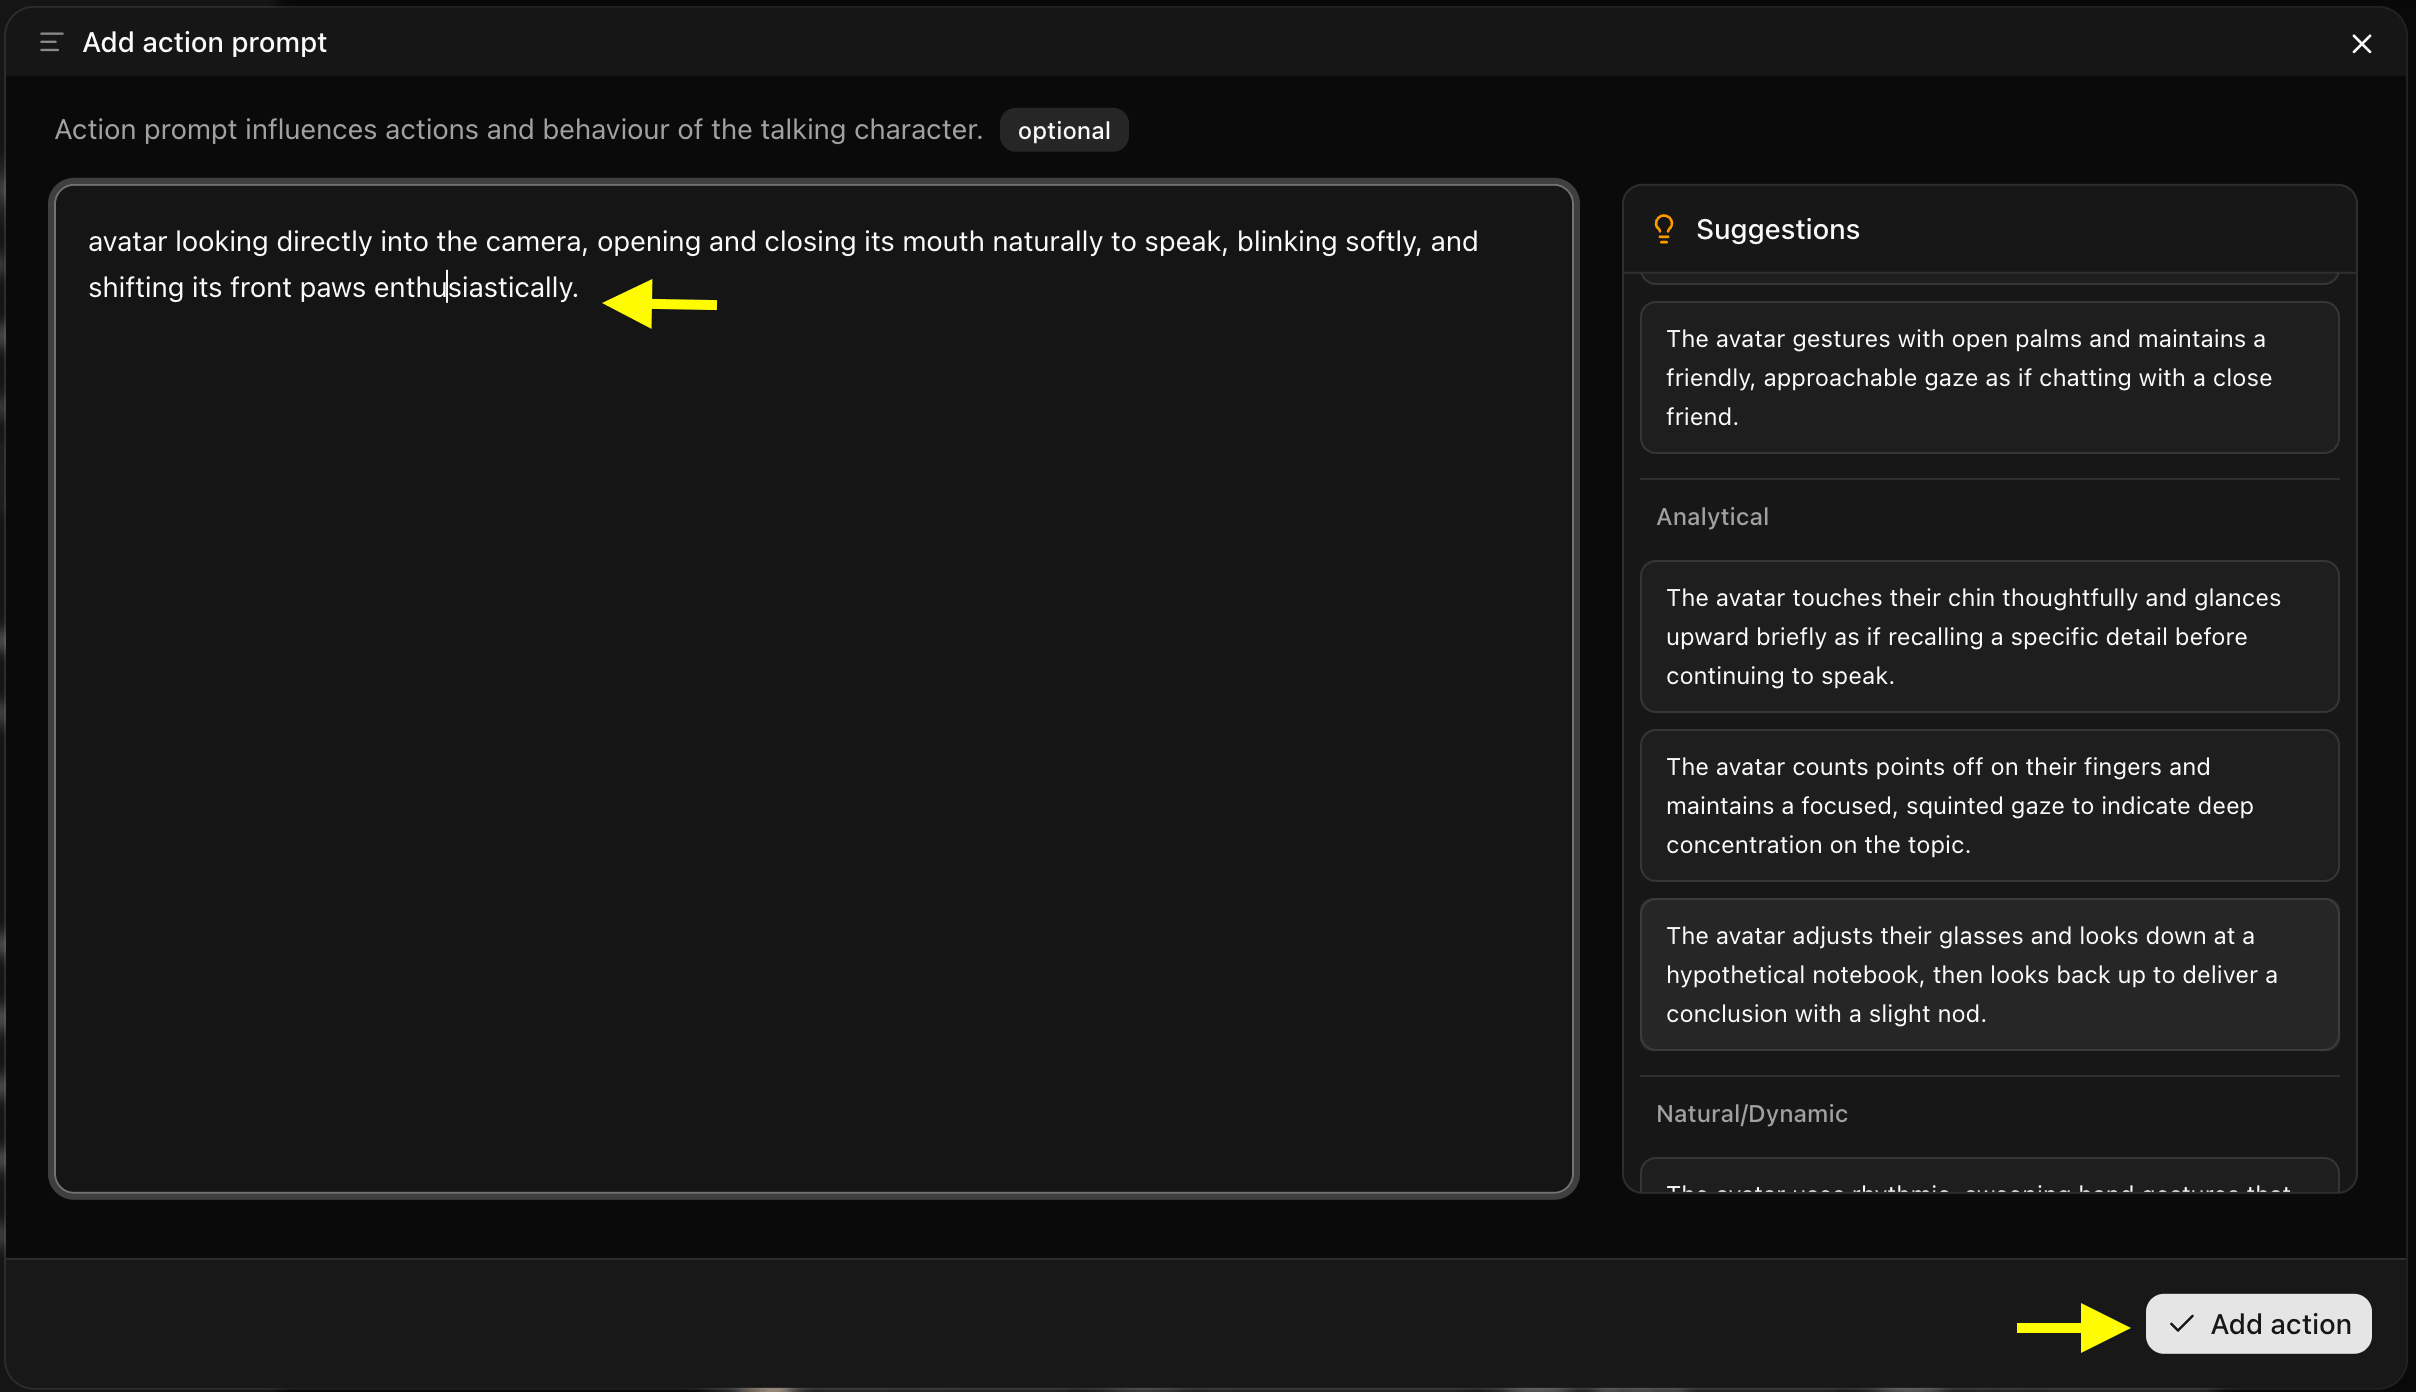
Step 12: Add an Action Prompt
Click on Action Prompt to set the expression and animated actions of your pet character. Select or write a custom action prompt that matches the mood and tone of your video content.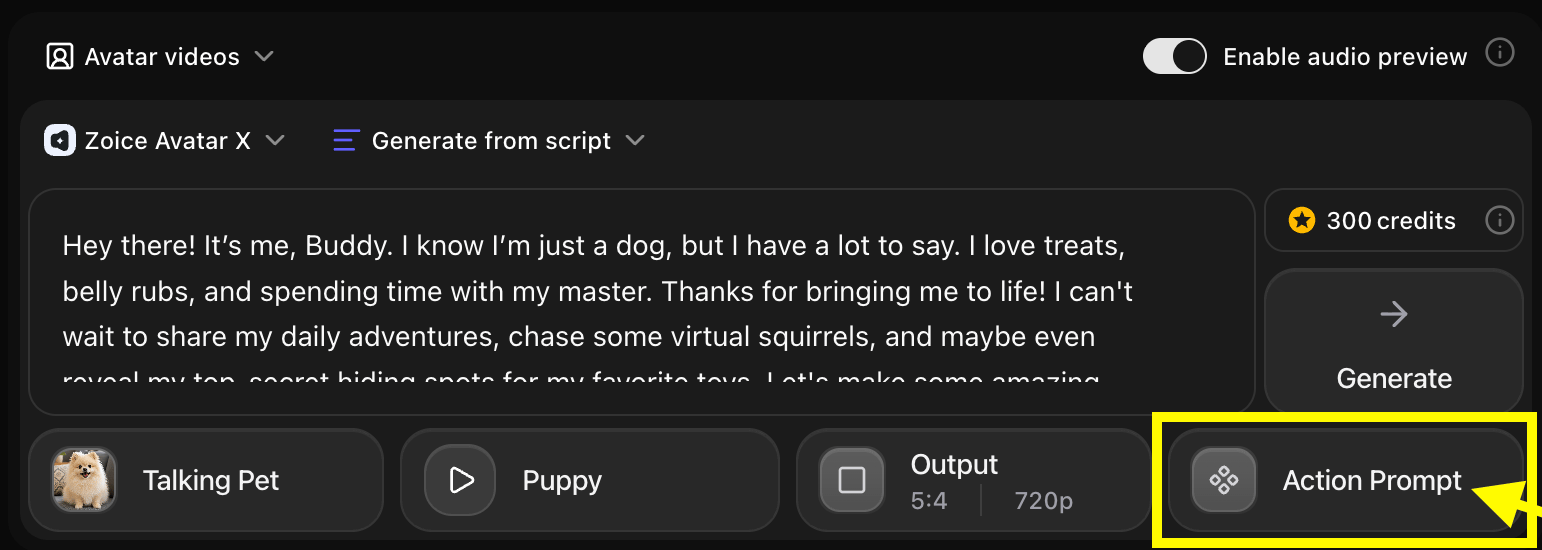
- We have written a prompt for our pet avatar.
Step 13: Generate Your Talking Pet Avatar Video
Once all your settings are ready, click the Generate button. Zoice will process your script and pet avatar to create the talking video.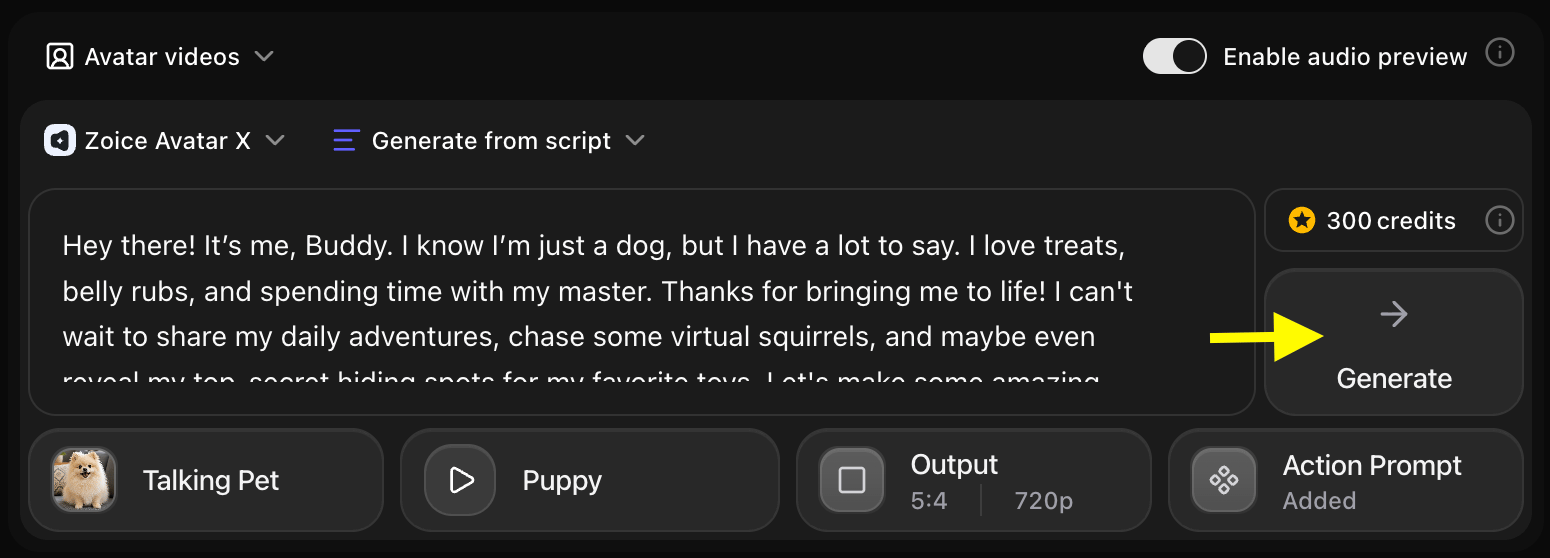
Step 14: Preview the Audio and Generate the Video
Before generating the final video, Zoice creates an audio preview. Listen carefully to check:- Voice quality and clarity
- Timing and pacing of the speech
- Overall tone and expression
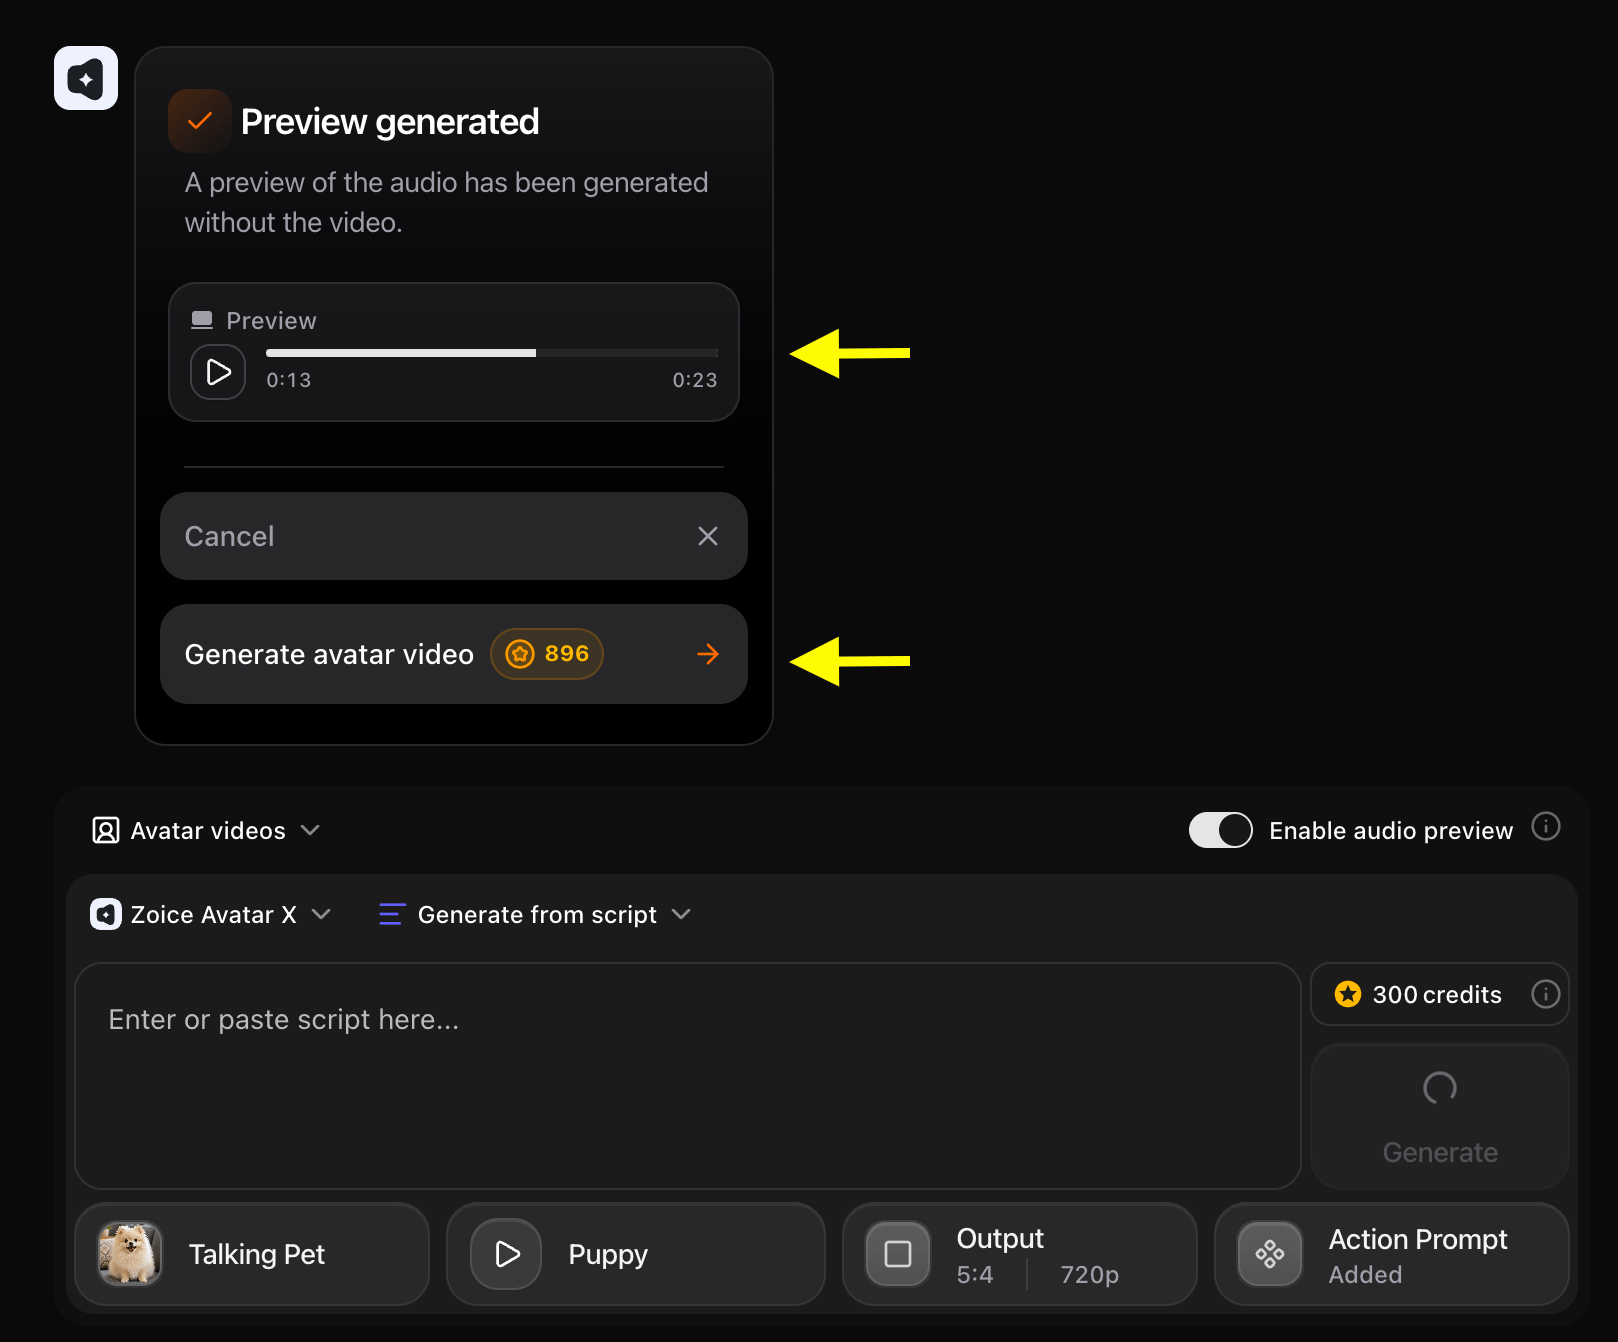
Step 15: Wait for Your Pet Avatar Video to Process
Zoice will now process and render your talking pet avatar video. Processing time may vary depending on the length of your script and selected resolution. You can stay on the page or return later to check on the progress.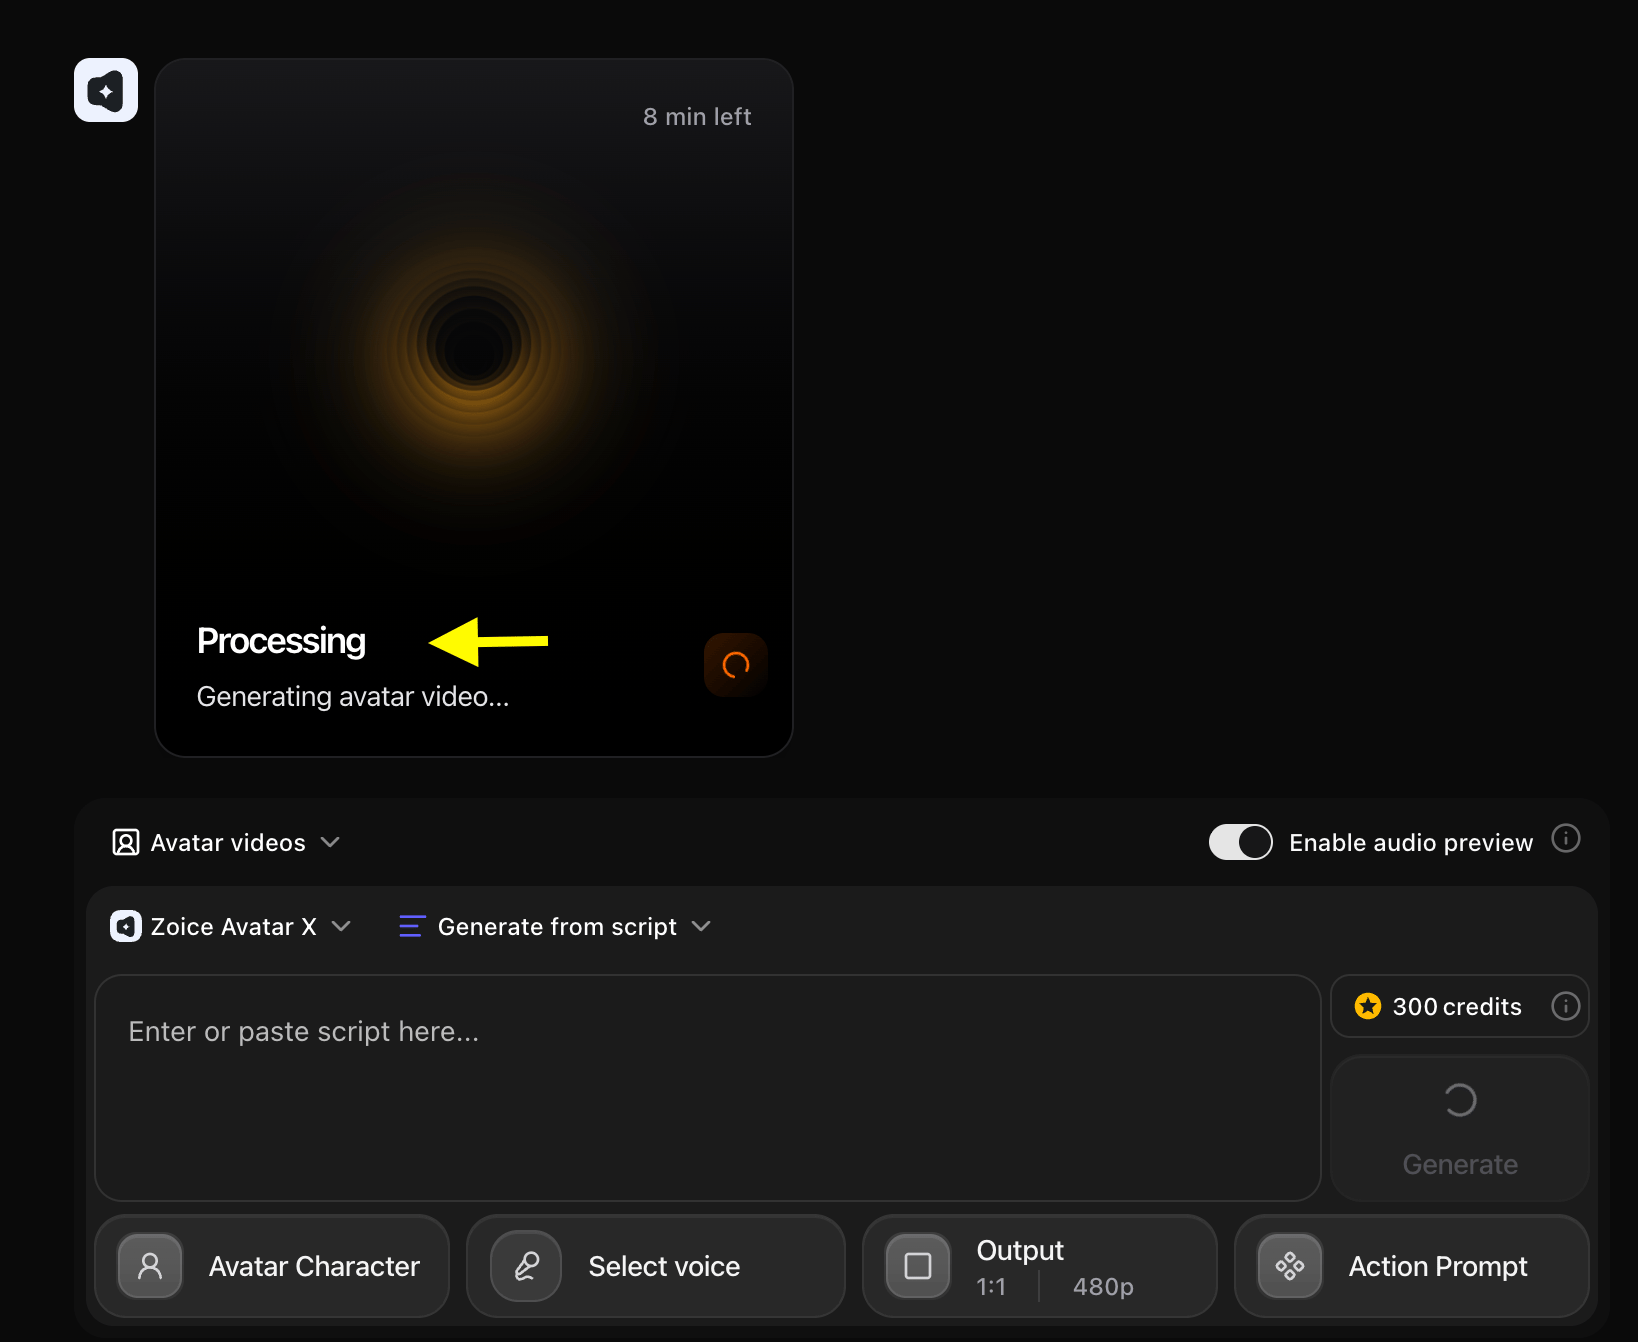
Step 16: Preview and Download Your Talking Pet Avatar Video
Once your video is ready, preview it to confirm the lip-sync quality, voice match, and overall output.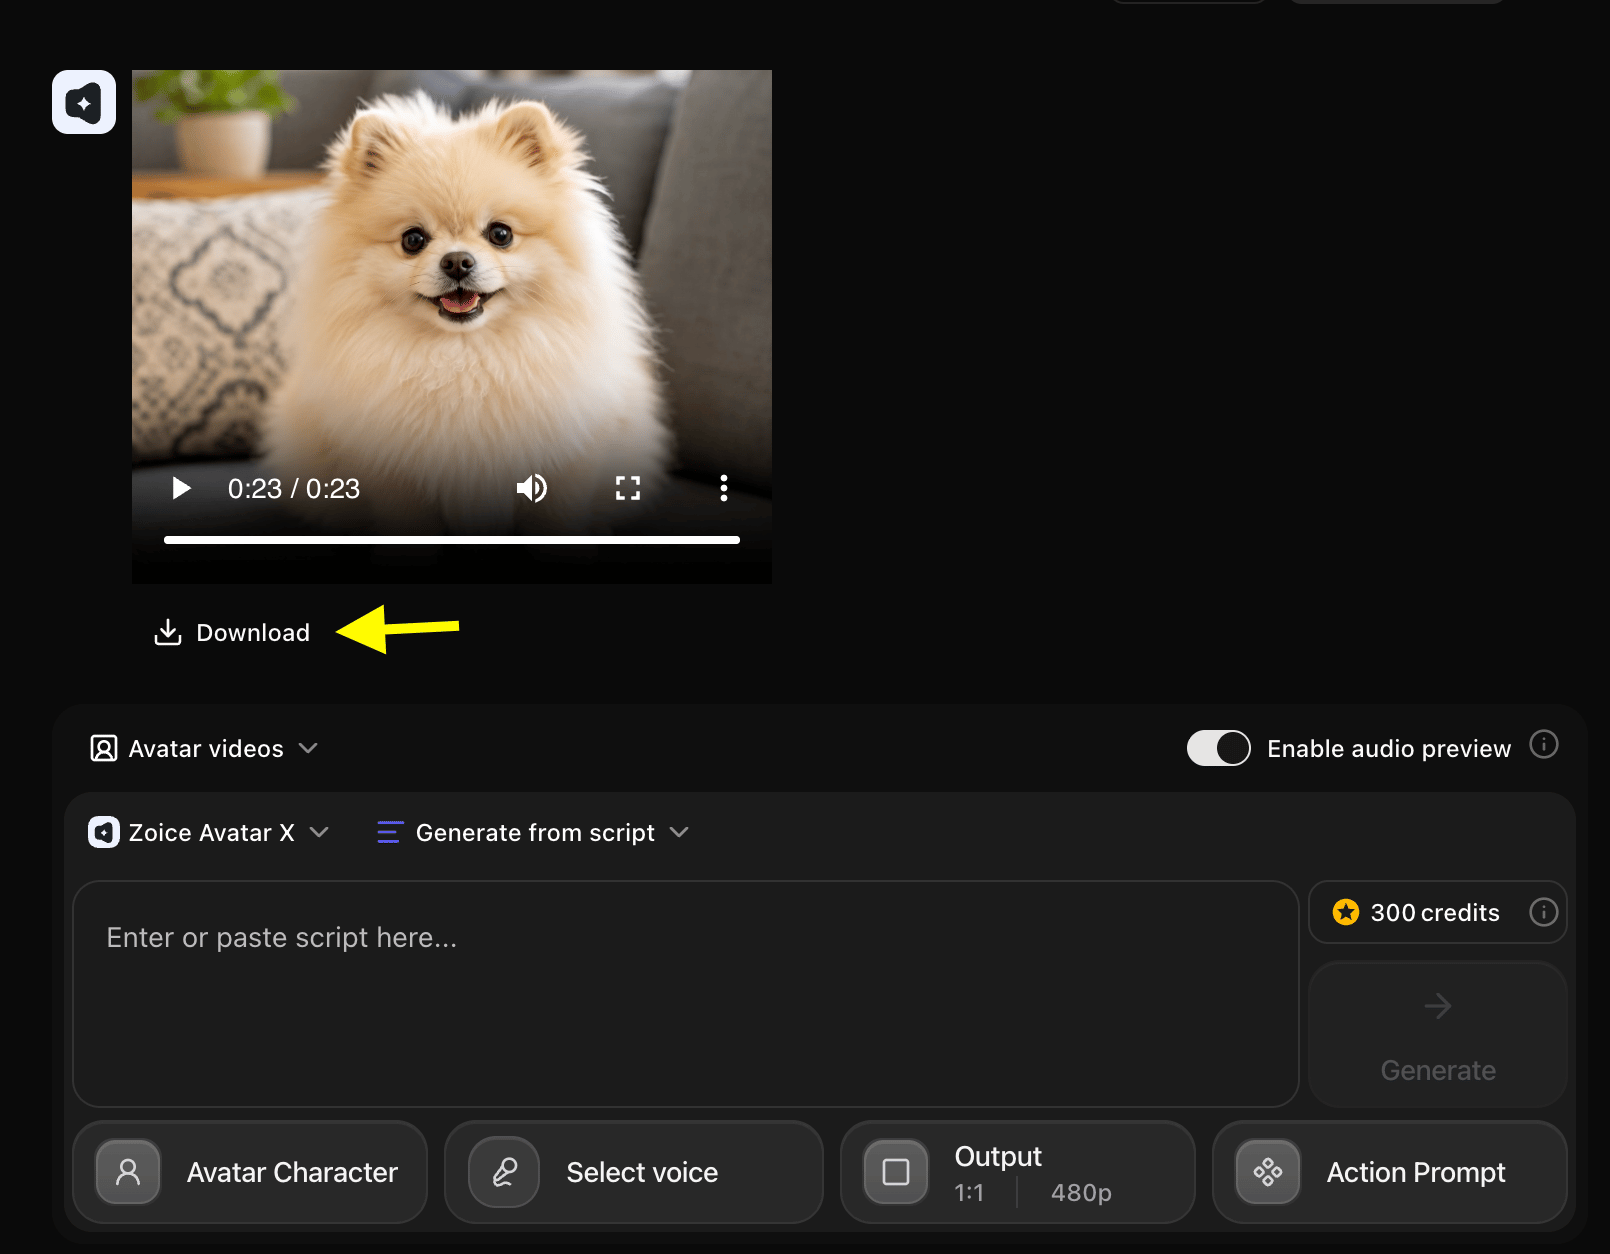
Example Input Image, Action Prompt & Output Video
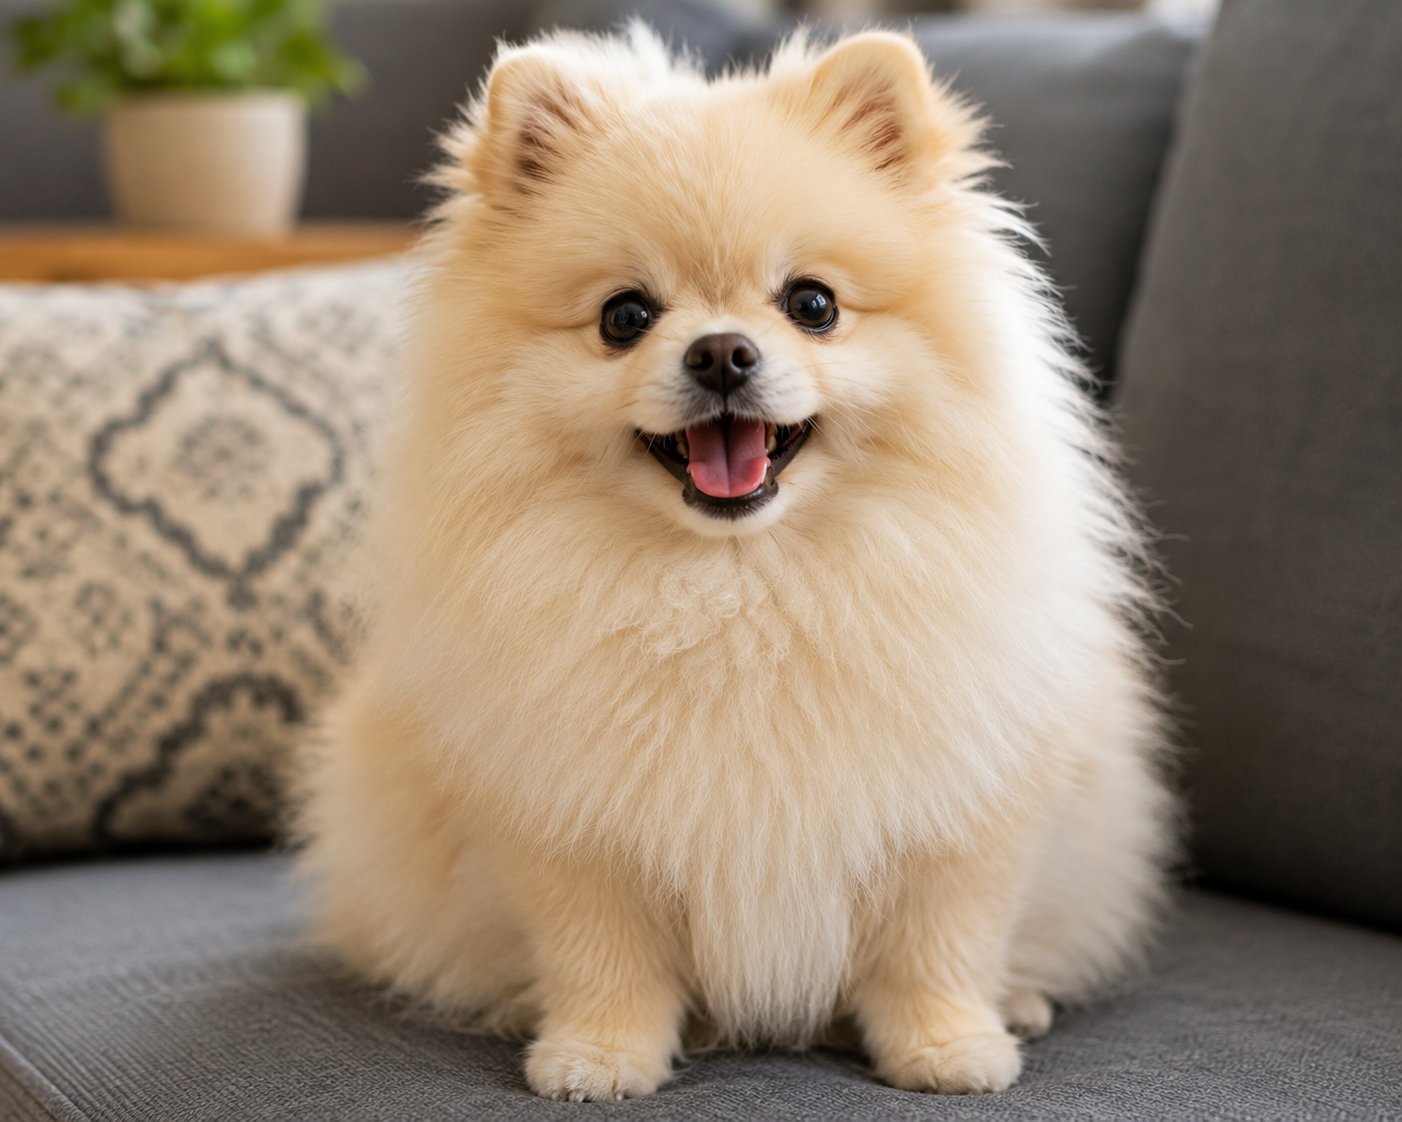
To help you get started, here is an example of an input script, action prompt, and generated talking pet avatar video.Used Image
Used Script
Used Action Prompt
Output Result Video
Below is the rendered talking pet avatar video based on the input script:Pet Avatar Videos Can Be Used For
AI talking pet videos are suitable for many creative and professional projects, including:- YouTube animations
- Educational explainer videos
- Children’s storytelling content
- Brand mascot promotions
- Social media entertainment
- Online course content
- Product marketing videos
- Digital storytelling
Final Words
Creating a talking pet video with Zoice is a fast and simple process. By uploading your pet image, adding a script, selecting a matching voice, and generating the final output, you can produce engaging pet talking videos in just a few minutes. Whether you want to create educational animations, brand character videos, social media content, or entertainment projects, Zoice helps you generate professional-quality talking pet avatar videos with natural lip synchronization, expressive facial animation, and smooth video output.Next Steps
Singing AI Avatar
Make your pet character sing with a vocal track.
Custom Avatar Guide
Learn more about creating and managing custom avatars.